<p>One of the unexpected oddities of the modern Sprinter Van is that it is designed to allow water to flow though it. In a way, this makes some sense since when managing unwanted water, it is often easier to allow water to flow in and then manage the removal of the water. This is why so many houses have sump pumps. Mercedes seems to have chosen this route, as it has designed weep holes along the interior sides to allow the water that comes in through the trim clips to flow back out.</p>
<p><img class="alignnone size-full wp-image-1031" src="https://ridingroadsandtrails.files.wordpress.com/2017/04/img_20161227_1219101631.jpg" alt="IMG_20161227_121910163" width="5344" height="3006" /></p>
<p>Normally, this periodic water flow would not be much of an issue since the metal surfaces are painted and treated with a wax sealant. However, if you are finishing the interior of the van and filling the wall spaces with insulating material, the insulating material can retain the water and cause corrosion. See the case in point here: <a href="https://radvanadventures.com/2016/11/27/leaking-into-sprinter-cabin-space-a-cautionary-tale-of-terrible-design/" target="_blank" rel="noopener">Campervan corrosion story.</a></p>
<p>Fortunately, there is an easy solution to preventing water from coming in through the trim clips in the first place. <a href="https://sprinter-source.com/forum/showthread.php?t=14454" target="_blank" rel="noopener">See this post for more background and pictures. </a></p>
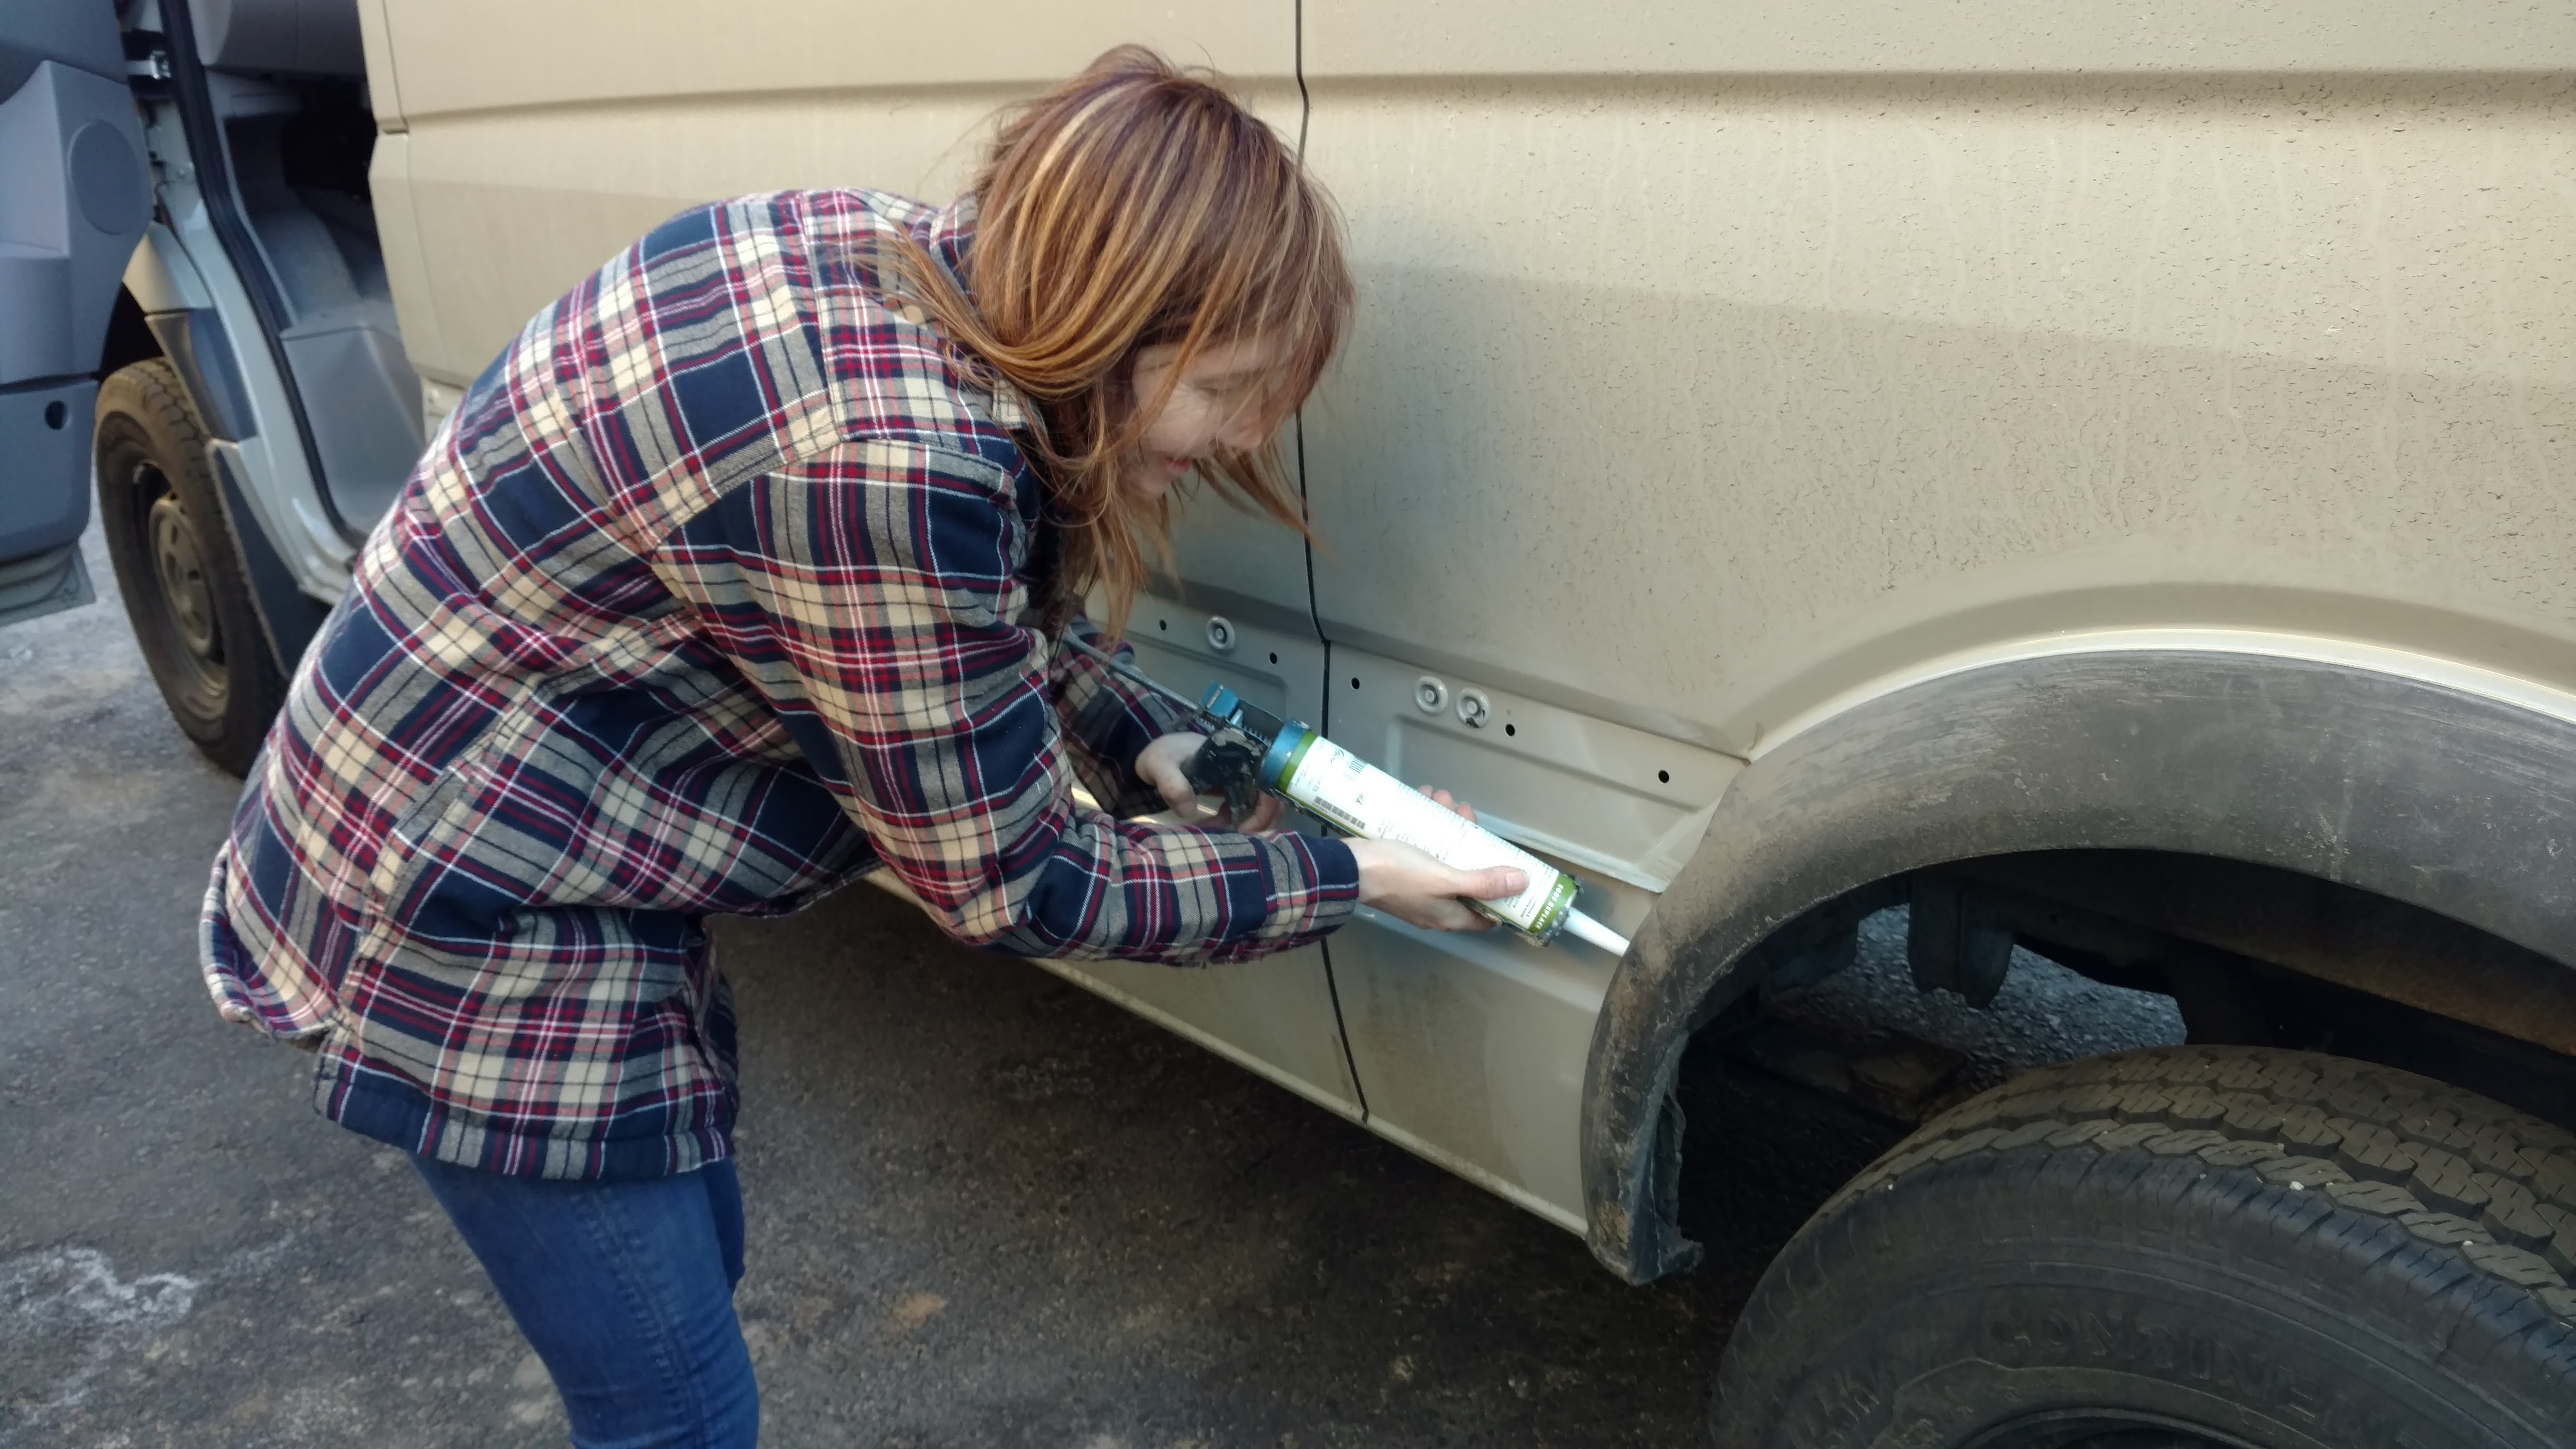
<p>We removed all of the side trim pieces behind the front doors using the trim tools, cleaned all the surfaces, applied the caulk to the holes in the body or the &#8220;skirt&#8221; of the clips and pressed the trim pieces back in place. Each of the trim pieces are a different size and the tops &; bottoms have a different number of clips, so it is very easy to be sure to put all the trim pieces back in place properly. The only kicker is that there is a screw in the leading and trailing ends of the trim on the sliding door, be sure to remove both screws before attempting to pry off the trim.</p>
<figure id="attachment_1017" aria-describedby="caption-attachment-1017" style="width: 5344px" class="wp-caption alignnone"><img class="alignnone size-full wp-image-1017" src="https://ridingroadsandtrails.files.wordpress.com/2017/04/img_20170304_163519362.jpg" alt="IMG_20170304_163519362" width="5344" height="3006" /><figcaption id="caption-attachment-1017" class="wp-caption-text">Caulk on the holes in the sliding door</figcaption></figure>
<figure id="attachment_1016" aria-describedby="caption-attachment-1016" style="width: 3006px" class="wp-caption alignnone"><img class="alignnone size-full wp-image-1016" src="https://ridingroadsandtrails.files.wordpress.com/2017/04/img_20170304_145337892.jpg" alt="IMG_20170304_145337892" width="3006" height="5344" /><figcaption id="caption-attachment-1016" class="wp-caption-text">Trim</figcaption></figure>
<figure id="attachment_1014" aria-describedby="caption-attachment-1014" style="width: 3006px" class="wp-caption alignnone"><img class="alignnone size-full wp-image-1014" src="https://ridingroadsandtrails.files.wordpress.com/2017/04/img_20170304_143402176_hdr.jpg" alt="IMG_20170304_143402176_HDR" width="3006" height="5344" /><figcaption id="caption-attachment-1014" class="wp-caption-text">B Pillar body, you can see where the water collects and flows over the clips. The van has only about 1000 miles on it at this point.</figcaption></figure>
<figure id="attachment_1019" aria-describedby="caption-attachment-1019" style="width: 5344px" class="wp-caption alignnone"><img class="alignnone size-full wp-image-1019" src="https://ridingroadsandtrails.files.wordpress.com/2017/04/img_20170304_164458610.jpg" alt="IMG_20170304_164458610" width="5344" height="3006" /><figcaption id="caption-attachment-1019" class="wp-caption-text">Applying caulk</figcaption></figure>
<p>Products used:</p>
<p><a href="https://www.amazon.com/gp/product/B004RCSR1G/ref=as_li_tl?ie=UTF8&;camp=1789&;creative=9325&;creativeASIN=B004RCSR1G&;linkCode=as2&;tag=ridingroadsan-20&;linkId=8bee0d9c62edc6fc905f54598e6eaf43" target="_blank" rel="noopener">Dicor Non Leveling Non Sag Lap Sealant 551LSW</a></p>
<p><a href="https://www.amazon.com/gp/product/B00HNMLQAG/ref=as_li_tl?ie=UTF8&;camp=1789&;creative=9325&;creativeASIN=B00HNMLQAG&;linkCode=as2&;tag=ridingroadsan-20&;linkId=6a6c8a321cfd15ed0b17f4c7a3f1503b" target="_blank" rel="noopener">Trim Tools</a></p>
<p><a href="http://www.ebay.com/sch/i.html?_from=R40&;_trksid=p2050601.m570.l1313.TR0.TRC0.H0.TRS0&;_nkw=391094294404&;_sacat=0" target="_blank" rel="noopener">Replacement trim clips (just in case)</a></p>

DIY Sprinter Van waterproofing