


The objective of this kitchen is along the lines of our other DIY Sprinter Van projects, which is for everything to have a place. We currently use a few plastic bins for all the things that don't yet have a built-in place and finding these things can be a bit of a pain. The end goal of the overall build-out is to eliminate the need for these bins containing miscellaneous items.
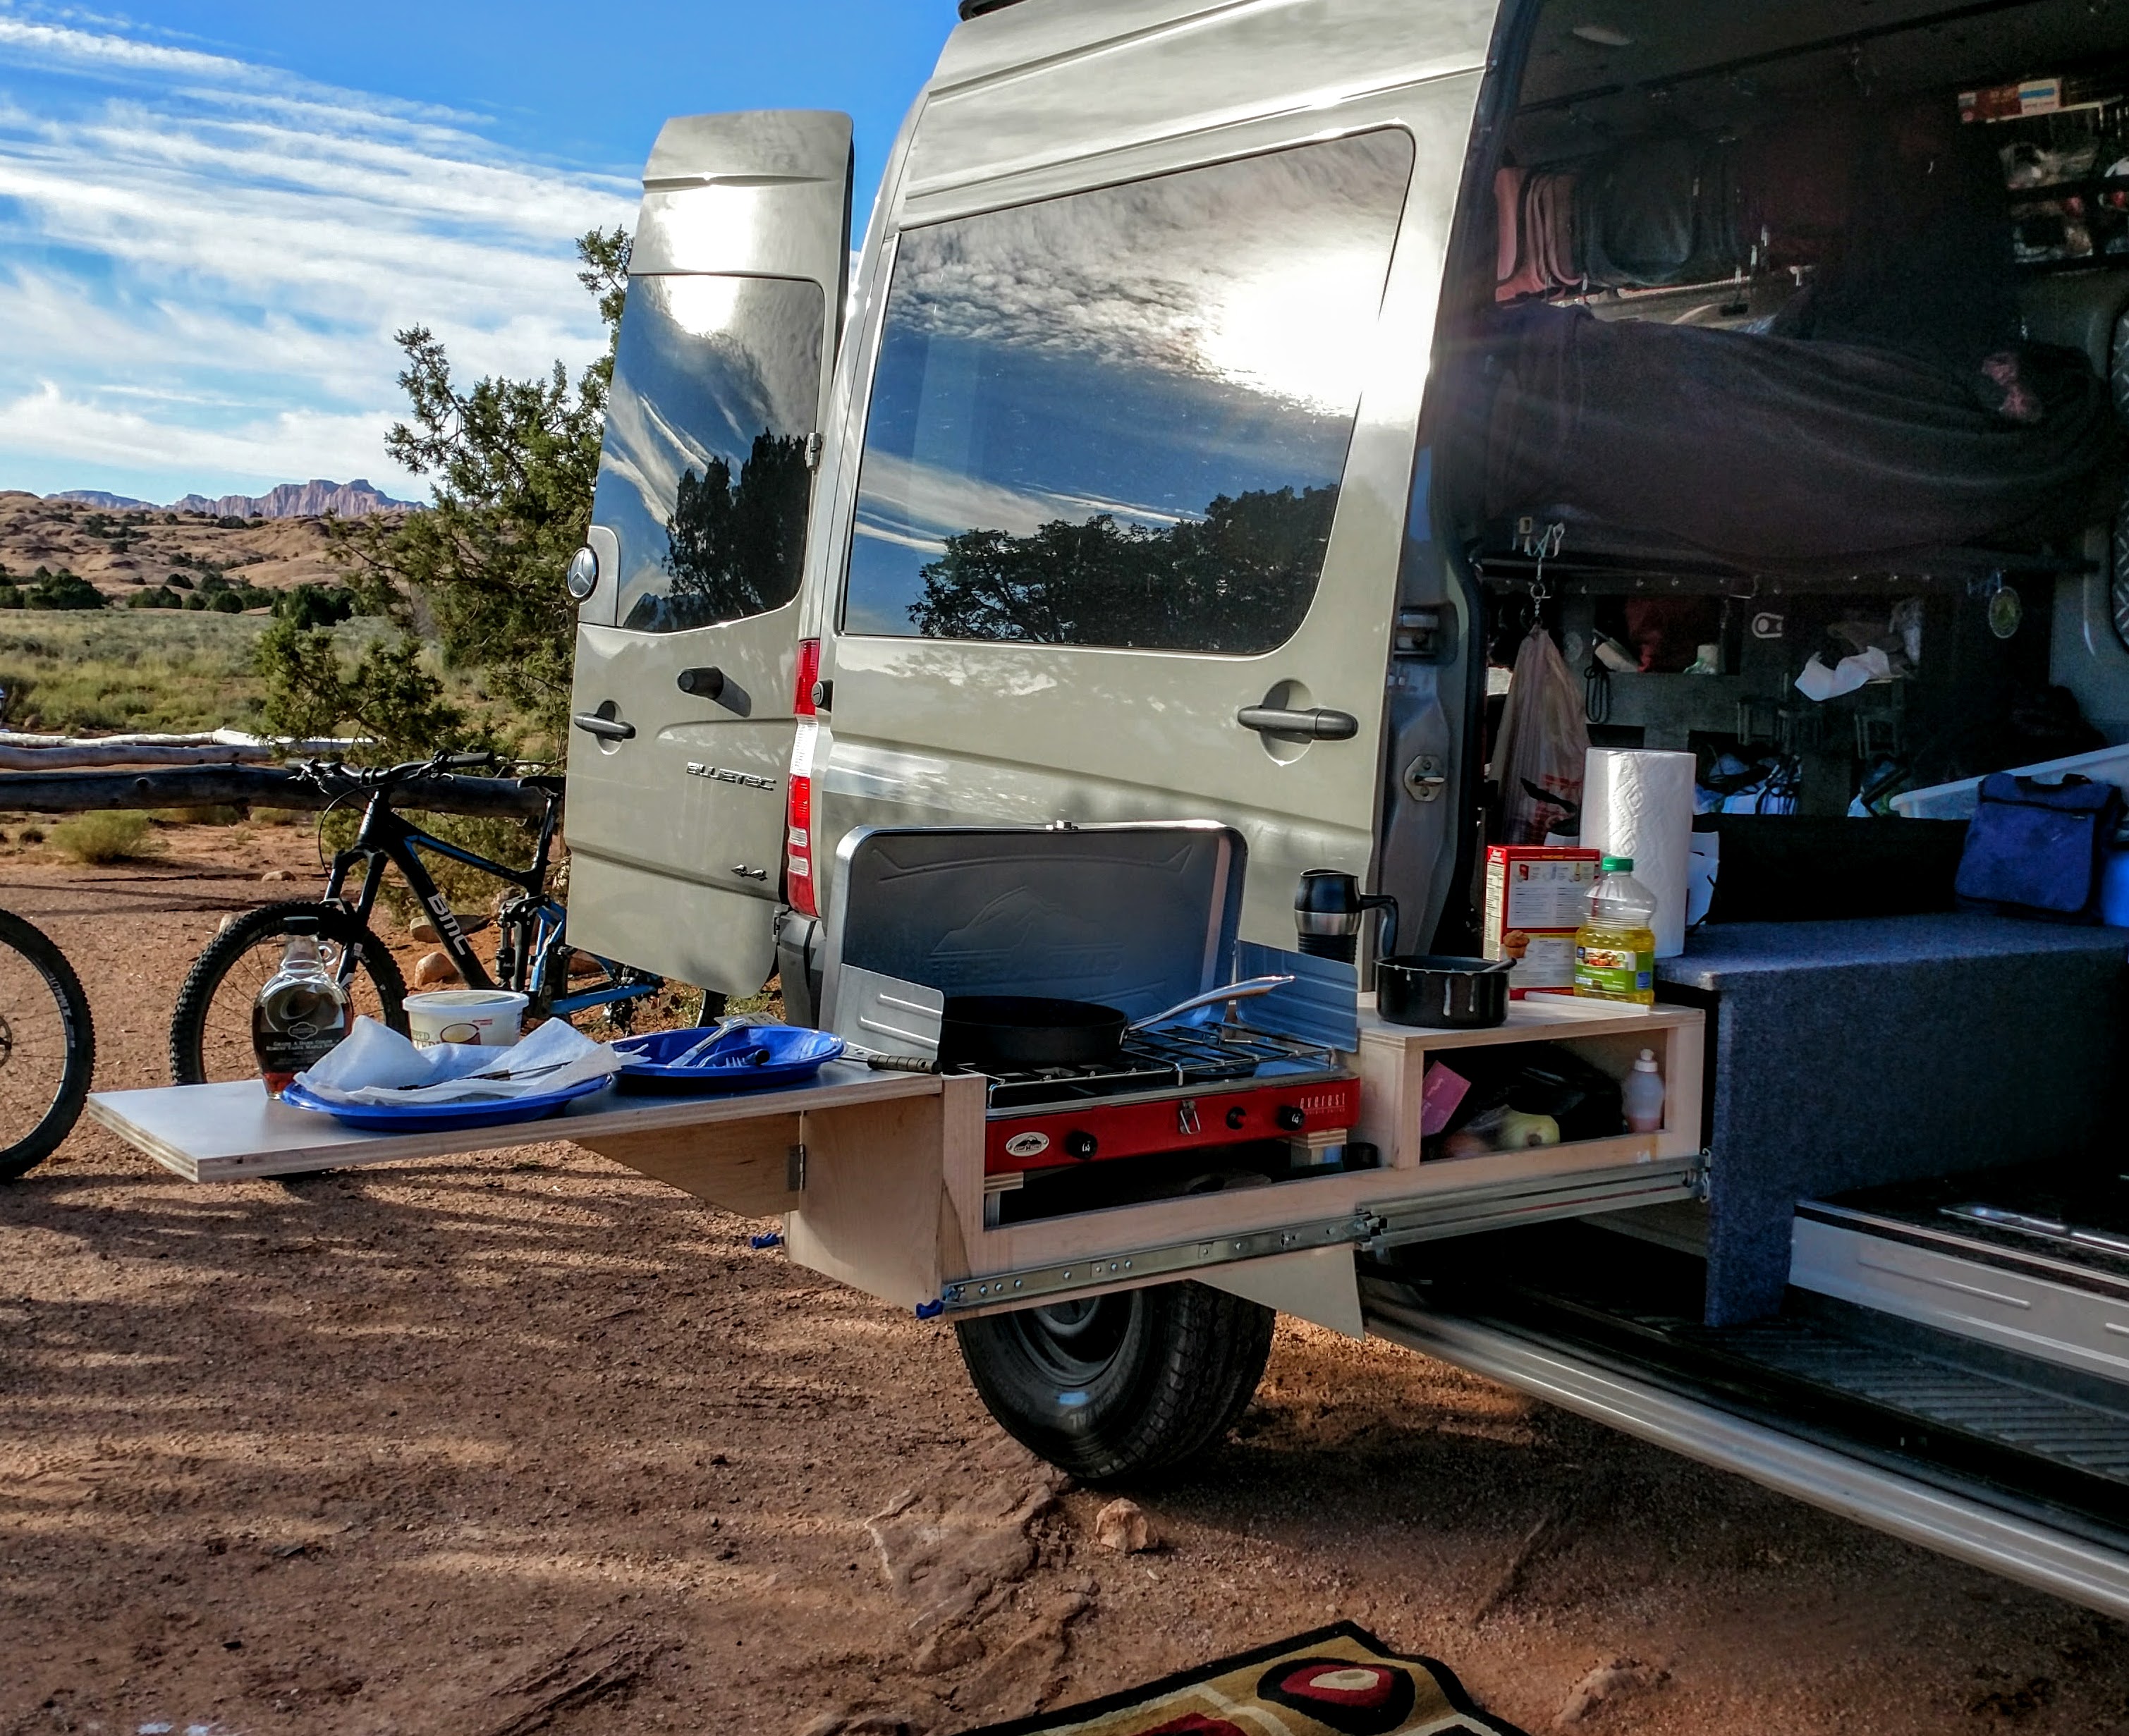
The term 'kitchen' is being used loosely here as the design calls for some food-prep workspace, space for the camp stove and storage for cooking implements like pots, pans, spatulas, etc. Our overall approach is that the van is a step up from our car/tent camping days moreso than a house on wheels. There is no plan at this time for other typical kitchen capabilities like running water or an oven. This design also provides for nearly instant setup once the van is parked.

Location:
The back of the van is already consumed by storage for 4 bikes and gear, the kitchen must go closer to mid-ship. Another consideration is that Sue is a good cook, she is a fast cook, but she is a VERY messy cook. Picture the Tasmanian Devil from the Bugs Bunny cartoons working in a kitchen. Having the work surfaces outside the van seems to make sense, mainly for my own personal sanity. We plan to generally travel to temperate climates, so having to cook in freezing temperatures with the side door open should not be too much of a concern (famous last words?).
Construction:
Overall weight of the kitchen is a concern, we've seen some beautiful van and RV kitchens built with materials typically used in an upscale home, marble, granite, porcelain, etc. These are great materials, but they require a compromise when it comes to cost, gas mileage and vehicle handling.
I had a bunch of furniture quality 3/4 plywood laying around, so that answered the question of what to build with. Connecting the kitchen to the van was a big question for me. Through-bolting to the floor would probably be the most correct and robust way to do this. However, I already have a fairly robust 3/4" plywood floor covered with vinyl installed. I felt that it would be adequate to use corner braces to the installed wood floor. Lots of corner braces with lots of 1" #12 wood screws, 50 screws into the wood floor to be exact, another 50 into the enclosure itself.

Size & Shape:
We still occasionally use the bench seat that came with our crew van. Although, we did have the bench modified from a 3-person to a 2-person bench by Mike at ShopDog Motors. The bench requires a few inches of rear clearance to install and remove. This leaves me with about a conservative 15 inches between the front of the sliding door opening when the door is open all the way and the installation access space for the bench seat. Therefore the overall width is 15 inches. Now, working toward the inside, there is the thickness of the enclosure, 3/4 inch front and back and the width of the sliders, another 3/4 inch front and back. This leaves us with 12 inches for the kitchen itself. This is convenient because the Camp Chef Everest camp stove we have, including the protruding knobs and hinges, is just shy of 12 inches deep.
Height is a concern because neither Sue or I have much of it ourselves. In a perfect world the kitchen workspace would be at the standard kitchen countertop height. The 4x4 Sprinter is a little higher than the 2wd Sprinter. Add the height of the kitchen above the floor of the van and the total height of the countertop starts to get pretty high. The compromise was that 10 inches for the kitchen should give us a reasonable amount of storage in the kitchen itself. This will be a little higher than typical kitchen counter top height, especially if the van is parked on uneven ground.
We had flexibility with the length since I was able to find heavy duty drawer sliders from various sources in increments up to the width of the van itself. We do want the stove as far out from the side of the van that is reasonable so that heat exposure and splatter are minimized. 48" for the main carriage was the decision. Additionally, there is a flip-out countertop extension for a total length of 76" which happens to coincide with the awning coverage.

Drawer Sliders:
I selected the max capacity, 500 lb drawer sliders. The extra cost was not that much and I had not seen a specification on what the capacity of the drawer sliders really means. 500 lbs at the far end of a cantilevered 48" length is very different than 500 lbs at the near end. I discovered after taking delivery that the drawback to the 500lb capacity sliders is that they do not come apart. This made assembly much more difficult and will make future work on the kitchen more difficult since I cannot take it out like you might take out a typical drawer. When (if) I do it again, I would get the maximum capacity sliders that still come apart. The sliders also lock when they are all the way in, all the way out and sometimes half-way. This is a very nice feature for our setup.


Miscellaneous:
The work surfaces are covered with Norpro flexible cutting board material using spray adhesive. This is cheap, easy to clean and will be easy to replace as it wears out. On a future version, getting a piece of formica counter top or making a zinc or stainless steel countertop would look better.
The work surface extension is covered on both sides with the same material. There is a hinged support for the extension to allow the extension to sit level with the rest of the kitchen carriage as well as not to over-torque the piano hinge for the extension itself.
The length of the extension is basically arbitrary, it extends out about as far as the awning covers so that it is usable in the rain.
We installed a propane hose extension so that the propane tank is easily accessible and changed from the kitchen storage space next to the stove top.
Cosmetically, the enclosure is covered in speaker box carpet which looks decent. The carriage itself is just raw wood at this point, which doesn't look awesome. I'll come up with something better. If I make a second version of this, the appearance will be part of the design instead of an afterthought.
Lookin good!
Pingback: Road Trip - Oregon Coast, CA & Utah - RidingRoadsAndTrails
Pingback: DIY Sprinter Van - Side-slide mini-kitchen update - RidingRoadsAndTrails
Pingback: Road Trip - Moab, Fall 2017 - RidingRoadsAndTrails