
If you’ve read much on this site, you’ll know that I prefer to do as much work on the van myself as I can. For instance, here is a link to how to change the oil.

Sprinter starter battery replacement is fairly straightforward operation. It is a bit more difficult than many other vehicles, but if you have any mechanical ability at all, you should have no trouble and save a bunch of money and time. Our Sprinter is a 2016 which is from the NCV3 series, years 2006-2018. As far as I know, this information is valid for the entire NCV3 date range, and possibly more.
When to replace the battery
I generally replace a starter battery as soon as it shows any sign of a problem. The first time the van struggles to start on a cold morning, I will replace the battery. In this case, the van is just shy of 4 years old. AGM batteries have a life expectancy of 6 years. I could use a battery tender and engine block heater to get more life out of the battery, but the risk of getting stranded isn’t worth the cost of the new battery to me.
Tools Required:
Battery Selection
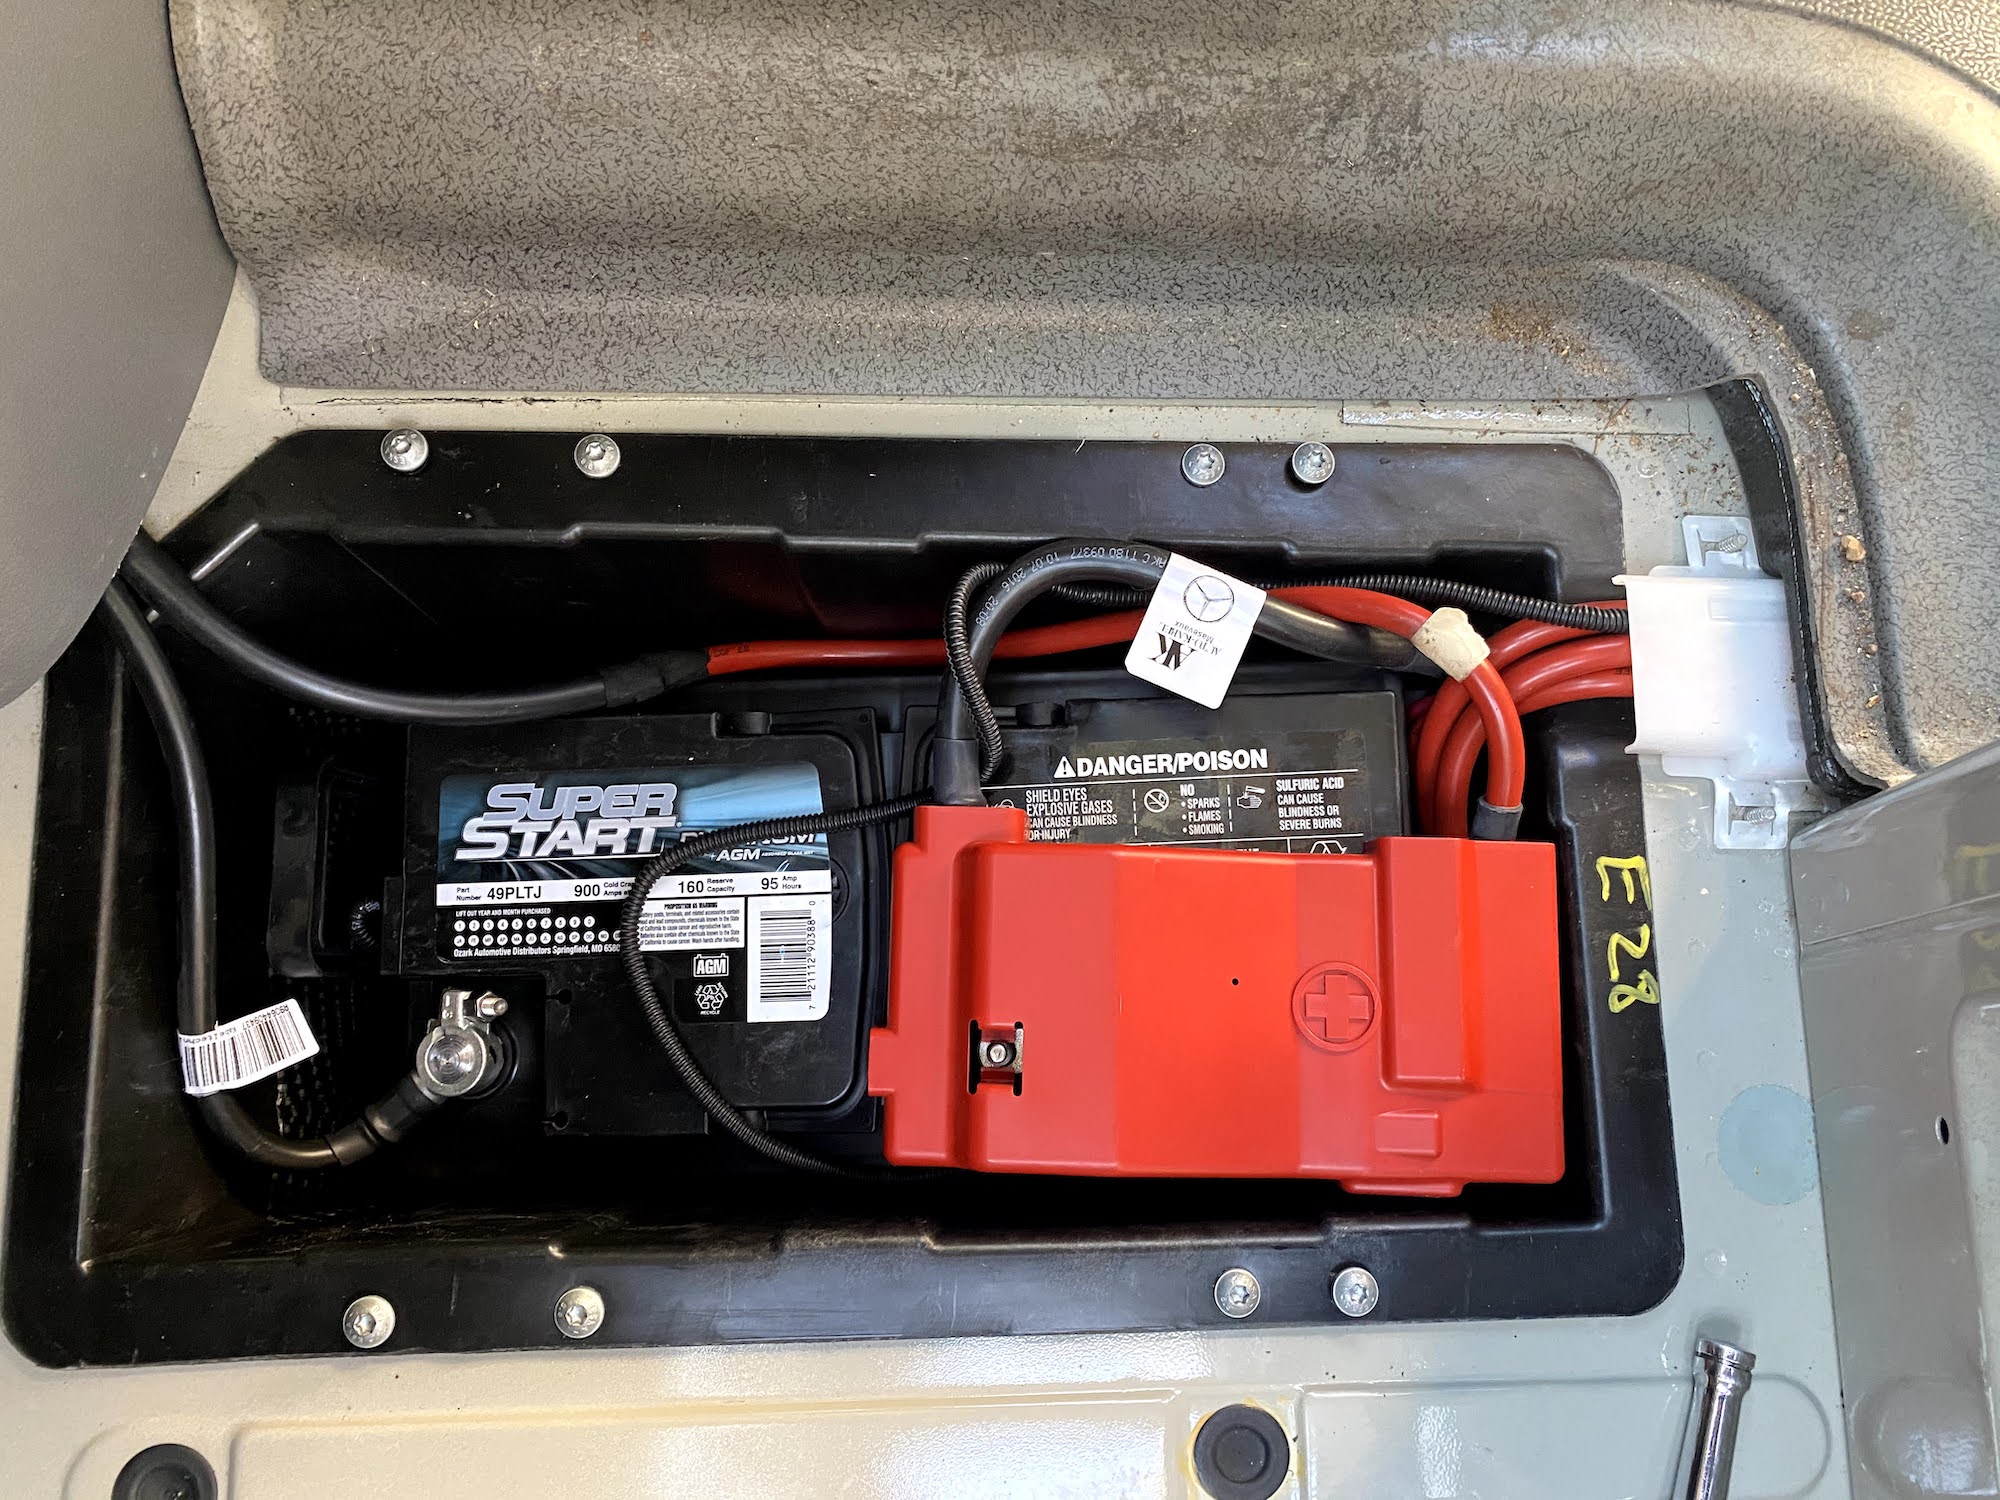
The battery itself is a size 49 AGM battery, also known as H8. The size 49 or H8 specifies the physical size and terminal location and type. Any battery with this size specification will fit in the Sprinter. The factory battery is AGM, so I stuck with that same battery type because, why not? This is also true if you have the factory auxiliary battery since it is the same specification as the starter battery.
Battery removal
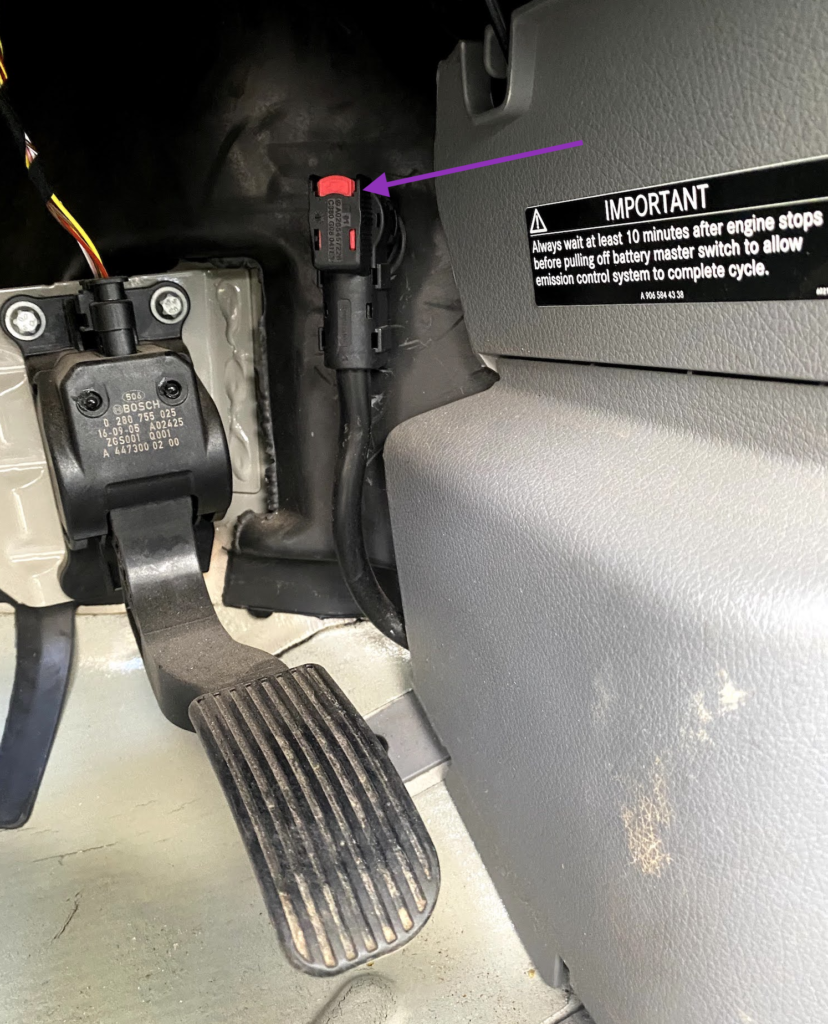
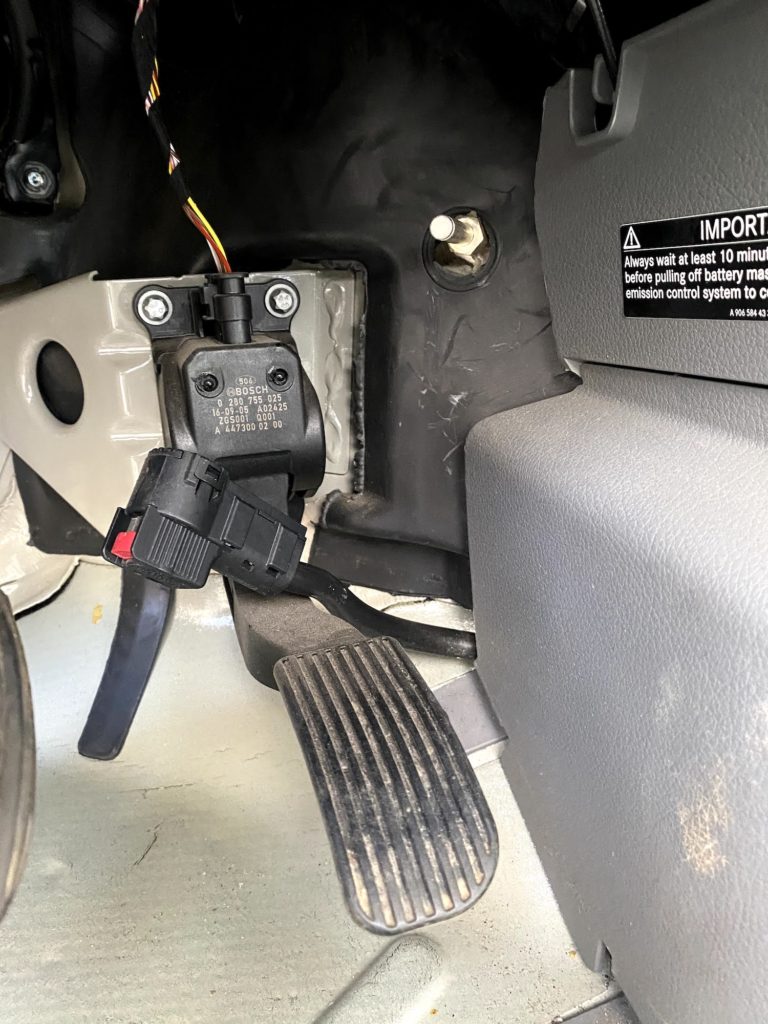
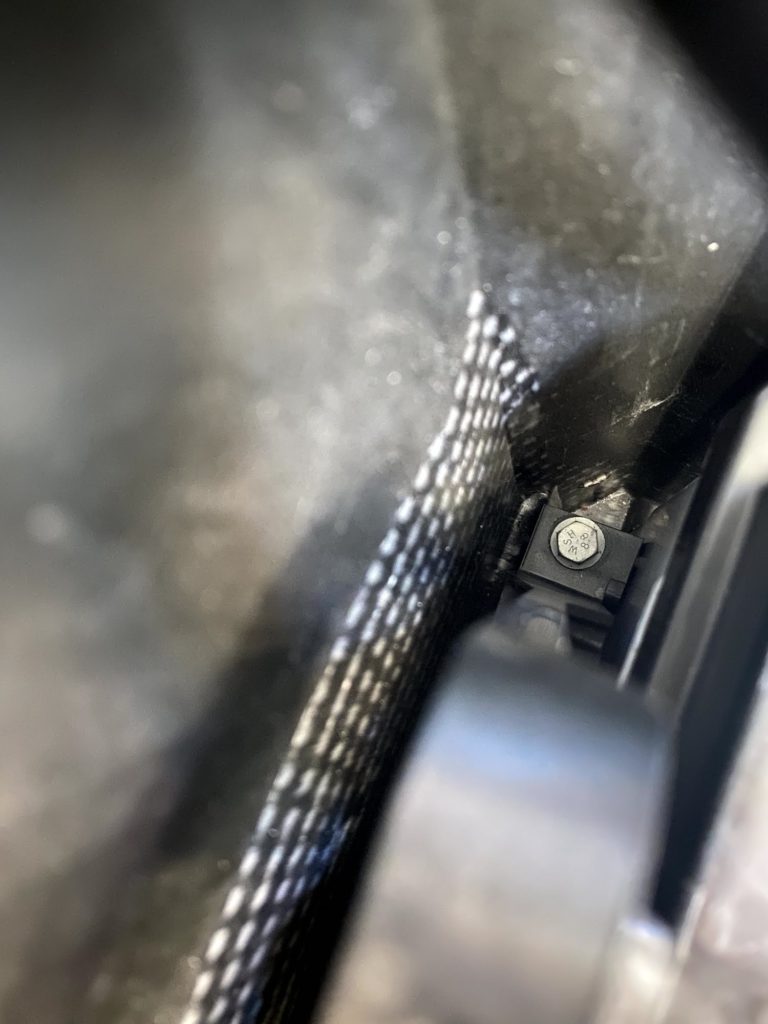
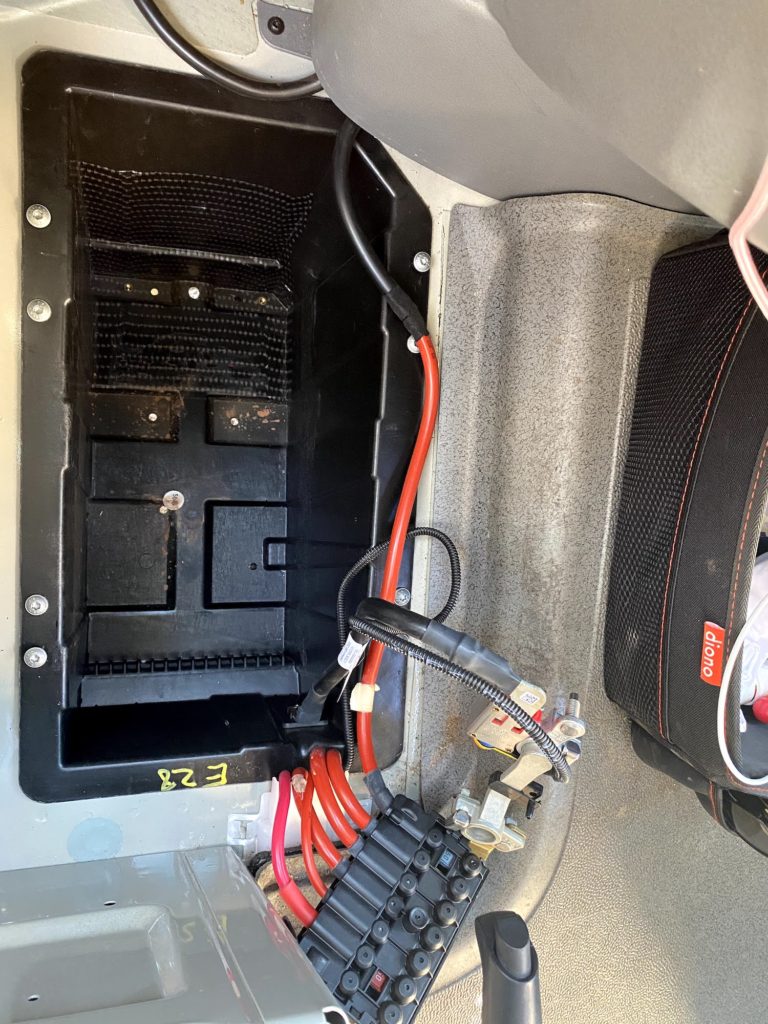
Before doing anything in the van, wait 10 minutes after turning off the engine and then disconnect the main ground which is located next to the accelerator pedal. Push down on the red tab and pull back on the connector to disconnect the ground.
The starter battery is located under the floor in front of the driver’s seat. There is a piece of plastic trim that holds down the floor mat at the door opening. The three screws that hold the trim piece in place require a T25 torx tool.

Remove the 3 screws and set the aside. Then remove the plastic trim piece.
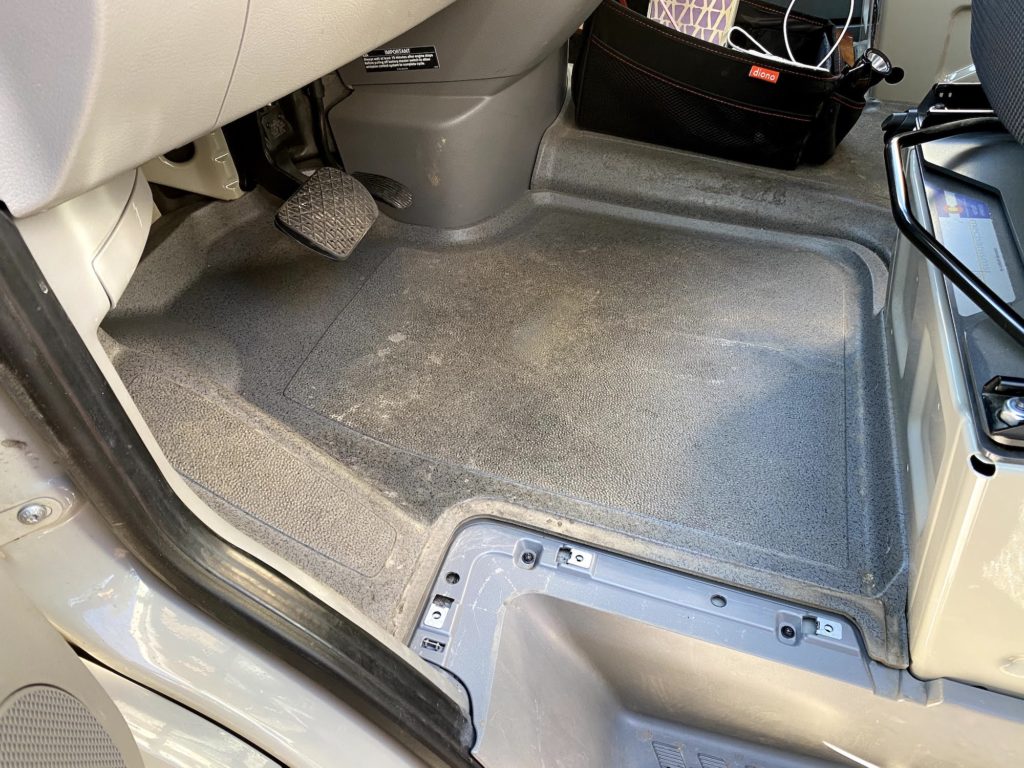
Next, the plastic floor mat can be picked up and removed. This will expose the battery compartment cover.

There are 4 screws that need to be loosened about 2 turns so that the cover can be slid back and lifted off of the battery compartment. The T-27 driver will work for these screws. There is no need to remove the screws completely.

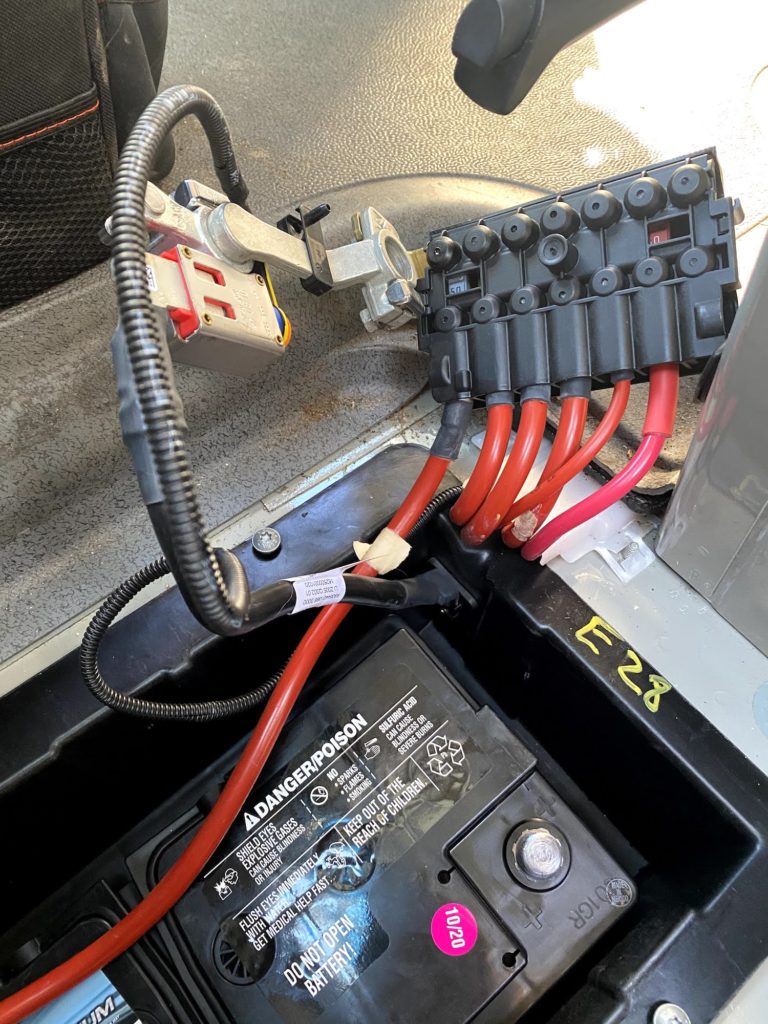
Next, the red plastic cover for the positive terminal and power distribution center (PDC) needs to be removed. This requires a small upward force by hand to remove.
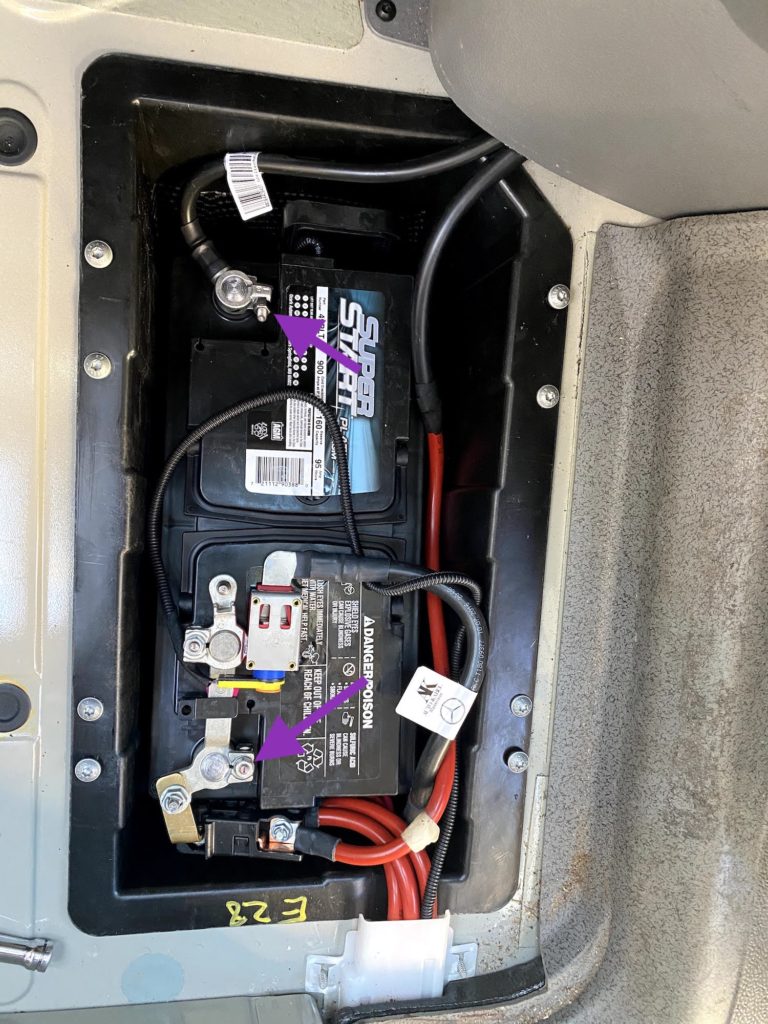
Now, both of the terminal connectors can be loosened with the 10mm socket and pulled from the battery. The PDC will come out with the positive terminal connector, it looks complicated, but it is basically a self-contained unit.
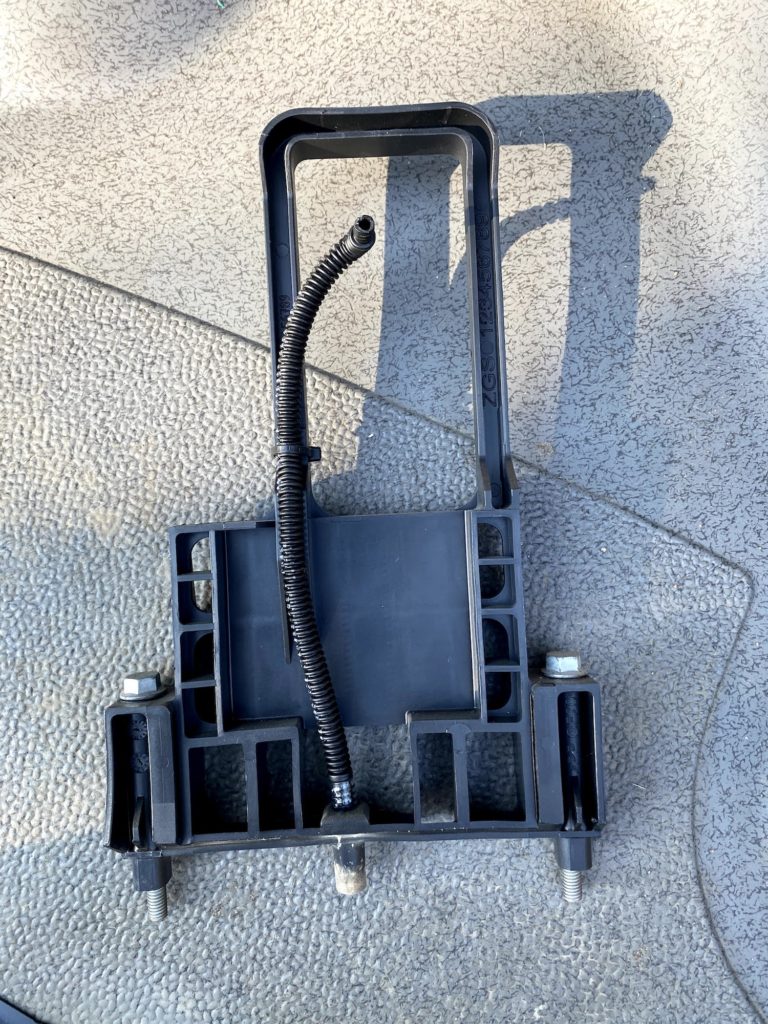
Now that the battery is disconnected electrically, the battery mount and vent need to be disconnected. This is done by unthreading the two 10mm bolts at the base of the battery on the negative side of the battery. There is a plastic assembly that holds the two mounting bolts as well as the plastic vent hose.
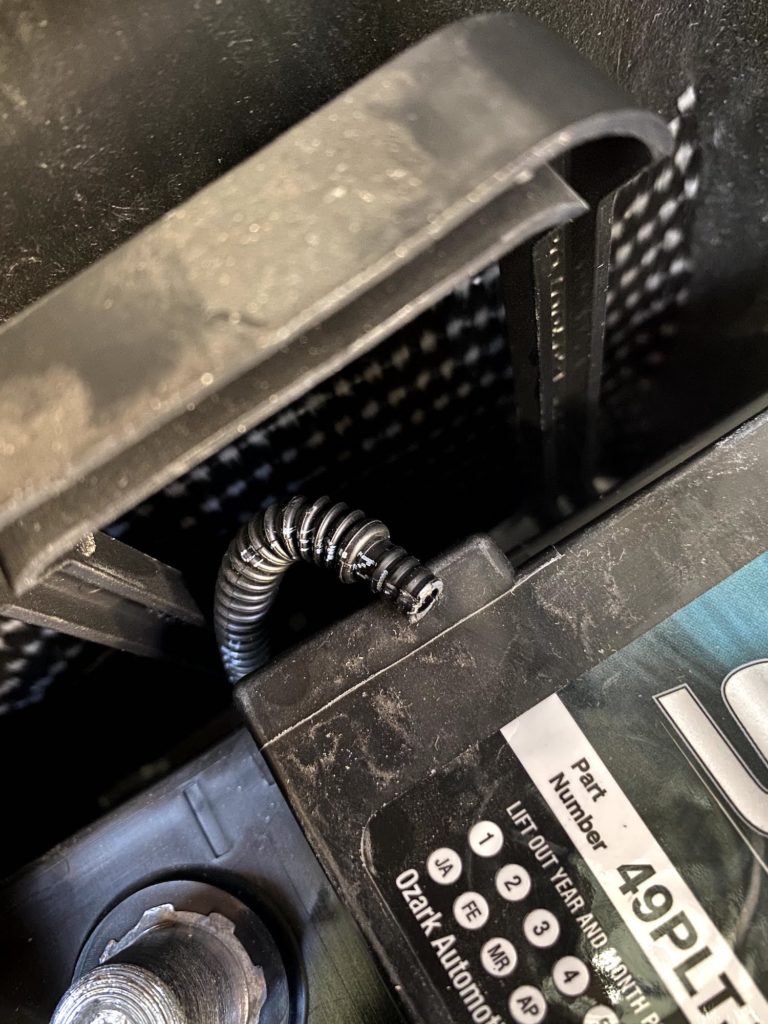
Pull the plastic vent hose from the negative side of the battery. This vent hose will be reused with the new battery.
Loosen the mounting bolts using the 10mm socket and socket extension. You do not need to remove the bolts after loosening them all the way as they will remain in the mounting assembly.
Once the 2 bolts are loosened all the way, the plastic assembly can be lifted out of the battery compartment.
The top of the battery will have 2 handles folded down. Lift these up and use them to lift the battery out of the compartment. The battery is heavy and the angle is awkward, so you may need to recruit some muscle for this part of the project.
New battery installation
Installing the new battery is as simple as performing each of these steps in reverse order. Be sure to position the new battery the same as the old battery in the battery compartment.
In all, it probably took about 30 minutes to replace the starter battery.
Factory auxiliary battery
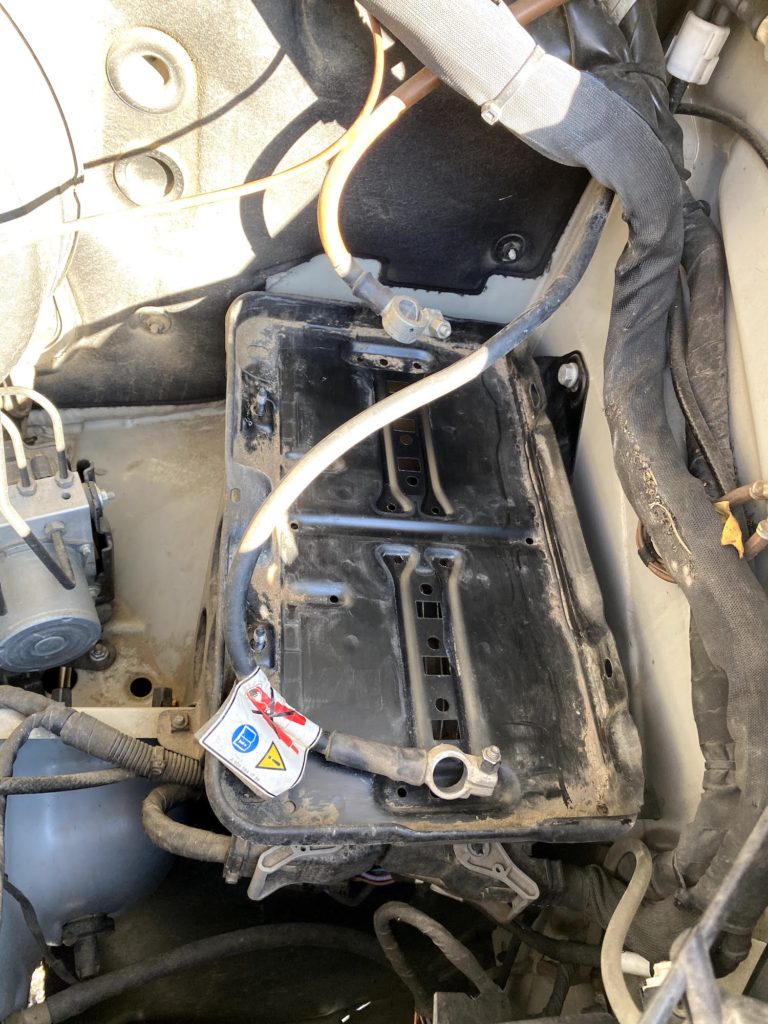
The factory auxiliary battery is in the engine compartment and is much easier to access than the starter battery.

Use the 10mm socket to loosen each of the battery terminal connectors and lift them off of the battery terminals. Use the same 10mm socket to fully remove the two mounting nuts and then lift off the mounting brackets. Lastly pull the vent tube connector from the original battery.
Carefully lift the battery out of the engine compartment.
Next place the new battery in the same position as the original battery. Install the two brackets and tighten the nuts onto the studs. Place the terminal connectors onto the battery terminals and snug down those nuts. Lastly, place the vent host connector into the hole in the new battery.
Support our site by shopping on Amazon with this link

Professionally done clear and very easy to follow. Well done 100% satisfied.