
One of the pleasures in a well designed vehicle is to have cup holders that are in easy reach and can hold cups of various sizes securely. The NCV3 (2006-2018) Sprinters have several cup holders built in but they are either difficult to reach or are not deep enough to keep cups from tipping.
Some of the design considerations include:
- Must not restrict the seats from being turned on their swivels.
- Mounted securely
- Accommodate different cup sizes
- Stuff should not slide off easily when driving
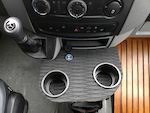
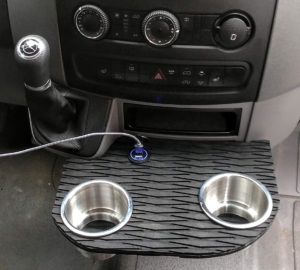
I first saw a DIY solution that looked good by a member of the Sprinter-Forum here: https://sprinter-source.com/forum/showpost.php?p=576155&postcount=2947 Which looks like this:
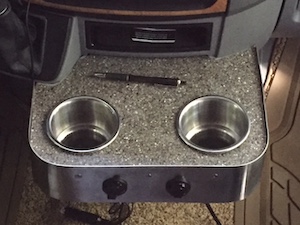
I thought Corian was a good choice for the deck material with a nice balance of strength and weight. I checked around and was unable to find a supplier that was willing to part with any scrap pieces inexpensively. So, like I usually do, I went through my scrap material pile and found some 1/4″ plywood that looked like it would do the trick.
Determining how to mount the console was the next task. In order to do this, I removed the ashtray and the storage cubby.

The cubby is removed by putting a hand in the cubby and pushing upward and then sliding it outward. The ashtray is removed by pushing a small screwdriver in each of the 2 slots in each side of the ashtray and pulling outward.
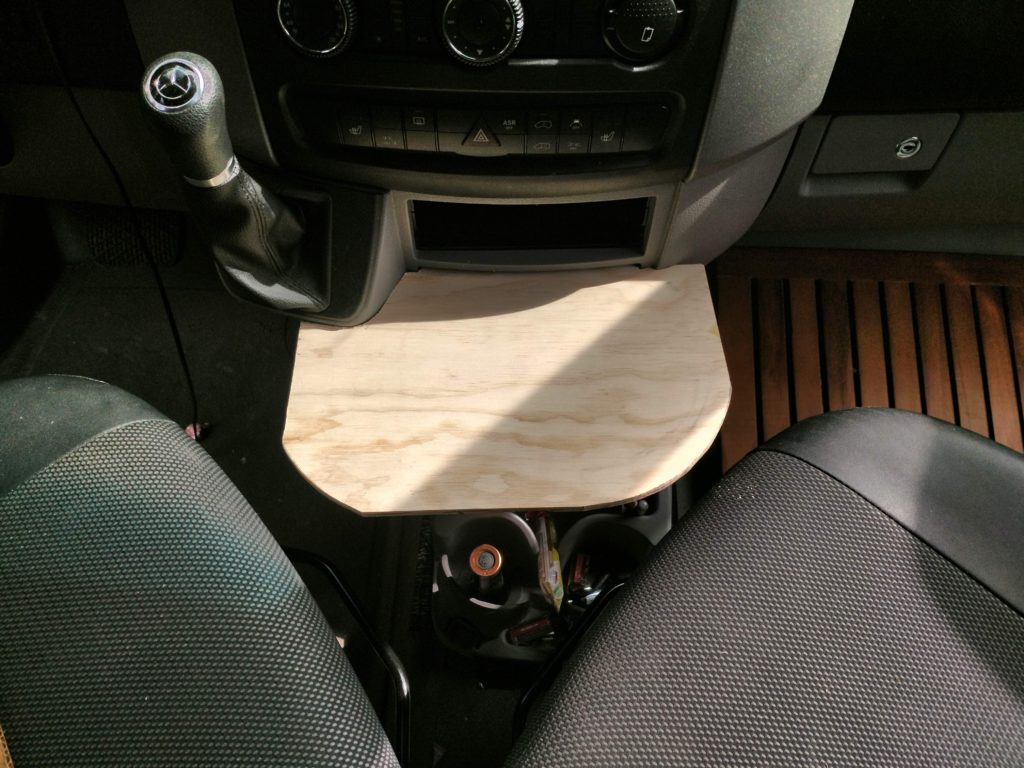
With the cubby and ashtray removed, it was evident how to mount the console. There are two layers of fairly strong plastic at the bottom of the cubby space and the top of the ashtray space. The plan is to through-bolt the plywood console to the plastic with large diameter washers so that the plywood is mounted to the top of the ashtray space. I will be able to reinstall the cubby box after the console is mounted.
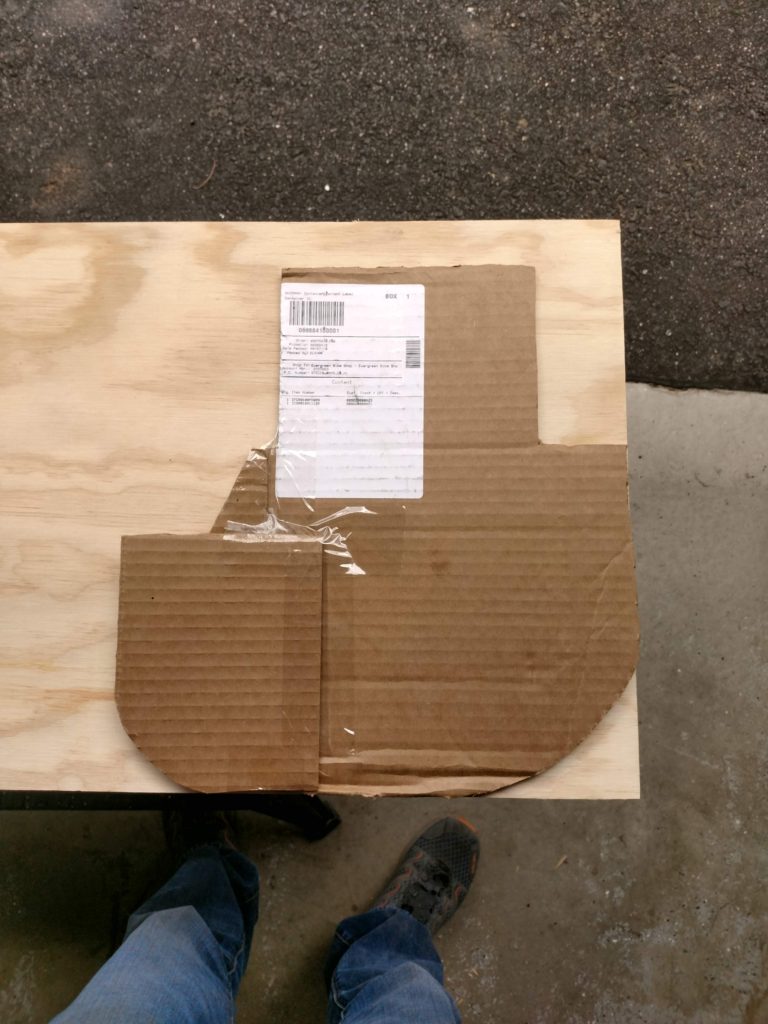
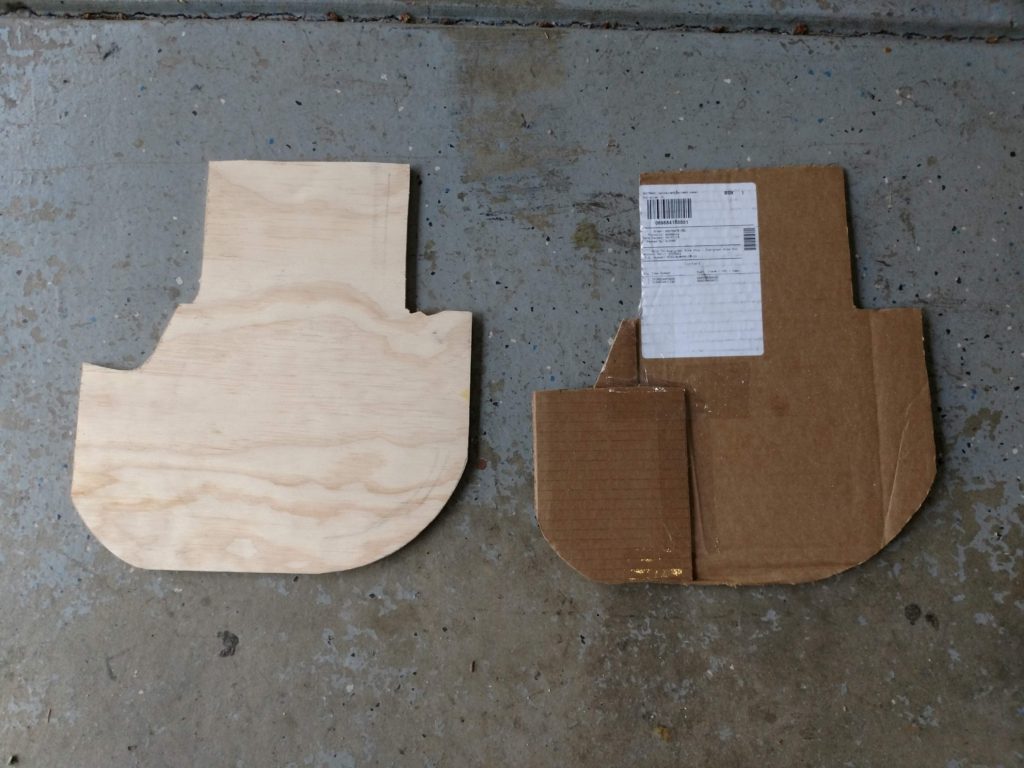
The next step is to make a template for cutting the plywood console. This is where the Amazon boxes come in handy. I want a tongue that replaces the space that the ashtray had occupied which will be as deep and wide as the space will accommodate for maximum strength. The console itself will be as big as the swivel seats will allow.
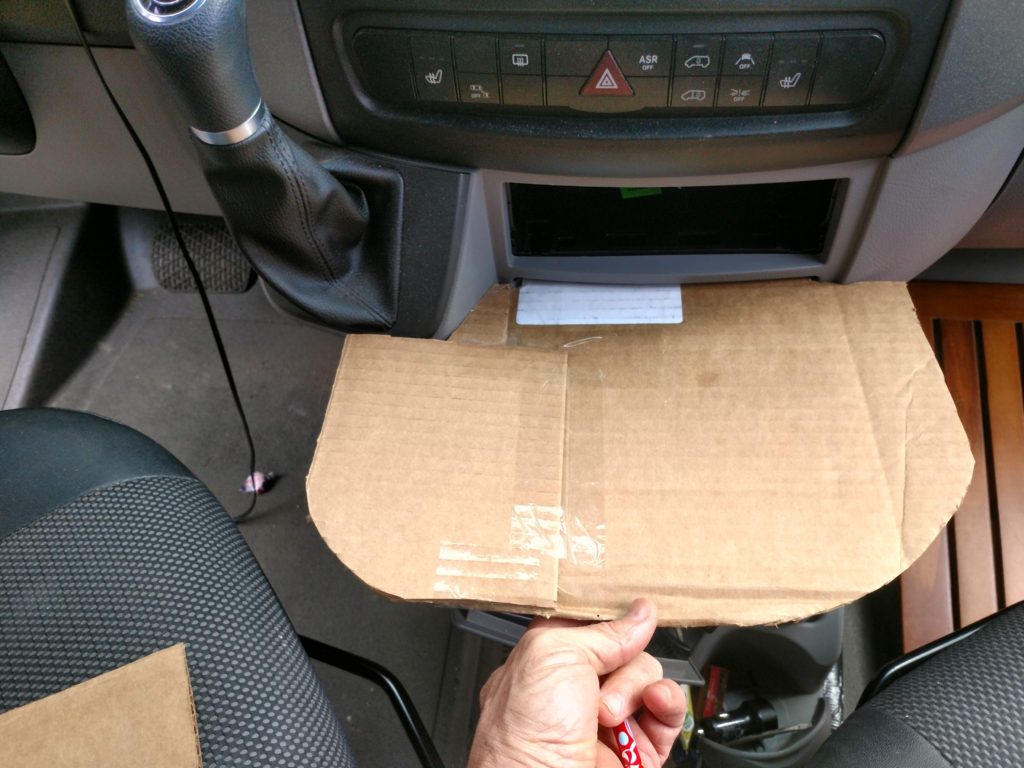
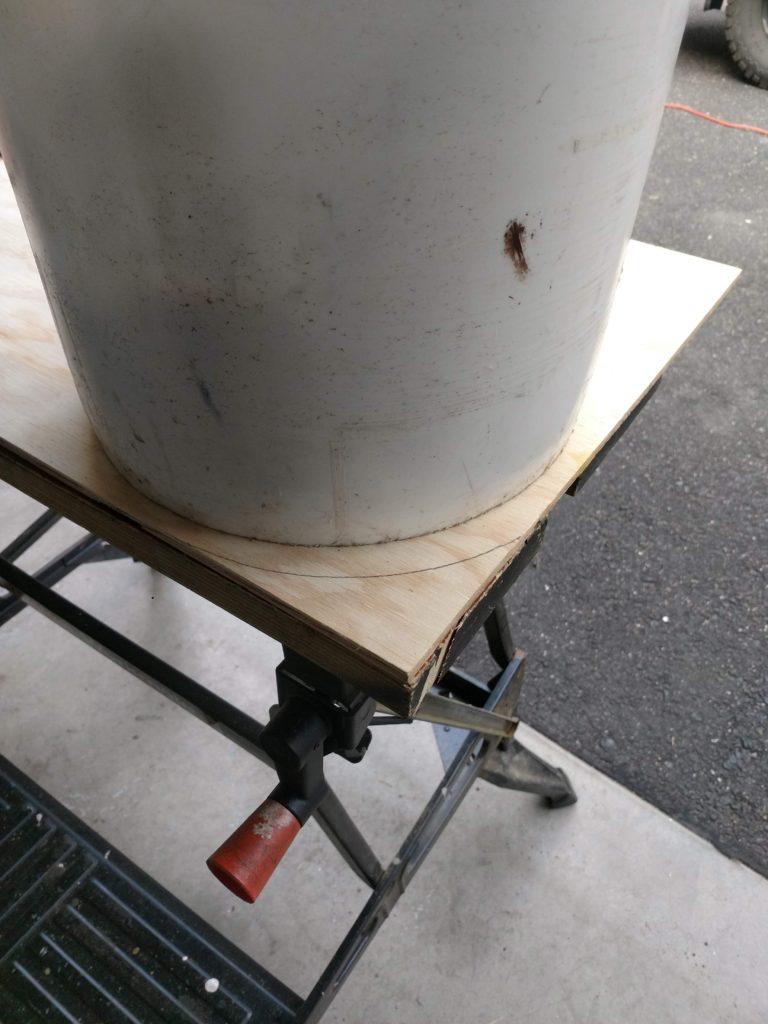
Once the template size and shape is satisfactory, it is time to cut the plywood.
It seems I stopped taking pictures during the latter stages of the build.
I lined up 3 gaps in the plastic layers of the space in the dash to drill holes in the plywood for the bolts to mount the plywood. Once I test fitted this, the plywood seemed a bit too flexy. To stiffen it, I glued a 1/2″ x 1″ hardwood rib along the middle of the plywood, front to back. This made a big difference.
The next step was to paint the edges of the plywood black to give it a more subtle look.
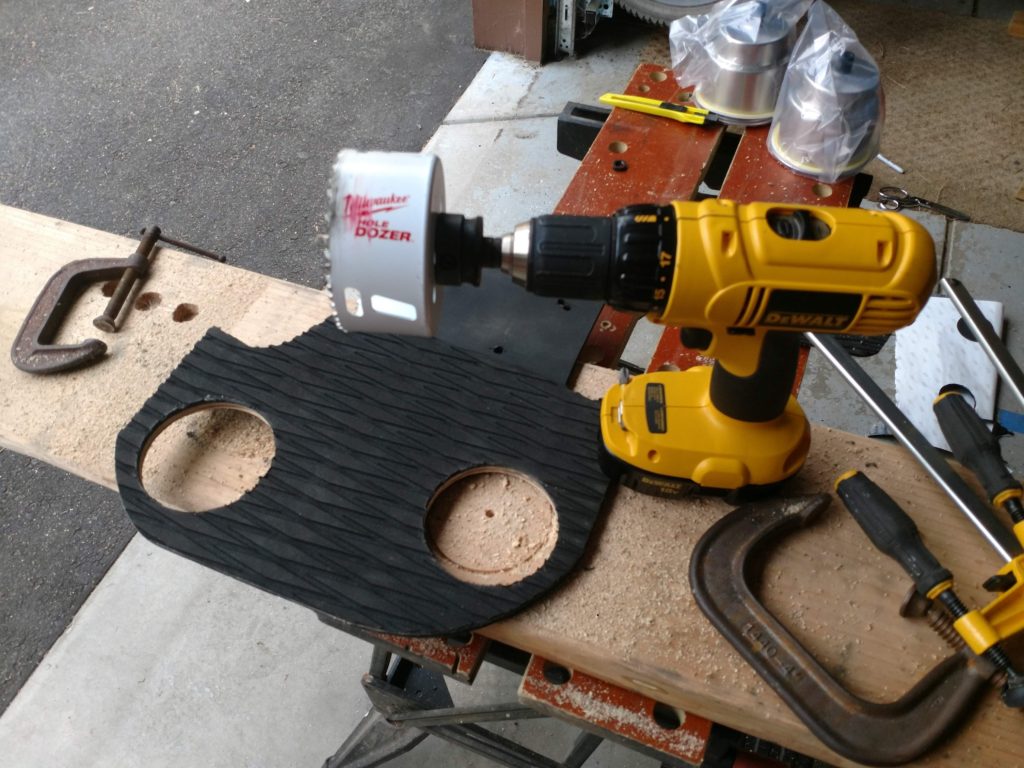
To get the surface of the console to be non-slip, I used non-slip grip mat pad with an adhesive backing that is used on stand-up paddle boards. I cut a piece slightly larger than the plywood and then stuck it to the plywood and trimmed it to fit with a razor knife.
The holes for the cup holders are drilled with a hole saw drill bit.
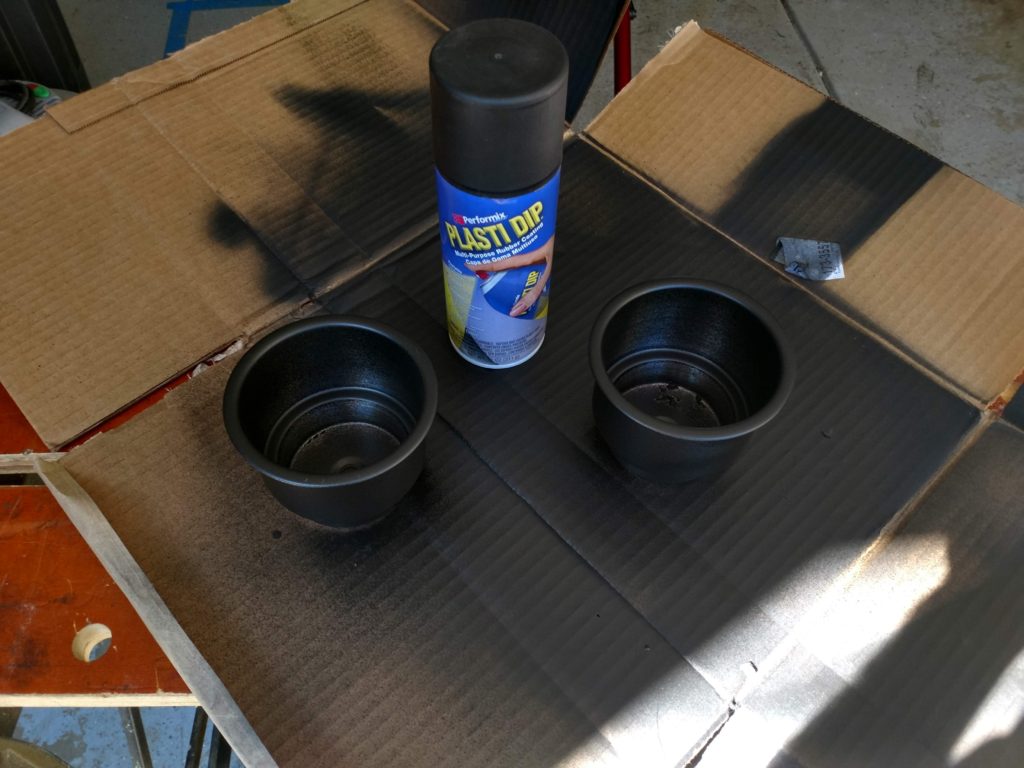
The cup holders that I ordered are nice looking stainless steel. However, on the first drive, the sun reflected off of them into my eyes, which was not good. The remedy for this was to paint them with black plasti-dip paint.
I also added a USB socket to the console. I stole the power wire from the power adapter that was below the ashtray and spliced in the generic connectors. This is an always-on power source from the factory auxiliary battery. I also had the option of taking power from the ashtray cigarette lighter, but that is only on with the ignition, so I chose the other.
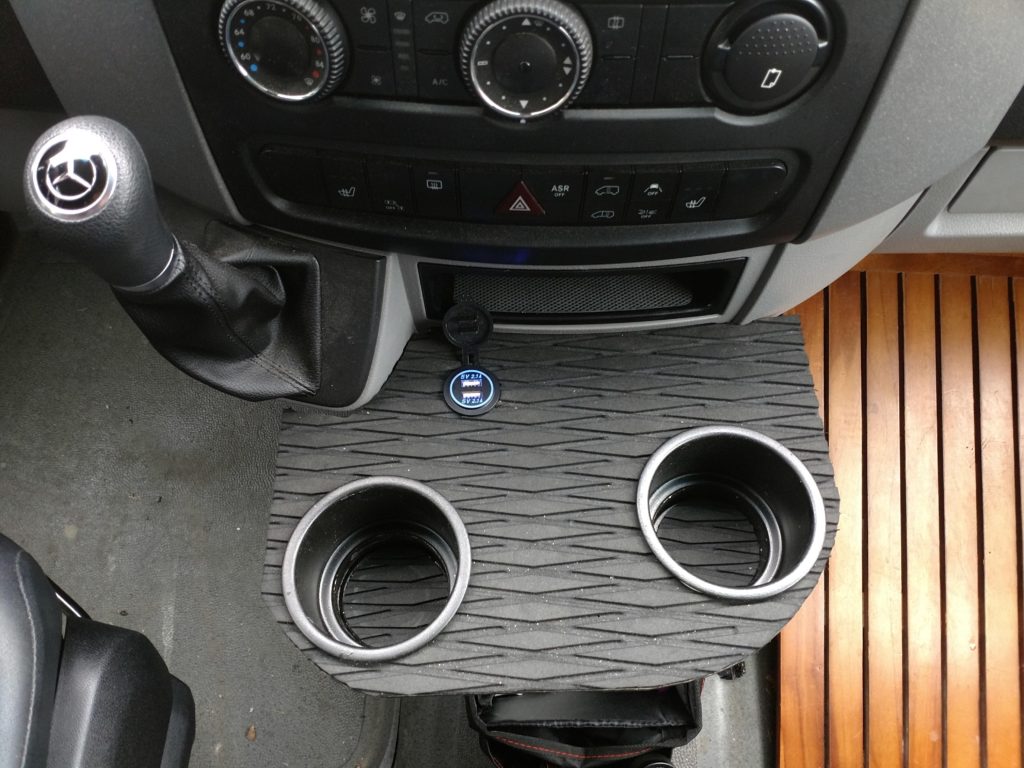
The last touch was to enclose the space in the dash below the console where the ashtray was installed. I used some of the remaining non-slip mat pieces to enclose this space and have a second cubby space.
Support our site by shopping on Amazon with this link
Materials & Tools
Thoughts or questions, let us know what you think!
Nice solution. I don’t think many have went down the path we did.
Thanks Patrick
I just drove my 2013 Sprinter to Minneapolis, and I jerry-rigged a cardboard center console. Yep, Amazon cardboard! And it worked so well I wish I’d taken pictures. When the conversion’s done I might do something like yours, because I like your design better than mine.