
The second time around on a camper van build should be easier than the first time, right? Let’s say yes and no. Yes, because we know so much more about building a camper van and how we will use it. No, because our set of requirements for the Transit camper van build out is far more complex than the first time.
The first van was an upgrade from tent camping with our F-150. The initial requirements when we got the first van were bike storage inside, a bed, heater and storage for gear. As the months & years went on with the Sprinter we added more capabilities to make van life more capable & comfortable.
As we begin the process of starting over, we itemized all the capabilities of the first van that we wanted in the Transit camper van build as well as any additional capabilities we wanted to add.
Key new features include:
- The kitchen inside the van instead of sliding out the side door because we use the van in cold weather much more than we originally thought.
- A fixed toilet because the folding toilet was difficult and inconvenient.
- Storage for 2 SUPs as whitewater SUPping has found its way into our hearts.
- Additional general storage so we don’t have miscellaneous items floating around, everything needs a place.
- Power inverter large enough to power a hair dryer
- Fixed solar panels on the roof instead of portable solar panels
- 12v and 5v power outlets throughout to run and charge various accessories
- 2 roof fans instead of just one for additional active ventilation
- Add an additional seat to make hanging out in the van more comfortable.
Aside from the above list of items, the new van build will be similar to the feature list of our original van.
- Storage for 4 or more bikes inside the van
- Raised bed
- Fridge
- Heater
- Ventilation
- Cooktop
- Food prep surface
- Enhanced internet connectivity
- Swivel seats
- Awning
- Roof rack
With the first van where we started with minimal expectations. As the build matured and we added more things, it became more difficult to add the next new thing since the previous new thing was inevitably in the way as there was no master plan. This added work to change or remove the old thing in order to make way for the new thing. The lesson in this is that order is important when we decide what gets installed into the van when. A high level sequence that seems to make sense is this:
- Design the physical layout that accommodates our list of capabilities
- Order all the materials we’ll need for the build
- Install anything that requires holes in the van (roof fans, windows, heater, etc)
- Electrical system
- Internal structures & facilities
- Drawers, shelves & doors
- Insulation, wall & ceiling panels
- Suspension upgrades
Breaking Ground
Good or bad, we will do the most difficult jobs very early in the Transit camper van build, these include:
- Electrical design, build & install (Fortunately, I found the folks at Unaka Gear Co to be very helpful with this.)
- Heater install
- Windows & roof fans
Electrical system
The electrical system requirements were pretty much the same as our Sprinter with the addition of a bigger inverter and fixed solar panels on the roof instead of the portable solar panel. From the charging perspective, we wanted solar charging, DC-DC charging from the alternator and shore power. We also decided to go with a heated lithium battery for higher capacity, lower weight and a better long-term value.
Charging
We were very happy with the RedArc Manager30 charging system in our Sprinter and had planned to use it again. However, since we are incorporating the smart heated lithium battery, we are taking the responsibility of ensuring that the battery is within proper temperature range to be charged from the charging system to the smart battery itself. RedArc did not have a way to override its low-temperature cutoff. That is, if the ambient temperature is 20°F and the battery internal temperature is 40°F, RedArc will not charge the battery even though it is safe to do so. I went back & forth with them several times but RedArc was not interested in modifying their system to work with the new generation of lithium batteries.
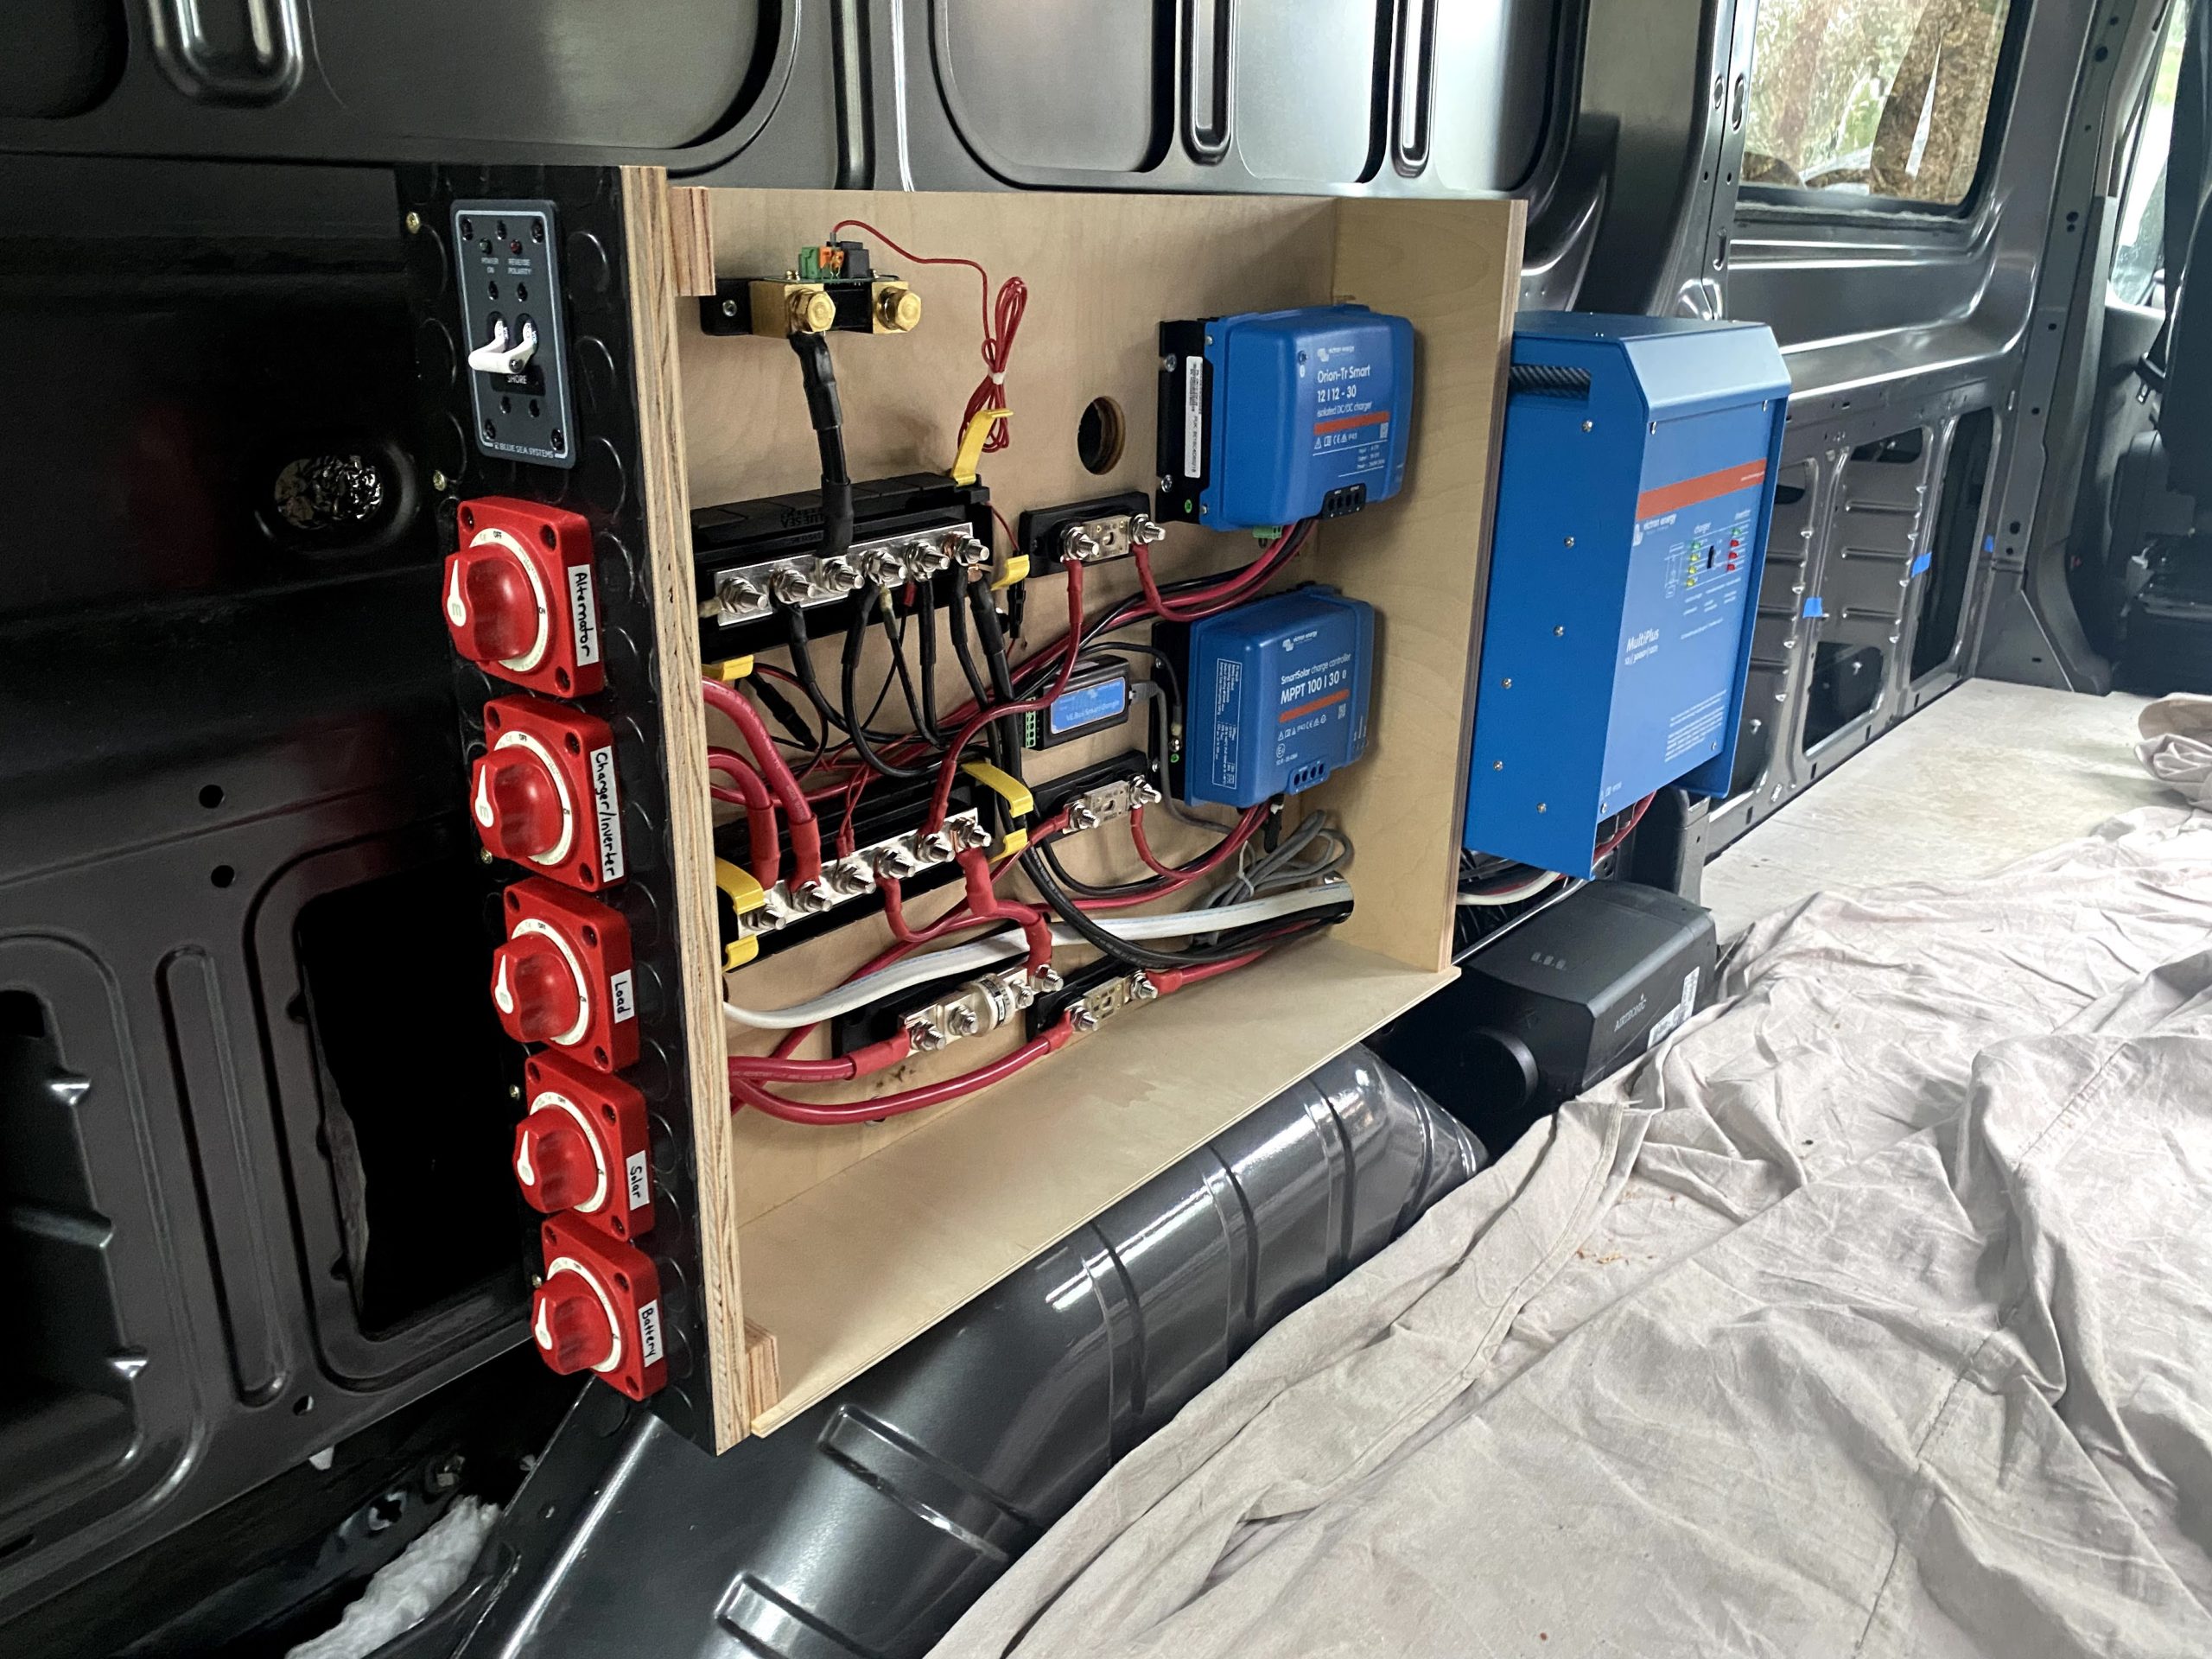
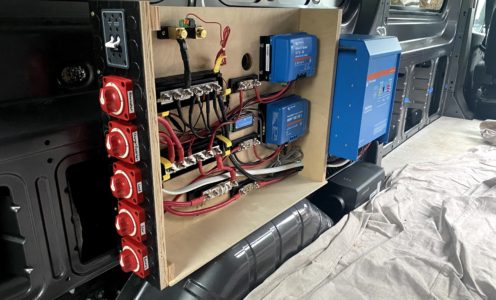
This lead me to the Victron charging ecosystem. This system required a minimum of 4 components in place of RedArc’s 1 component, but the added complexity also provides added flexibility in making the system do what you need. The system cost between the 2 choices is similar. The components include:
- MultiPlus 3000 (charger and pure sine wave inverter)
- Smart MPPT 100/30 (solar controller)
- Orion-TR Smart 12/12 – 30A Isolated (DC-DC charger from the alternator)
- BMV 712 (battery monitor with smart shunt)
It is not required to use all the components from the same manufacturer, for each of the components above, you can select the best-of-breed or best value and make them work together. I went with the “one throat to choke” theory if I had problems, I had only to go to Victron to get it sorted out. Shout out to the folks at Unaka Gear Co to source the equipment and make sure I had all the right parts that I would need at a great price.

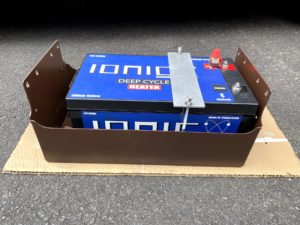
Battery
The battery was a concern for us because we had spent some time in the upper mid-west and had several days in a row where the temperature did not get above -14°F. This led all of our batteries to fulfill their fantasies of role playing as bricks.
In researching smart, heated lithium batteries, it seems that most systems are designed to heat themselves with the battery power. In my mind, this limits how long a battery can keep itself warm. When the state of charge (SOC) drops to a certain level, the battery will no longer heat itself and cannot be charged safely if the ambient temperature is below freezing. Once again, the battery can become a brick when in very cold weather for an extended period of time.
I found one system that the battery heats itself from the power provided by the charger. The battery is smart enough to determine whether to use the incoming charge to heat itself if it is cold or charge itself if it is warm enough internally. This is the solution I was looking for and I don’t see a scenario where this does not work, even in extreme cold for an extended period of time.
The house battery for our Sprinter was stored underneath the van for weight distribution and space savings inside the van. We didn’t want to give up these benefits in the Transit.
Heater
For the Sprinter build, I had hired a local van upfitter to do the jobs I wasn’t comfortable doing myself. The Espar D2 heater install was one of them. After being around van builds for a few years now, I feel more comfortable doing the entire build myself, including the most difficult one, the heater install.
Heater Fuel Supply
In our Sprinter, we had the Espar D2 which worked great. I really liked not having to worry about an alternative fuel source as it pulls fuel right from the van’s fuel tank. We did this again for the Transit with the difference being that the Transit is fueled by gasoline and not diesel. For a gas fired heater the Espar model changes to M2-B4L instead of D2. This model has the added benefit of built in altitude adjustment, so we don’t have to worry about the high-altitude switch we had on the Sprinter.
In researching the installation process for this heater, there was an issue raised in the forums regarding how well it functions at altitude even though the heater compensates for altitude. The general consensus is that the the problem is not with the heater itself, but with the delivery of fuel to the heater.
The way the fuel is taken from the fuel tank, the gasoline can vaporize or cavitate in the fuel line prior to reaching the heater causing the fuel pump to be ineffective in delivering fuel to the heater. There are several reasons this can happen; 1) the fuel pulls the gas instead of pushing the gas creating negative pressure in the fuel line. 2) The diameter of the auxiliary fuel line in the transit is far larger than necessary allowing more space for the gasoline to vaporize prematurely. 3) At higher altitudes, there is less air pressure to keep the gasoline in liquid form.
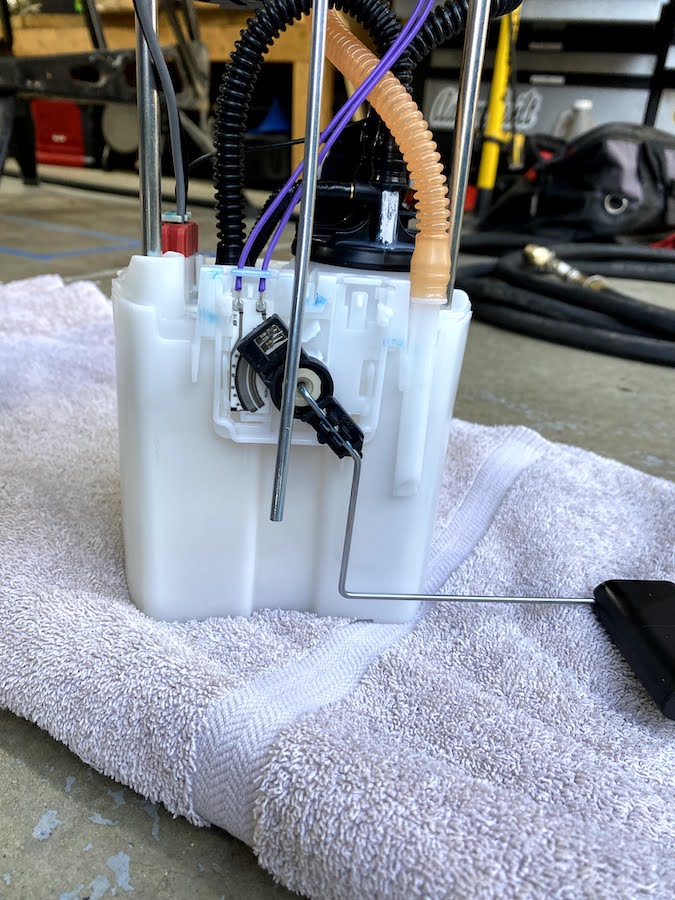
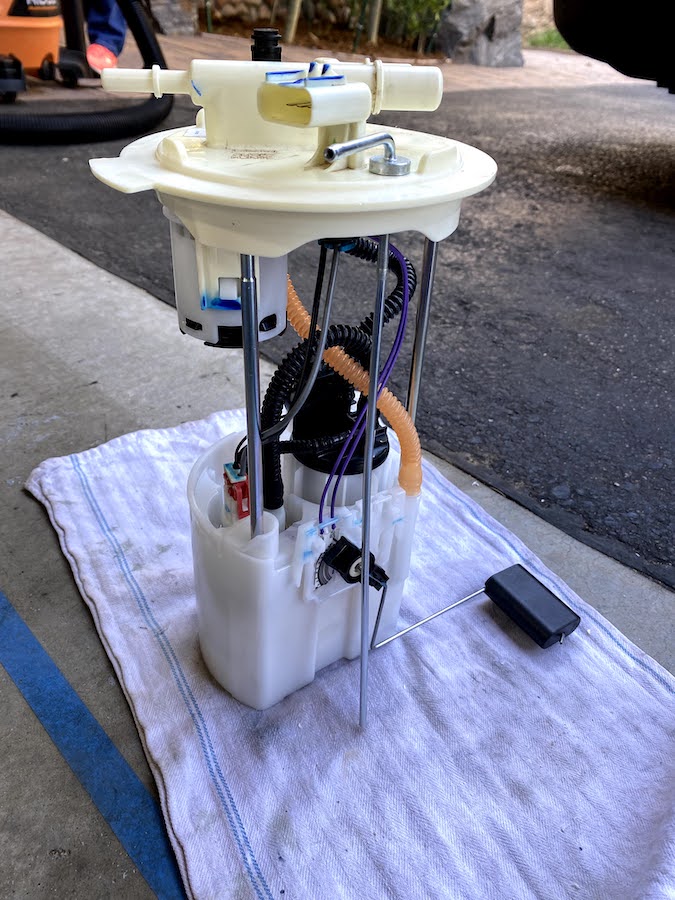
To mitigate this issue, Espar provides a thin stainless steel standpipe that is to be installed into the van’s fuel pump. With this, the auxiliary fuel tap is not to be used. This requires the extra steps of removing the fuel pump, drilling a hole in the top of the fuel pump assembly, installing the standpipe, reinstalling the fuel pump and hoping the van starts afterward.
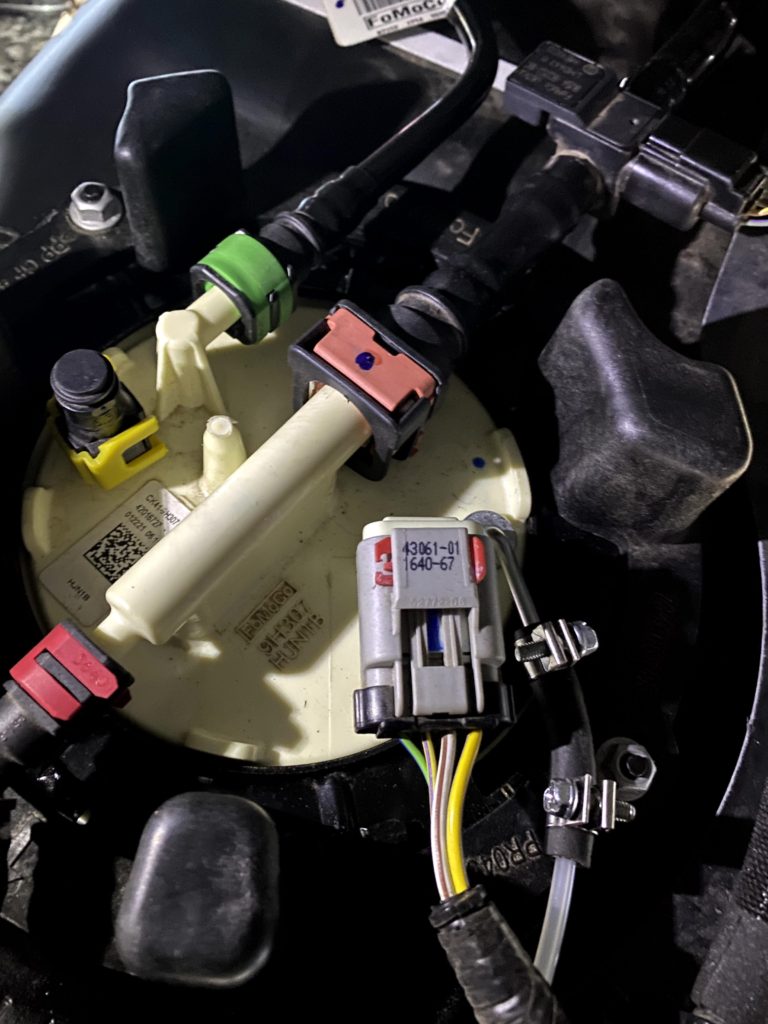
Removing the fuel tank and fuel pump from the fuel tank were a big challenge for me as I had never done anything like that before. I did not have all the proper tools to remove the fuel lines from the fuel pump. Ford’s documentation and Chilton’s documentation were both out of date on this topic. Eventually, I figured it out with two very small screwdrivers and got the fuel pump out. If I had tools like this, life would have been much easier that day. Fortunately, I did have the fuel pump removal tool.
Heater Wiring Harness
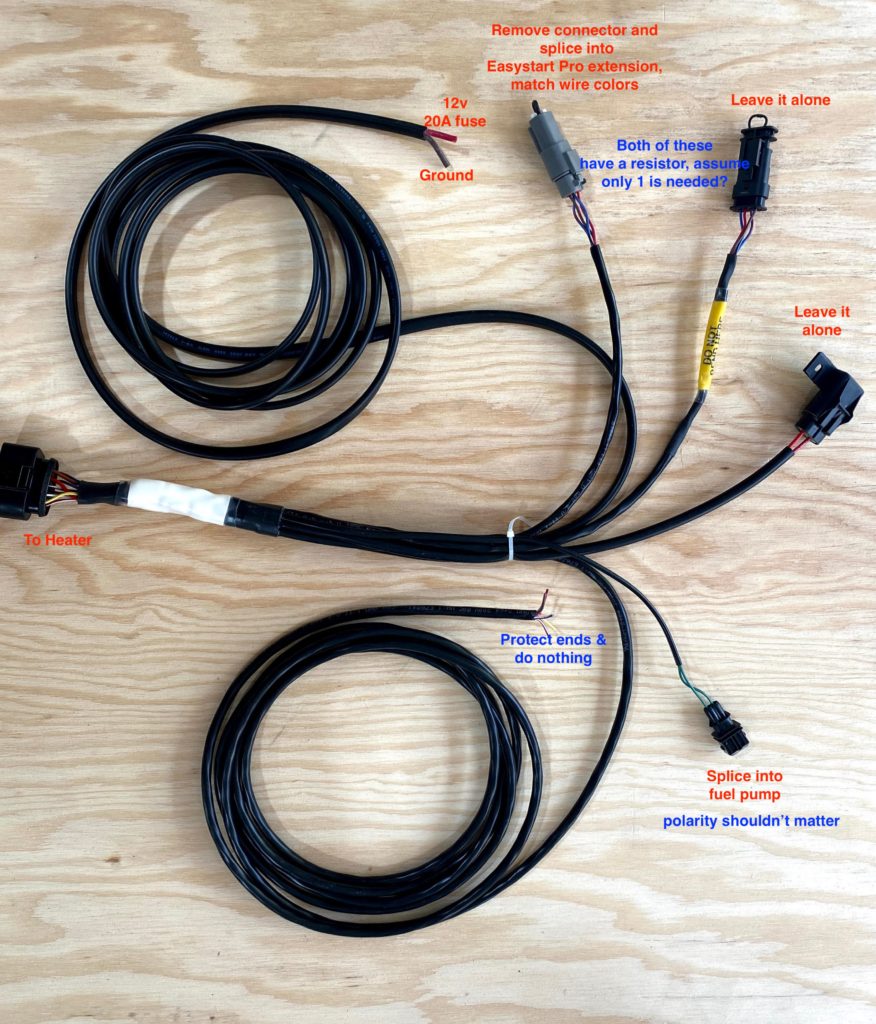
Espar is well known for providing terrible installation instructions. This is likely why there is so much information published on the internet about how to install an Espar heater. Unfortunately, much of the information regarding the installation is out of date as Espar updates their products from time to time and the well-intended information doesn’t always line up with the version of the product you have in your hands. A prime example of this is the wiring harness.
The version of the installation kit I purchased contained a wiring harness that did not line up with Espar’s documentation or any of the many examples I found on the internet. To compound the issue, the wiring harness is mostly unused in any given installation since the same wiring harness is used in a whole range of heater products. It took several days of sleuthing with a multimeter to trace all the wires and deduce the purpose of each wire and determine how to make the connections. Once you determine which wires are and are not used, the process of wiring up the heater becomes relatively easy.
Once the installation was complete, the heater failed to start. I rechecked all my work and then reached out to Espar support in Canada. Espar was actually really helpful and after getting some help troubleshooting, I had to send back the ECU to be re-flashed. Once it returned about a week later, the heater fired right up with a massive feeling of relief.
In all, there are 3 primary steps to installing the heater; 1) physical installation of the heater itself into the van, 2) connecting the standpipe, the fuel line and heater’s fuel pump, 3) connect the wires. Way back when we embarked on the adventure to build out this van, I had thought that the fuel hookup would the single toughest day on the entire van build and while the van build is not yet complete, that has held true.
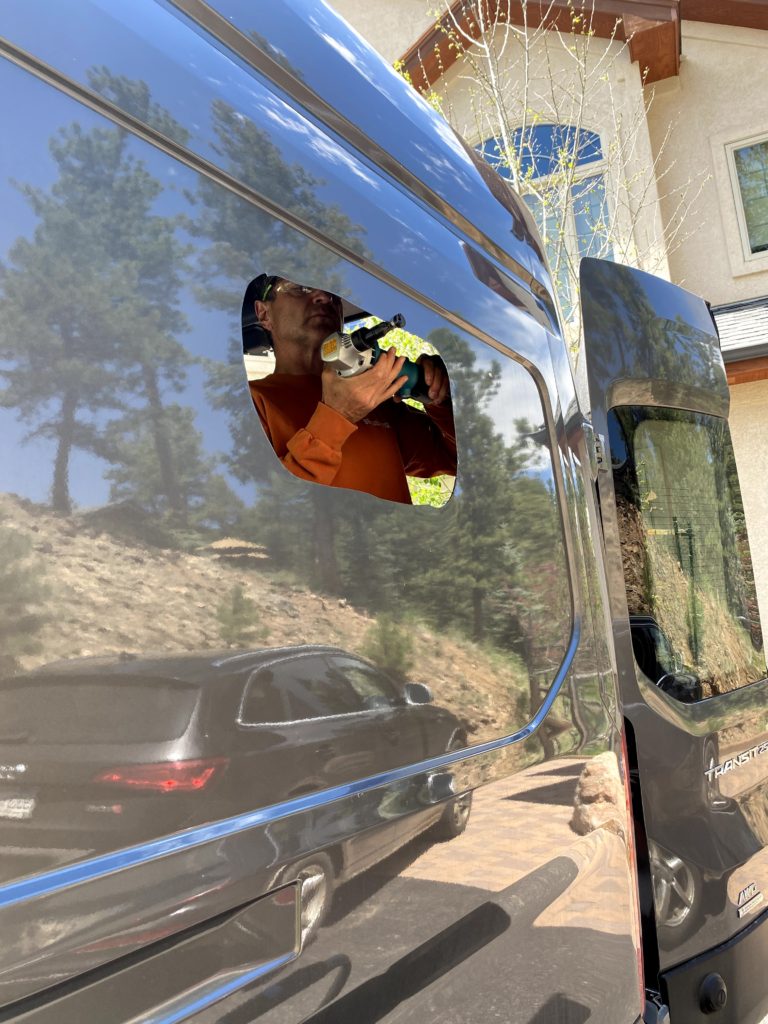
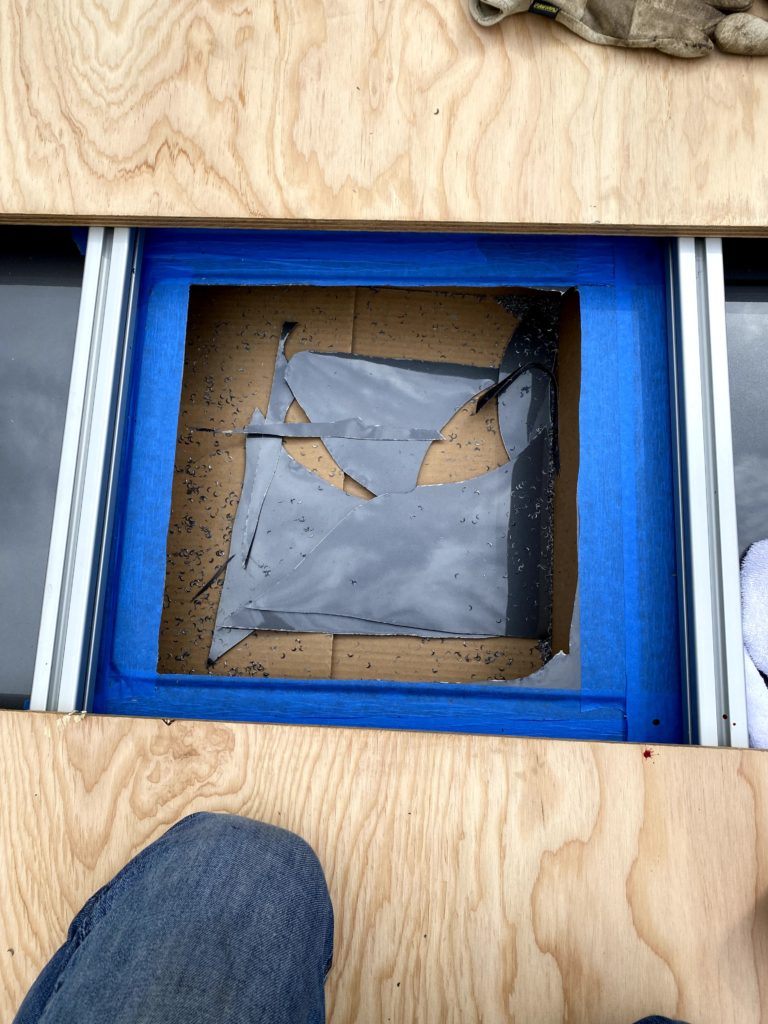
Windows and roof fans
Installing windows and roof fans requires cutting big holes into a brand new van. While not very difficult, it is stressful since cutting too large or in the wrong location leads to an expensive repair. In researching this, I found a tool that makes cutting the sheet metal much easier and less error prone. The tool is called a sheet metal nibbler. It took me a little practice on scrap sheet metal for me to figure out the technique. Once you get it down, it is far easier than a jigsaw with less vibration and heat.
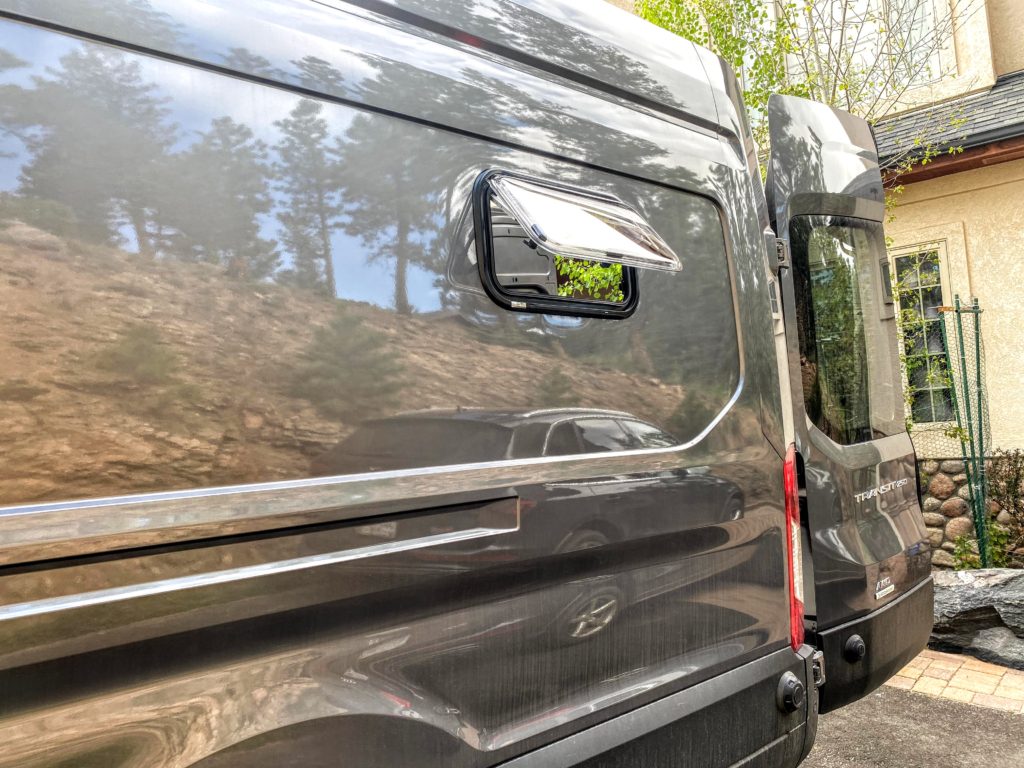
There are a number of options for aftermarket windows. We ordered the Transit with a fixed window in the sliding door and rear doors. We wanted to add a fixed window in the forward location behind the driver’s seat and a bunk window next to the raised bed, also on the driver’s side.
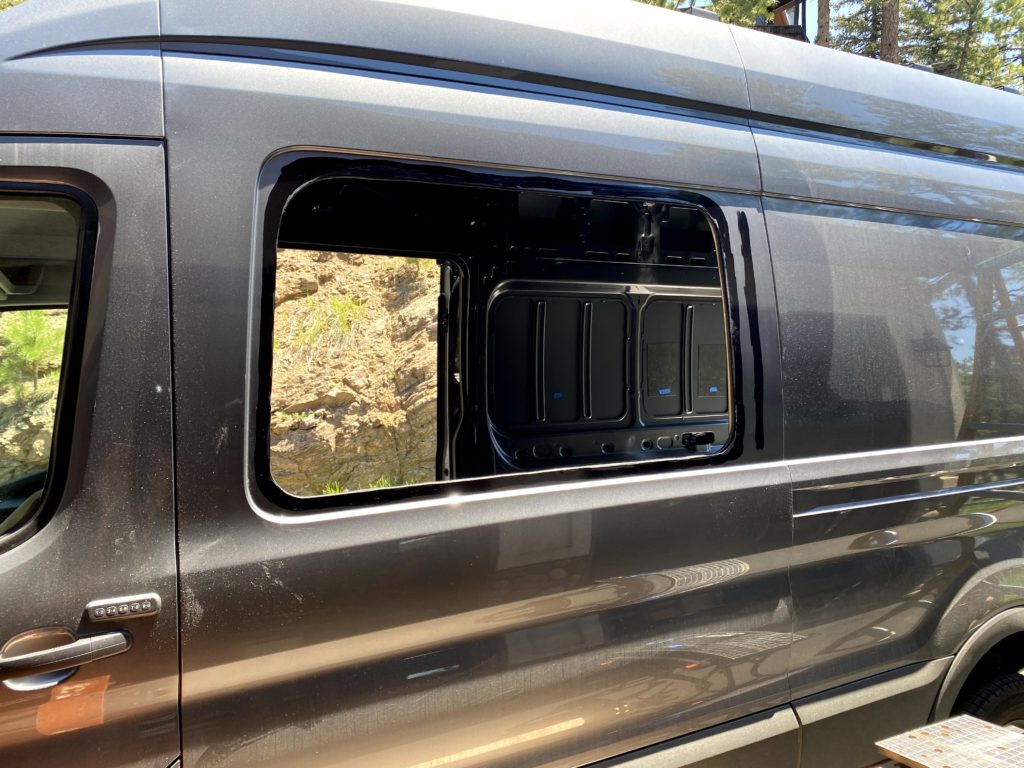
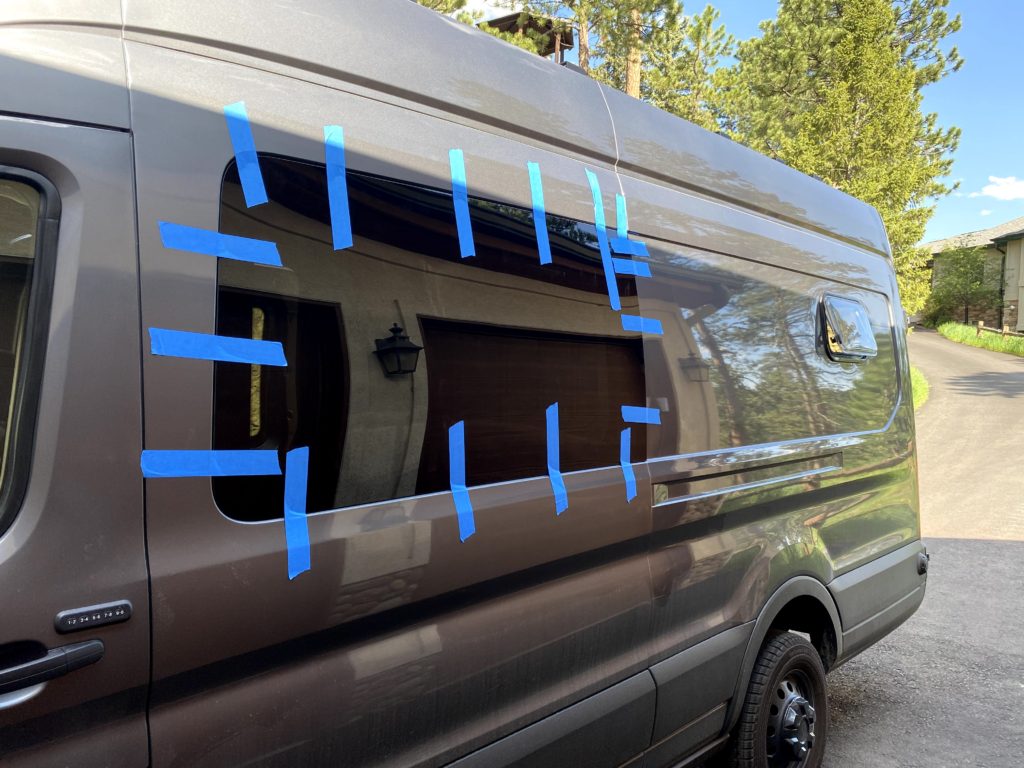
The fixed window was actually the easiest of these installs. We installed it with urethane sealant and essentially just glued to the side of the van. The only concern with this is that the curvature of the window and the curvature of the van don’t match exactly, so the sealant has to be applied very generously to fill the gap left by the curvature mismatch.
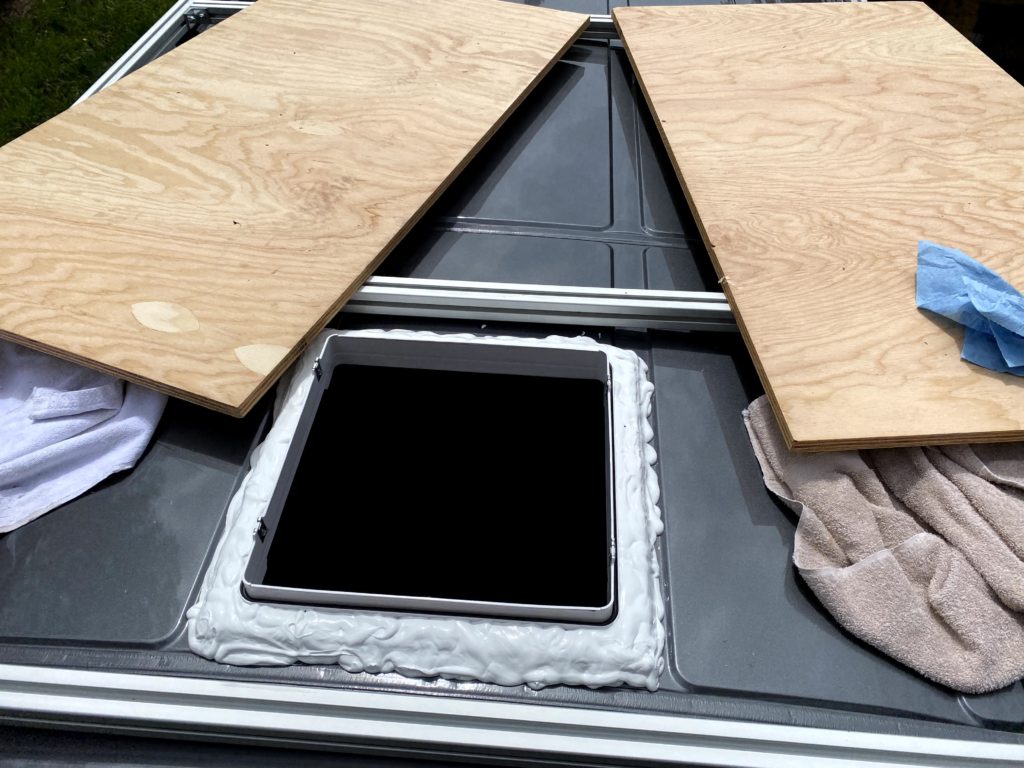
Bunk window
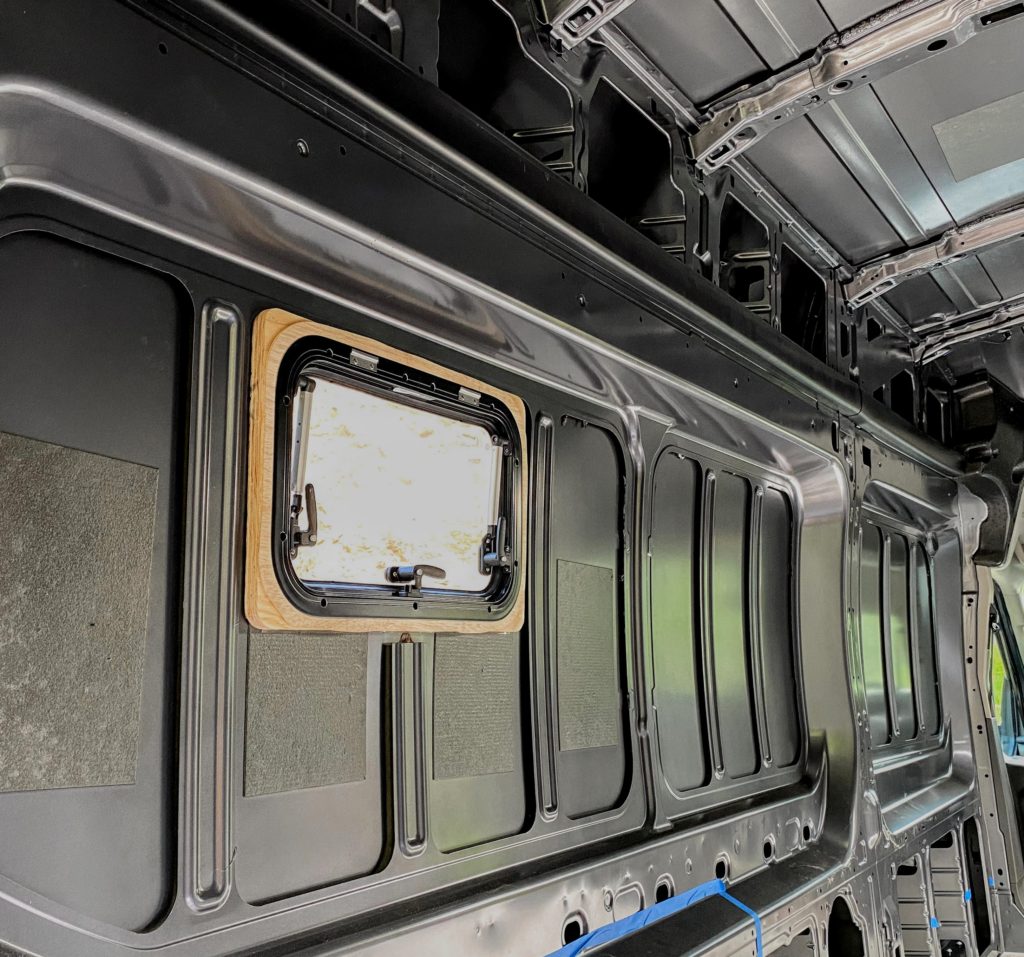
We chose the Arctic Tern bunk window. The bunk window install was also fairly easy, with one caveat. There is very little overlap with the flange, so I had to cut the hole precisely. This window install did not require sealant, we just had to install a rubber gasket with the window.
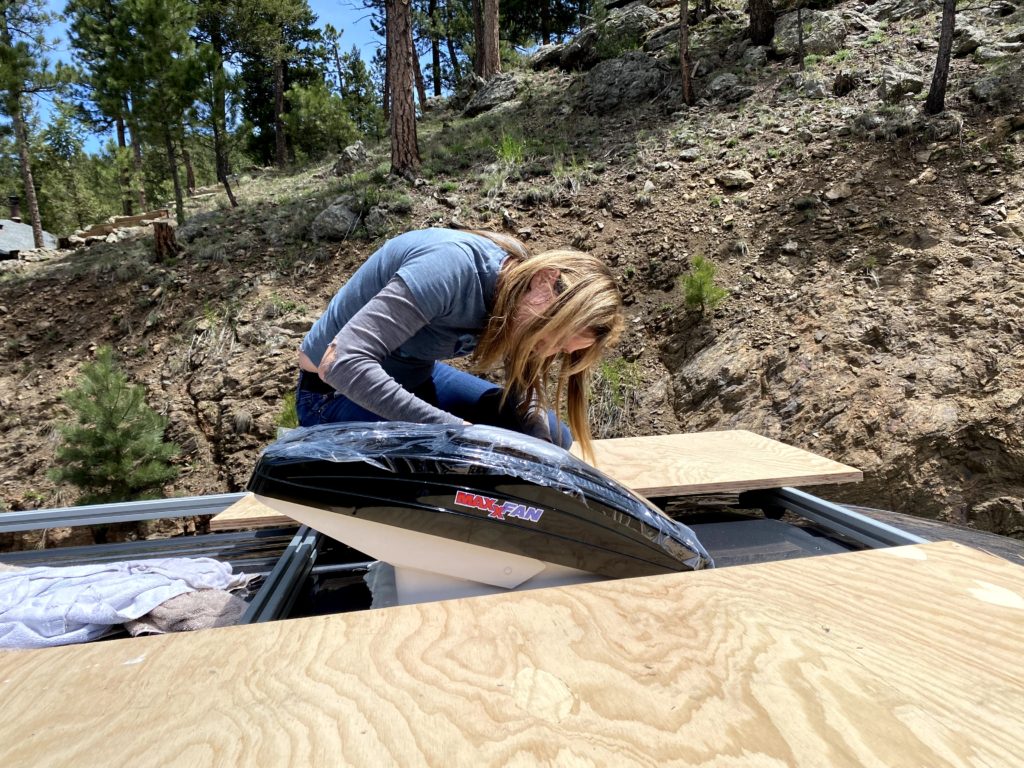
Roof fans
For the roof fans, there is plenty of overlap with the flange from the edges of the hole so you have plenty of wiggle room if your hole is not perfect. The question is whether you want 1 or 2 fans. We had 1 in our Sprinter and decided that more ventilation is better, so we went with 2 for the Transit. This video explains the installation process far better than I can.
Stay tuned for more updates as the Transit camper van build continues.
