
For the next phases of the interior build out, we are working from the bottom up.
The factory wood floor is about 3/8″ plywood which is functional for protecting the metal van floor but not really substantial enough to attach anything to. Soon, we’ll be attaching fork mounts for the bikes to the floor via L-Track. Also the storage, wheel well covers, and bed support cabinets that we’ll be building will be attached to the floor.
There is a bit of discussion around the ‘net on the best way to insulate the floor or even whether it is worth doing at all. Part of it depends on where you will be using your van. In southern California, insulation isn’t so important but in the mountains of Colorado, you should not scrimp on insulation. I am also still looking to eliminate as much road noise as possible.
I decided on 2 layers of insulation, the first Noico sound deadening insulation which is both sound deadening and insulation. The second layer is Low E insulation which provides insulation and vapor barrier. The 2 rolls of the 37.5 square feet of the Noico was just about right with a little left over.


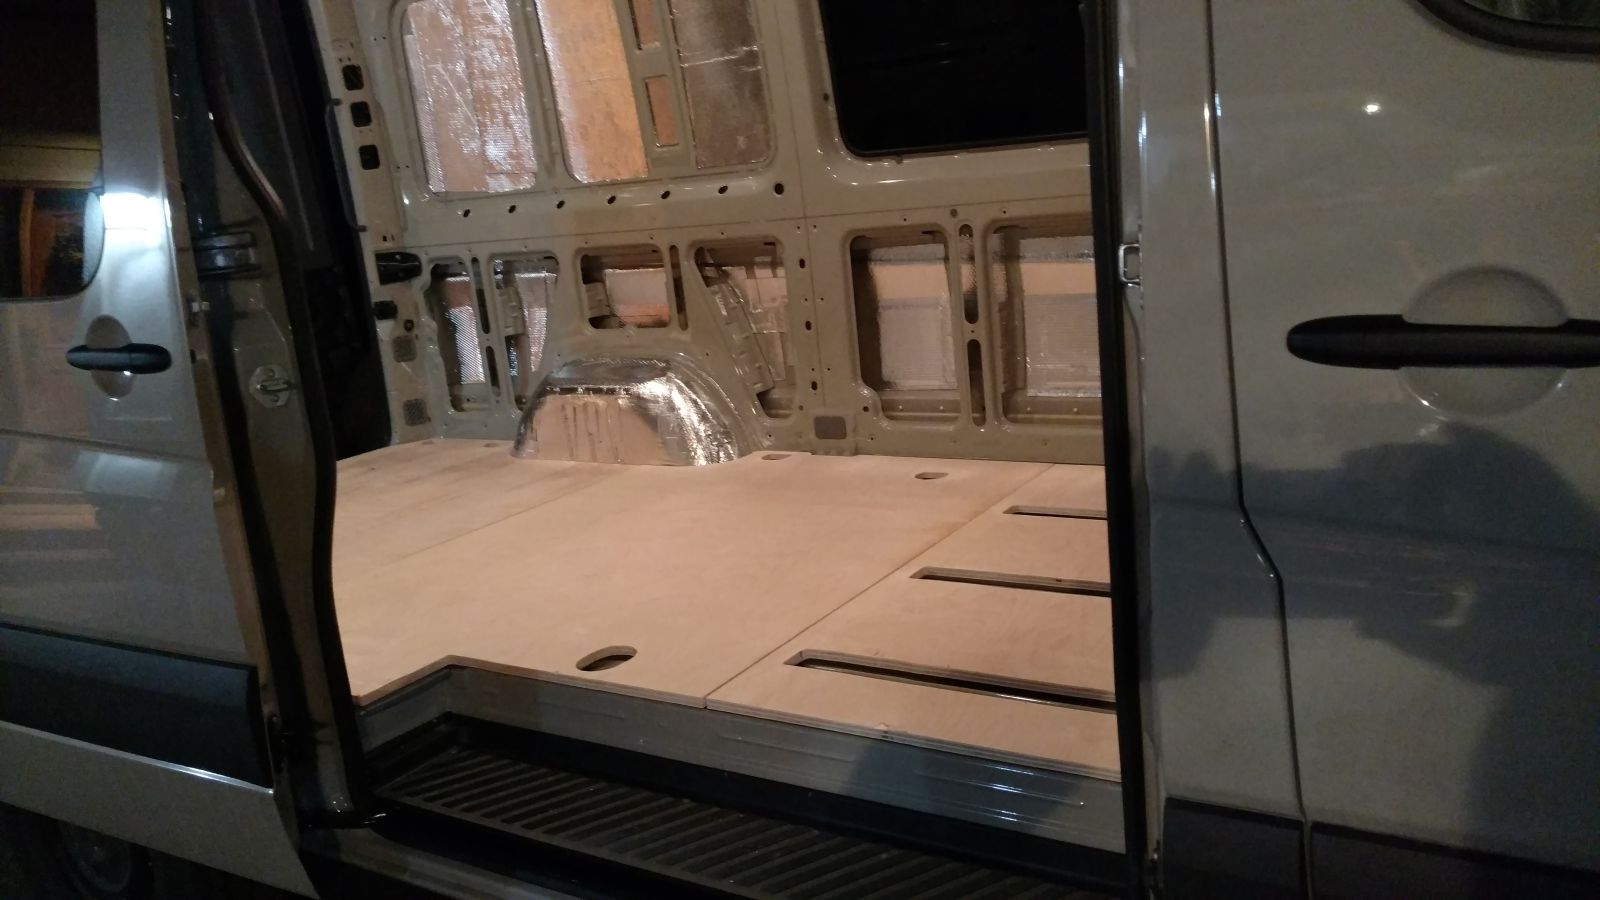
Next the wood subfloor needs to be cut to the proper size and shape. The factory floor made a great template for this. Due to the size of readily available plywood, 4′ x 8′, the new floor will be 3 pieces instead of 2 as is the factory wood floor.

Since few of the cuts are long or straight, I decided it was time to upgrade to a more powerful jigsaw with the added bonus of variable speed to cut out the floor pieces. I ended up with this one which seemed like a good cost-feature value and it performed SO MUCH better that my old jigsaw. As far as attaching the new, thicker subfloor to the van floor, the placement of the tie-downs are laid out such that all 3 pieces of the new subfloor will each have at least 2 tie-down bolts securing it in place.
Sorry no pictures while power tools are in use.


With the new wood subfloor and insulation in place, the noise level of the van has dropped again. Unfortunately, I don’t have a good device for measuring the sound levels for an objective measurement before and after. By ear, the improvement seems substantial.
One other note is that the plywood I purchased is not underlayment or exterior grade which means it won’t be water resistant. So, before I put the finish floor in place, I’ll take out the subfloor and waterproof it so that future water, snow and mud won’t cause premature deterioration.
Materials used:
Self adhesive sound deadening insulation
3 sheets of 4′ x 8′ 3/4″ plywood
Pingback: DIY Sprinter Van – Vinyl Flooring - RidingRoadsAndTrails