

It is no secret that there is not a good option for an audio system from Mercedes for the Sprinter.
Our Sprinter came with the standard Audio 15 stereo which is pretty terrible both in functionality and sound quality. In addition, our Sprinter came with the multi-function steering wheel control, Becker Map Pilot navigation system and backup camera.
System Upgrade
With the upgrade, we wanted to maintain the steering wheel control and backup camera integration with a new head unit. Additionally, since we live in an area where AM & FM reception are nearly non-existent, satellite radio integration is important. Lastly, since Google Maps and Waze on the smartphone are generally far superior to car navigation systems or Garmin navigation devices, we opted for an Android Auto capability and forwent a head unit with navigation capability.
I did a fair amount of research online and with aftermarket audio dealers and decided that we would stay basic as far as audio quality goes and apply the budget to the capabilities listed above and possibly upgrade the speakers and add an amplifier some time in the future.
The selected components of the new system are:
- Kenwood DDX9903S Stereo
- JBL Club 9630 speakers for the rear doors
- JBL Club 5020 speakers for the front doors, to replace the factory speakers
- SiriusXM SXV300v1 Connect Vehicle Tuner Kit for Satellite Radio
To DIY or not DIY the installation?
I've never installed a car stereo before, but a $900 labor quote for the install encouraged me to DIY. Additionally, folks have recommended Crutchfield as a place with great support and expertise. The final decider was this youtube video Sprinter Radio Install which was helpful letting me know what would be involved in the install. Note that I did not run into the problems mentioned toward the end of this video even though I used most of the same components.
I ordered the following pieces and parts for the installation based on the advice from Crutchfield:
- Axxess XSVI-9005-NAV Wiring Interface
- Axxess ASWC-1 Steering Wheel Control Adapter
- Scosche CR1294B Dash Kit
- Metra 40-EU10 Antenna Adapter for the antenna (I actually needed 2)
Much like the gentleman in video above, I had called Crutchfield while wiring up the wiring interface and steering wheel control adapter to answer questions that were not clear in the provided instructions. All of their answers were correct, except one. They had no answer for integrating the factory backup camera. My solution was to purchase an additional Metra 40-EU10 Antenna Adapter and splice it to a male RCA plug to connect the camera to the stereo.
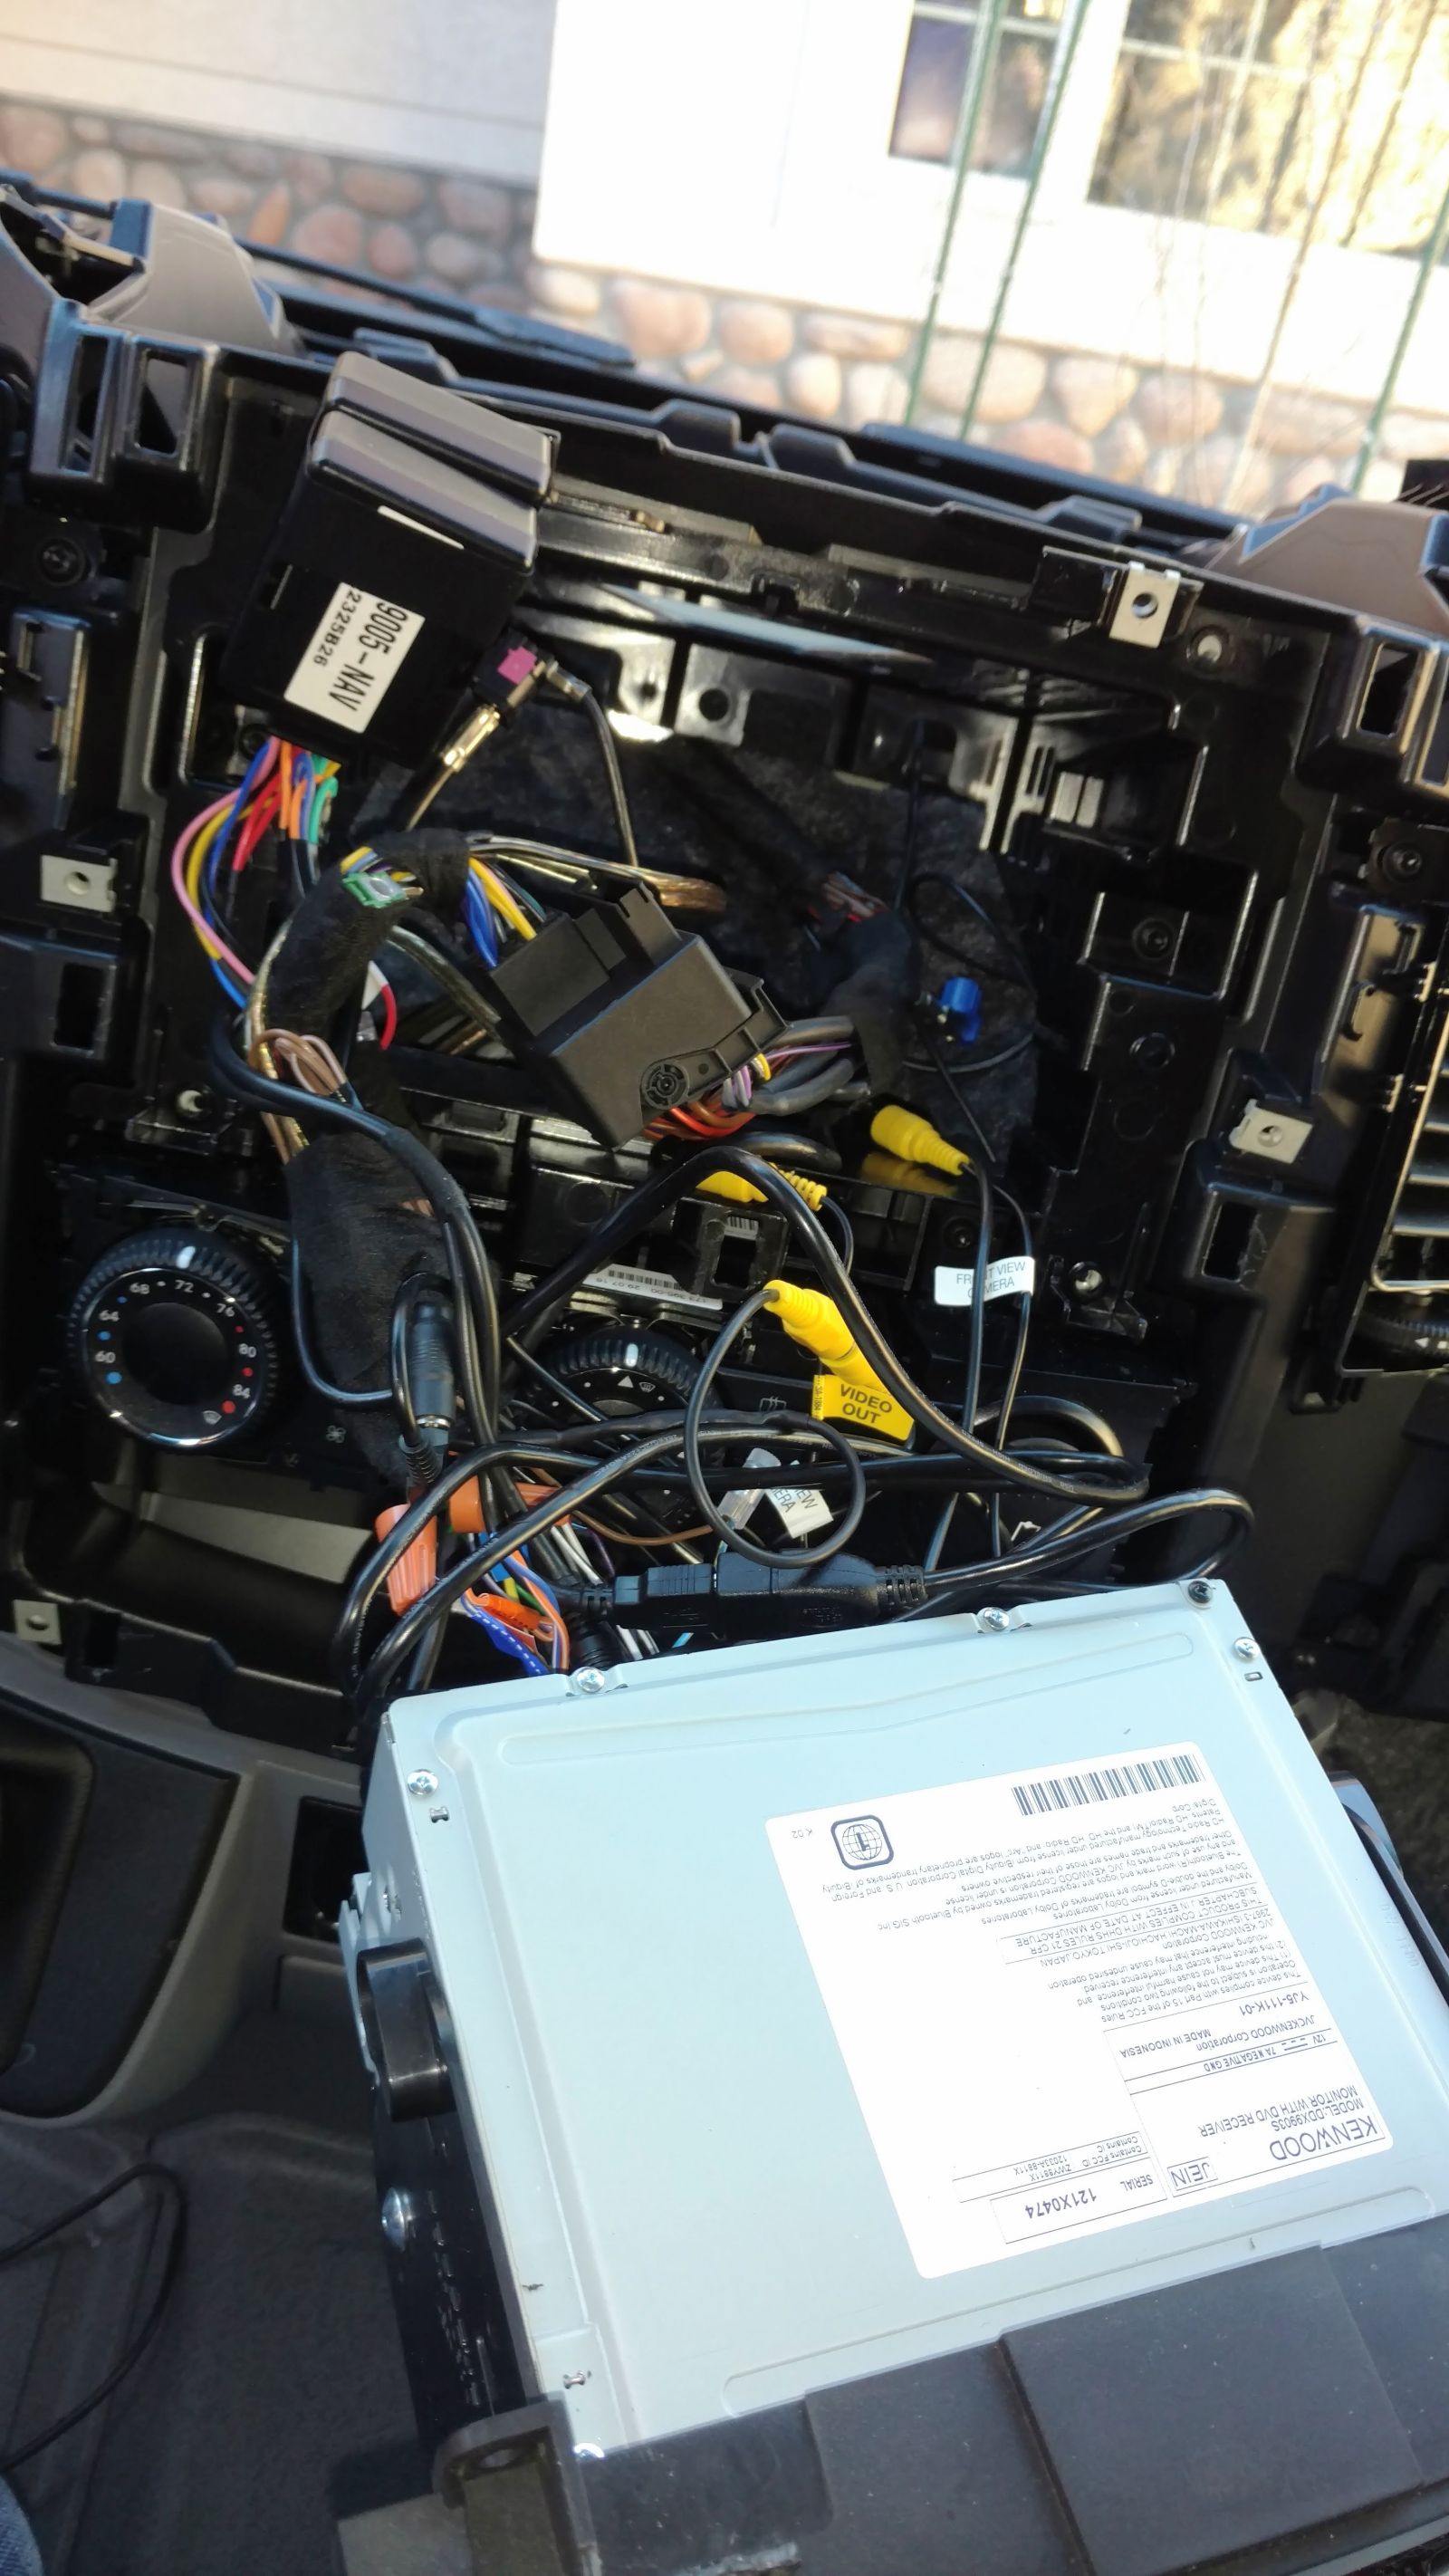
The Install
The install and configuration of the wiring is intimidating at first. There are a LOT of wires.

Taking each component one by one, matching the wire colors between the harness and the adaptor gets you most of the way there. Researching the Kenwood stereo wiring harness revealed a parking brake bypass hack that prevents the stereo from disabling certain features when the van is in motion. Of course, the driver should never access these features, only the passenger. Splicing the green wire from the radio to the black wire is all that takes.
Helpful video with info on the Kenwood Excelon wiring harness

Removing the factory head unit is pretty simple. There is a cover plate that is pried off from top to bottom with trim removal tools (shown in the video referenced above). Once the faceplate is removed, there are 4 screws at each corner of head unit. Remove those and the head unit slides right out.

The back of the radio has the main harness for the speaker wires, power and steering wheel controls. There are also 4 FAKRA connectors.
- Black, 2-wire COAX for the radio antenna
- Green, 2-wire COAX for the backup camera video

- Violet, 4-wire USB connector mounted on driver's side dash
- replace this with a USB extender since the FAKRA end is not compatible with the new head unit
- Blue, 4-wire leads to the GPS module in the glove box
- Not used with the replacement stereo


Once everything was wired up and working, the last piece was to run the XM antenna outside. This was much easier than expected. The windshield weather stripping has a channel in it that the wire sits in nicely. Run the wire along the windshield weather stripping and down to the front of the door, behind the side mirror, under the door weather strip and up under the dash to the stereo.


Now that everything is wired and tested, it is time to install the head unit into the dash. The bezel that came with the dash kit required some customizing to make it fit properly. This was not a big deal, except I was being conservative with the modification to not cut too much which caused many trial fittings. This would have been easier if I had done a dry fitting before doing the wiring.

The Rear Speakers
The van came with front door speakers and tweeters in the dash. These are terrible, but I first wanted to add speakers in the rear of the van and at the same time take a crack at making interior panels.
The panels are 1/4" luaun plywood covered with 1/8" closed cell foam and then wrapped with upholstery material designed for outdoor furniture.
You can get the foam here: Ebay foam vendor We got the material from a local JoAnn Fabrics store. If you shop there, get their coupons from their website, it will save you over half-off.


As luck would have it, when shopping for the speakers, I didn't consider the depth of the speaker and the depth of the pocket in the door. The end result being that the speakers were too deep for the door. Therefore, I needed some really thick spacers cut in an oval shape to match the shape of the speakers. I cut the oval spacers out of 5/4 inch thick planks. With the spacers in place the back of the speakers were kept from contacting the door skin.

Running speaker wires to the back was pretty simple since I have the headliner out. I ran the wires back to front along the existing wire harness, down under the A-pillar cover and under the dash. There is plenty of room under the dash to run the wires to the radio from there.
Since there were no pre-existing rear speaker wires, I had to know where to tap into the wiring harness. The wire color standard, at least for Kenwood is this:
- Solid is positive, stripe is negative
- Purple - passenger rear
- Green - Driver rear
- Grey - Passenger front
- White - Driver front
The only challenging part of the speaker wiring was getting the wires from the back of the van into the top of the doors. Here is a good write-up on that.


This was the first project on the van that I thought may be over my capabilities. In the end though, I am glad I saved the $900 installation and did the job myself. I learned a crap-ton of stuff and my confidence is building which will help going forward with the rest of the build-out.
I’m trying to purchase an Android radio for my 2017 Sprinter. Seller claims it will only fit 2007-2014 models and will not fit 2017. When I look all pictures on google, it seems 2007 radio shape is same as 2017. All I need is for the radio to fit inside the opening. I can re-wire the harness. Do you know if the radio from 2007 model is the same (physical dimensions) as newer 2017 models?
Hey Bart,
This is a question better suited for the folks at https://sprinter-source.com/forum/ as I only have experience with my 2016 Sprinter. My guess is that if the radio is an aftermarket radio and is specified as “Doouble Din”, defined here https://en.wikipedia.org/wiki/ISO_7736 it should work.
Good luck!
Ross,
Thank you for reply and info.
Btw, great install write-up.
Regards, Bart.
Very nice write-up. Does the new radio interface with the instrument cluster? such as the radio station page and current location display?
Thanks…the steering wheel buttons do work with some of the basic radio controls, but the dash display does not show anything from the radio.
Hi, Ross Levin
I’ve tried to install pioneer single din to my crafter year 2008 ( same stereo & fascia as sprinters).
I use spare wiring harness which I can plug & play.
It plays nicely until I realise I didn’t even turn the key to On position, so I did it. It’s shut it self down.
I thought fuse blown.
I turn the key off, & checked but nothing wrong with fuses.
I jump in side & the stereo was singing while the key is in ignition. Not on.
Any idea why??
Hi Kumar,
The problem is likely that the “hot” you are using is not switched correctly with the ignition. If it were me, I would use a multimeter to track which wires are hot when the ignition is on and which when the ignition is off. Then you will know which wire needs to be attached to your wiring harness. Good Luck!
Thanks so very much for the write-up. There are many owners on the Winnebago forums unhappy with the performance of the XITE Infotainment systems and also desire Android Auto / CarPlay functionality. I had so many problems with mine that I had a new Pioneer 4400NEX installed last week. The stereo shop could not figure out how to make the existing XITE camera work with the new Pioneer even after calling tech support for Pioneer, XITE, and RiverPark. Finally RiverPark said the XITE camera was not compatible with anything but their XITE system. The local shop planned to run a new cable and install a new camera. That is until I saw a post of the Sprinter Source Forum which linked to this article.
From what others have said on the forum the XITE camera will work by splicing in an RCA connector or using the Fakra to RCA connector you referenced. I ordered the connector this Thanksgiving morning and am giving thanks to guys like you who spend the time writing up solutions to problems that so many have, Again, thanks so much! Will let everyone know how my solution works. Steve in Iowa. 2017 Winnebago View J.
Hi Steve…Thanks so much for the note, I’m glad this helped you!
Good Job! This was really helpful as I am in the middle of a project as well. I couldn’t figure out what those Fakraing connectors were and stumbled on your post. I’m in the middle of doing a stereo system, Solar system with isolated battery power with shoreline, entertainment (TV and Video game), and adding adjustable queen bed system in the rear of the van while still able (fingers crossed) to use at least two rows of rear seats. Not a day has gone by that I don’t feel overwhelmed… But WE are getting there. Last month I added a trailer hitch with 7wire braking, side step, roof rack mounts, insulation, and a bunch of Rivnuts for Ltrack. It’s not always fun but it sure will be if I ever finish it! Thanks for the post.
–B
Hi Brian, Thanks, I appreciate the feedback. It is nice to hear that this info is helpful. It sounds like you have quite a build going, I’d like to see pics if you have them to share. Cheers, Ross