
Here’s another one of the posts where we did a thing, learned something new and then did that thing again better. In this case, the thing that is getting revised is bike slider storage tray inside the van. And the something new we learned is that there is a low profile thru-axle fork mount available from Unaka Gear Co that allows for improved optimization of bike storage space in the van. You can read more about this new bike fork mount here: DIY Sprinter Van – Unaka Gear Company Thru-Axle Fork Mount.
We have previously posted articles on bike storage in the van which show the progression of bike storage throughout the years: DIY Sprinter Van – bed and bike storage, DIY Sprinter Van – Bike Mounts and DIY Sprinter Van – Bike Slider Storage Trays.
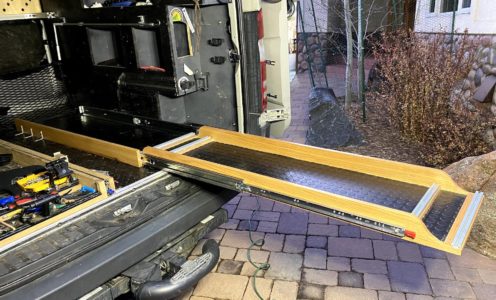
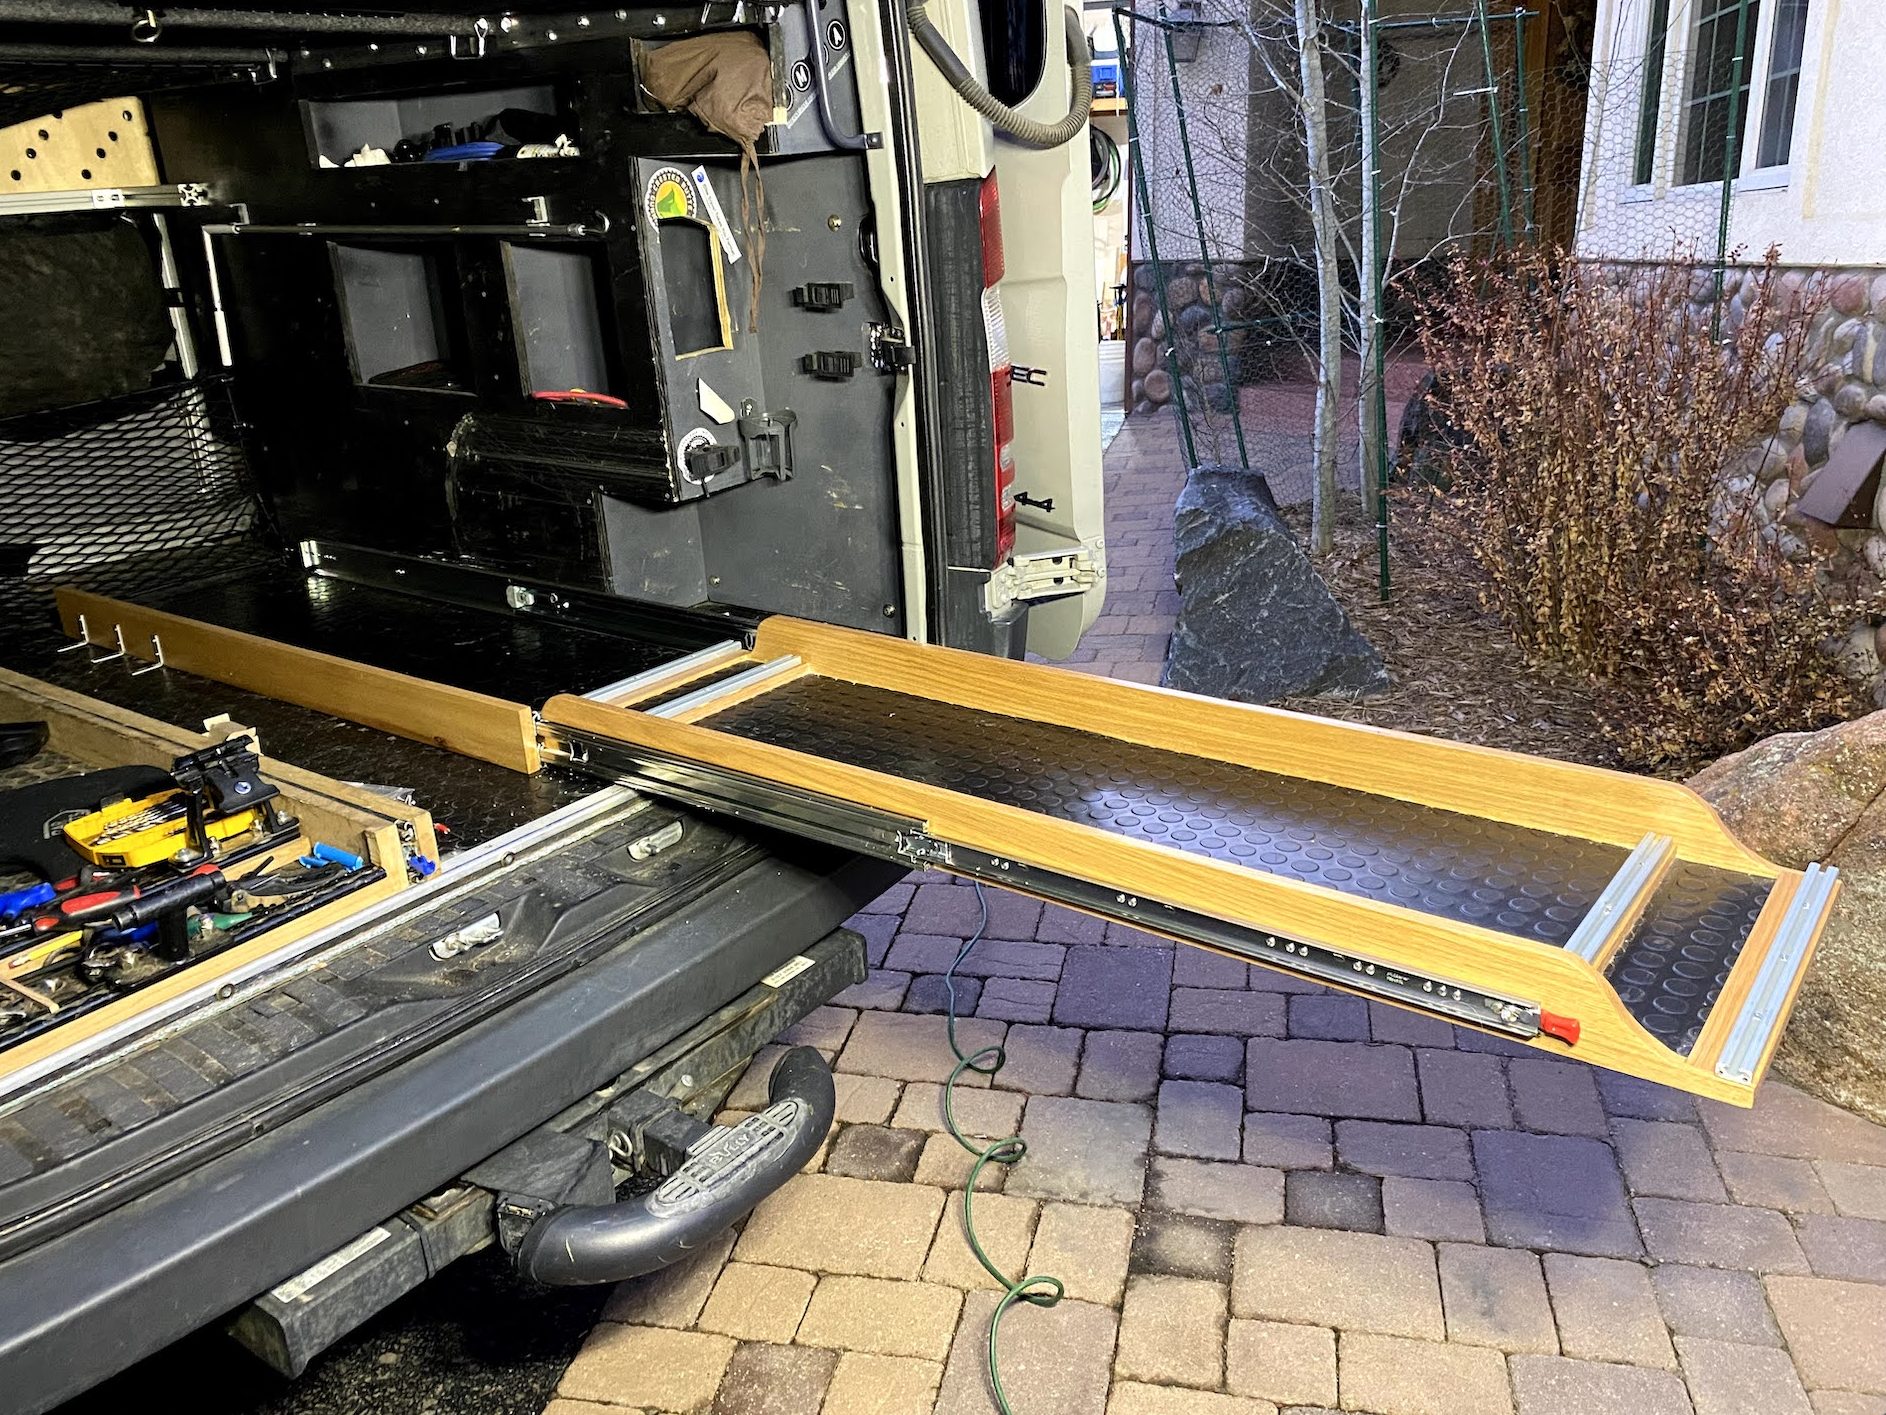
The impetus for the new sliding tray design was the new low profile fork mount. I was excited to be able to gain additional vertical space with the new mount, but quickly realized that the height of the sides of the trays became the limiting factor in how low the bike can be mounted. With the original design of the tray, the height of the tray side was dictated by the drawer slide itself. The drawer slide was the same length as the tray to maximize the amount of travel that the tray can slide. This brings up the question as to whether we needed the tray to slide all the way out of the van.
The reason that the tray needs to slide at all is to be able to secure bikes that are front facing, or head-first in the van where the fork mount is connected to the end of the tray that is furthest inside the van. In playing around with the trays with this in mind, it turns out we never really needed the trays to extend fully out of the van to still have access to both ends of the bikes on the bike slider storage tray.
Armed with this new knowledge of the low profile fork mount and ability to use shorter drawer slides, we embarked on a new tray design. The design considerations include:
- Fork mounts installed as low to the floor of the tray as possible
- Allow forks to overhang the sides of the tray
- Position fork mounts to fit drop bar handlebars (road & gravel bikes)
- Position fork mounts to fit flat bar handlebars (MTB & fat bikes)
- Tray slides out far enough to reach the head-in fork mounts
- Tray width just wide enough to contain the bikes
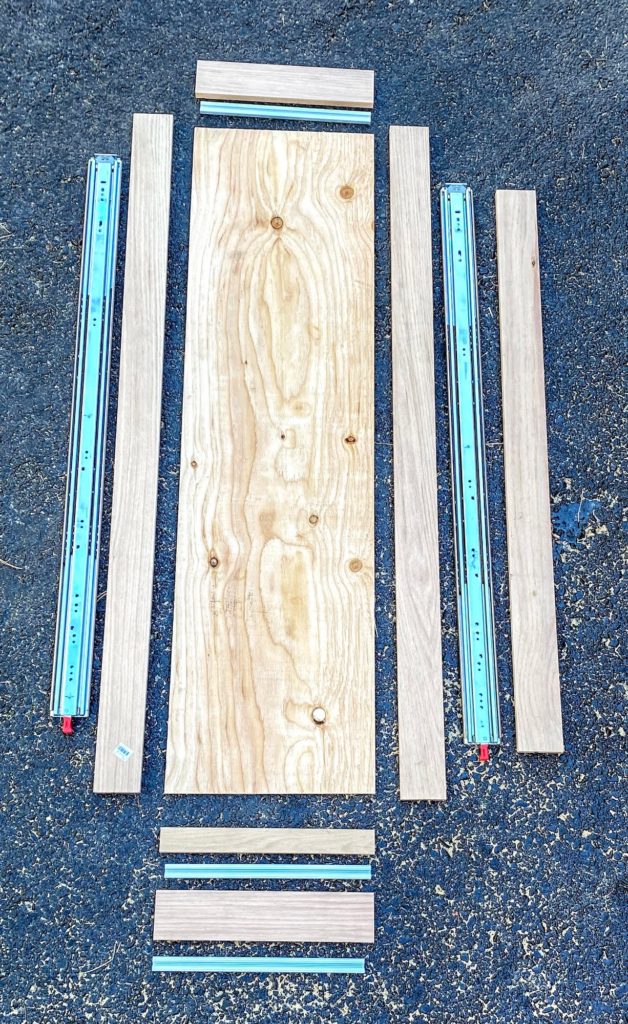
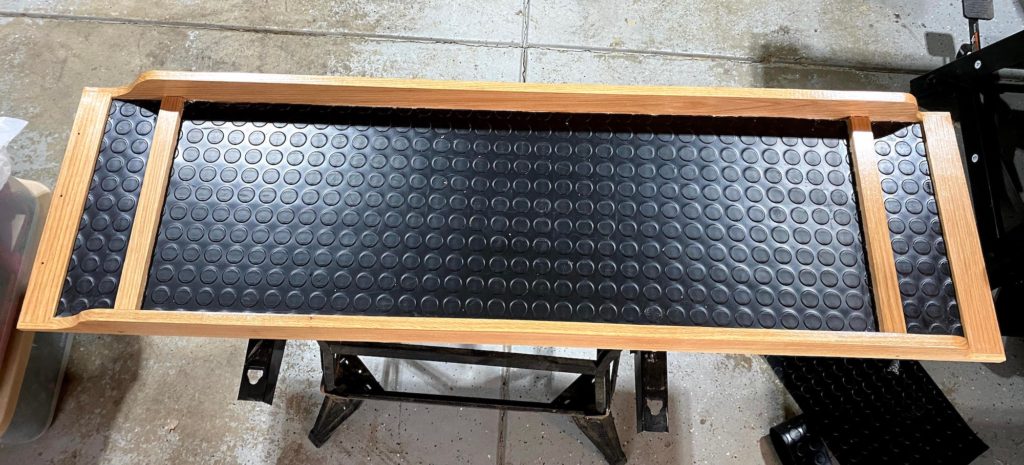
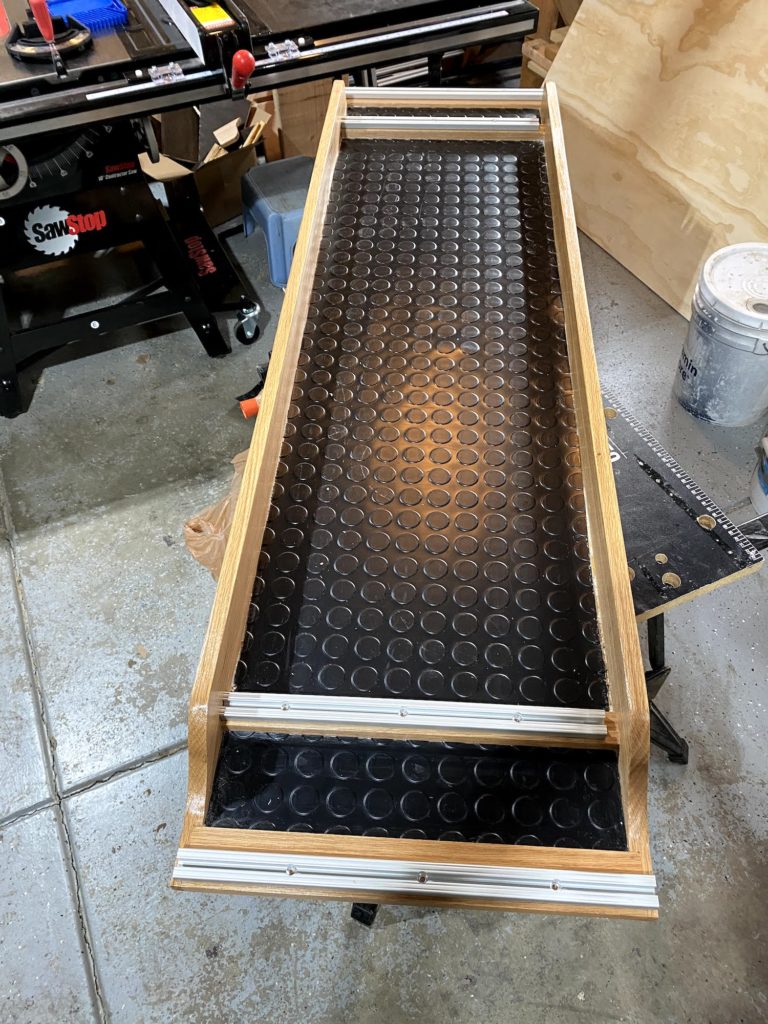
The tray construction itself won’t vary much from the original design with 3/8″ plywood bottom and 1″ x 4″ (actually 3/4″ x 3″) hardwood for the sides and ends.
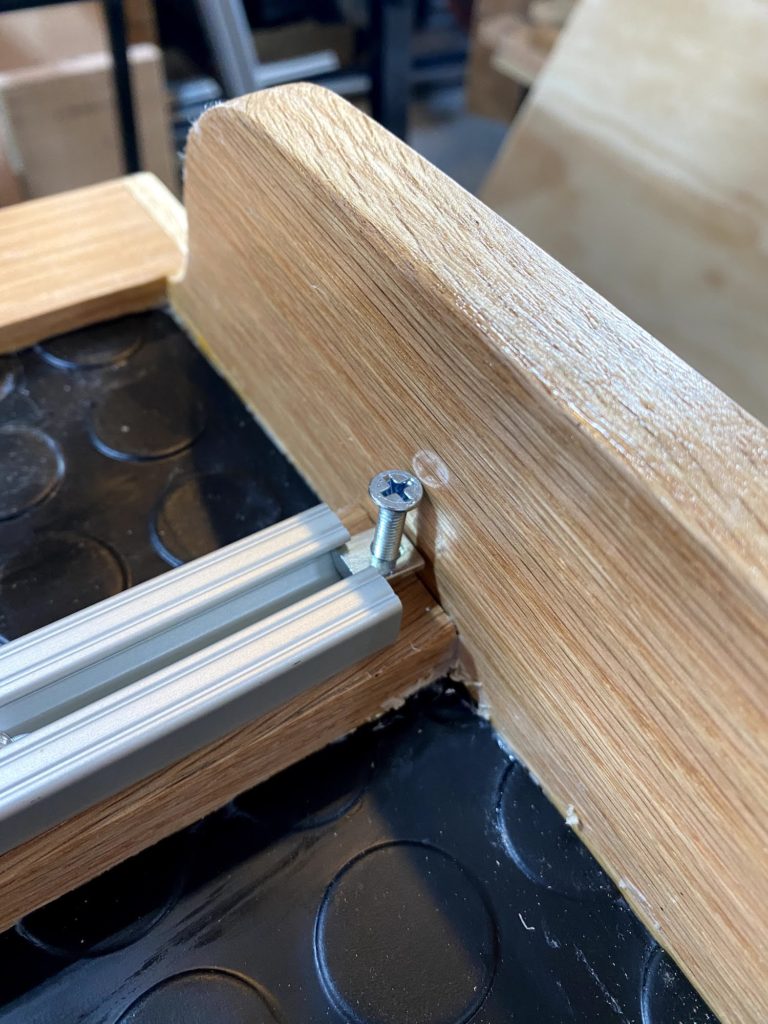
The differences come in with the front and back hardwood ends of the tray where they lay flat on the plywood to provide a good mounting base for the fork mounts.
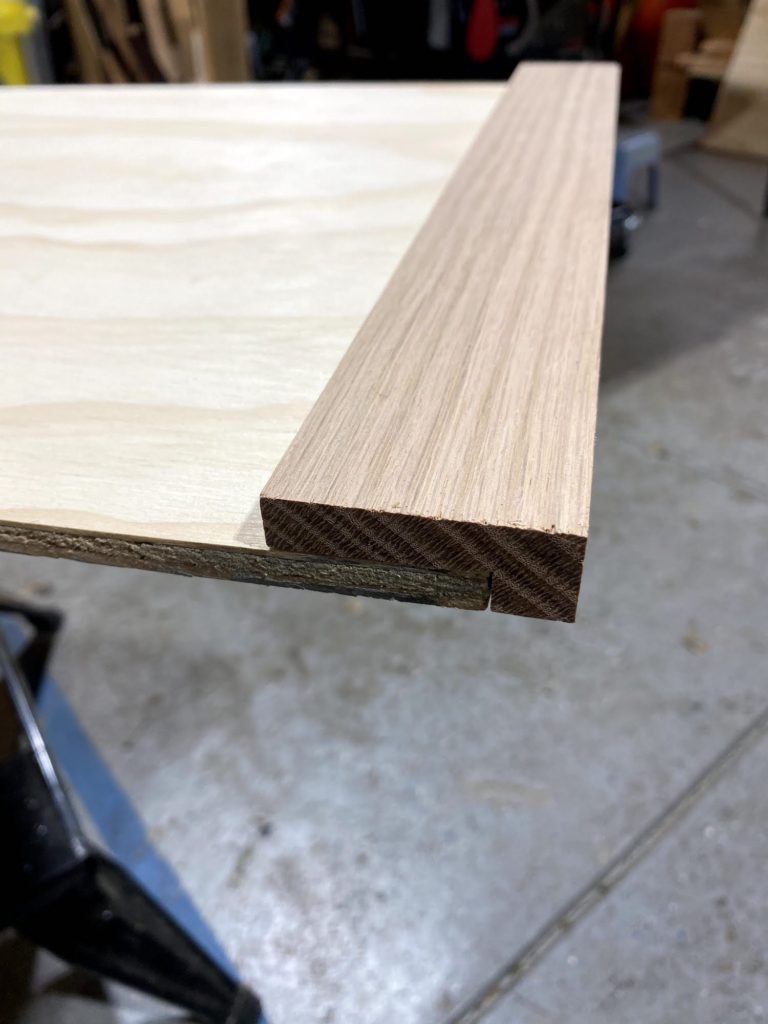
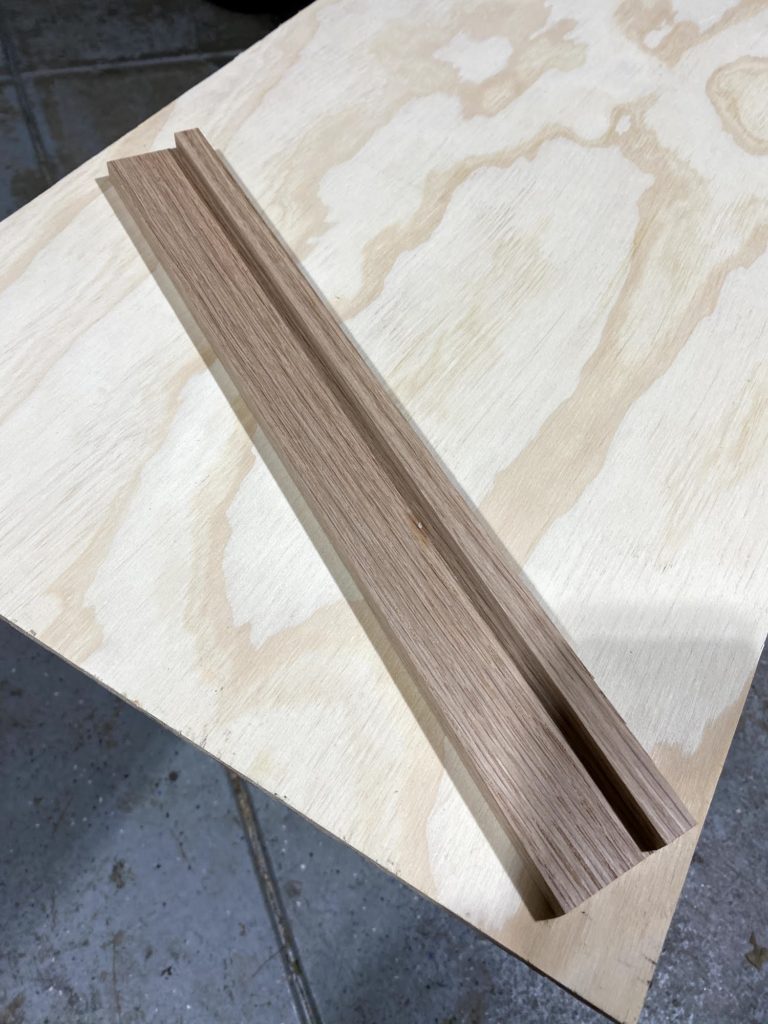
The side rails of the tray run the full length of the tray but the length that extends beyond the slider tapers down to the 3/4″ height of the tray end. The sides and ends are glued and pin-nailed to the plywood base.
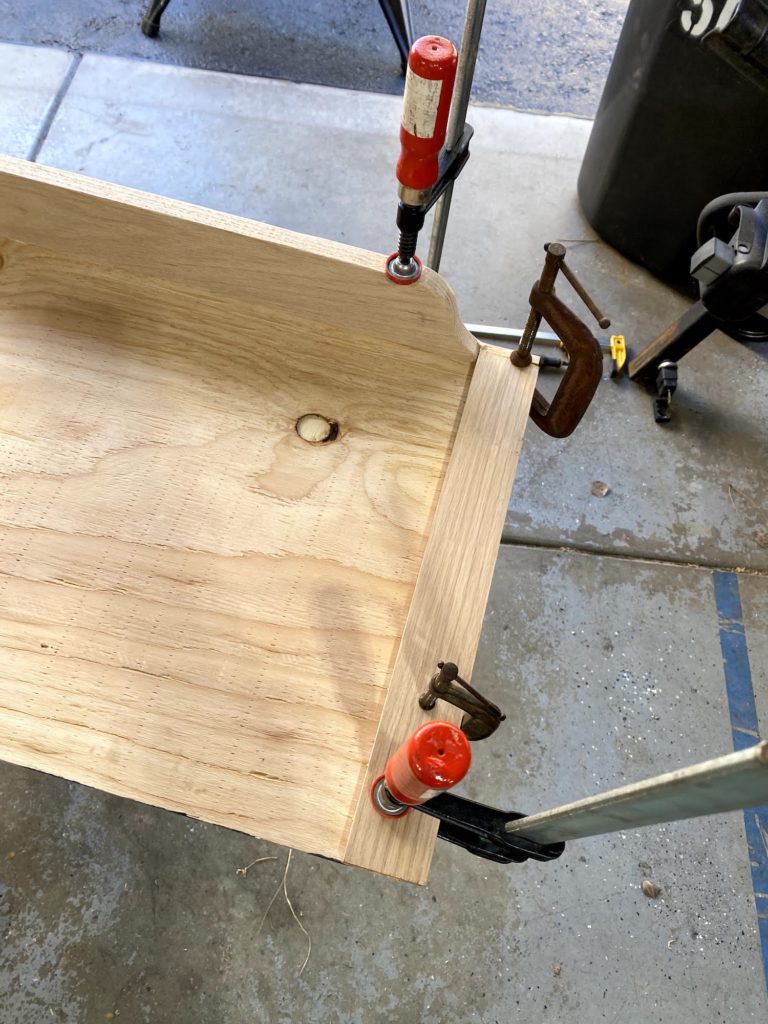
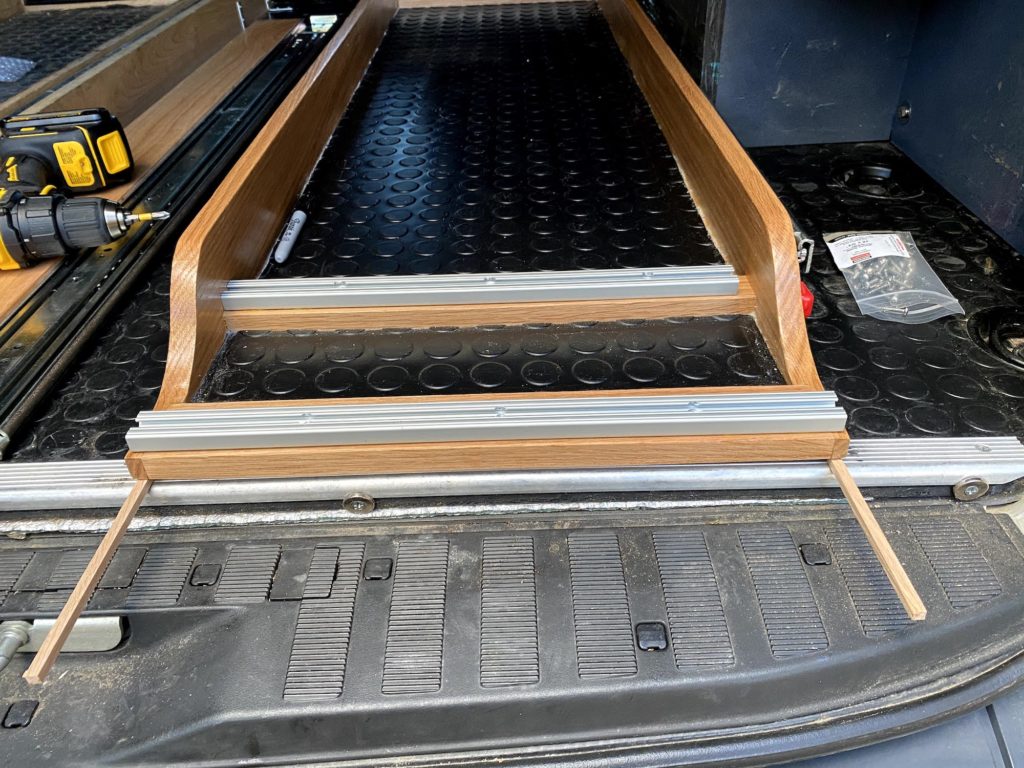
With the hard wood sides and ends secured, I added 2 more hard wood base pieces. These are to attach the fork mounts for the drop bar bikes since they need to be several inches back from the end of the tray. Also a couple coats of polyurethane on the hardwood that will be exposed help protect the wood and make it look a bit more attractive.
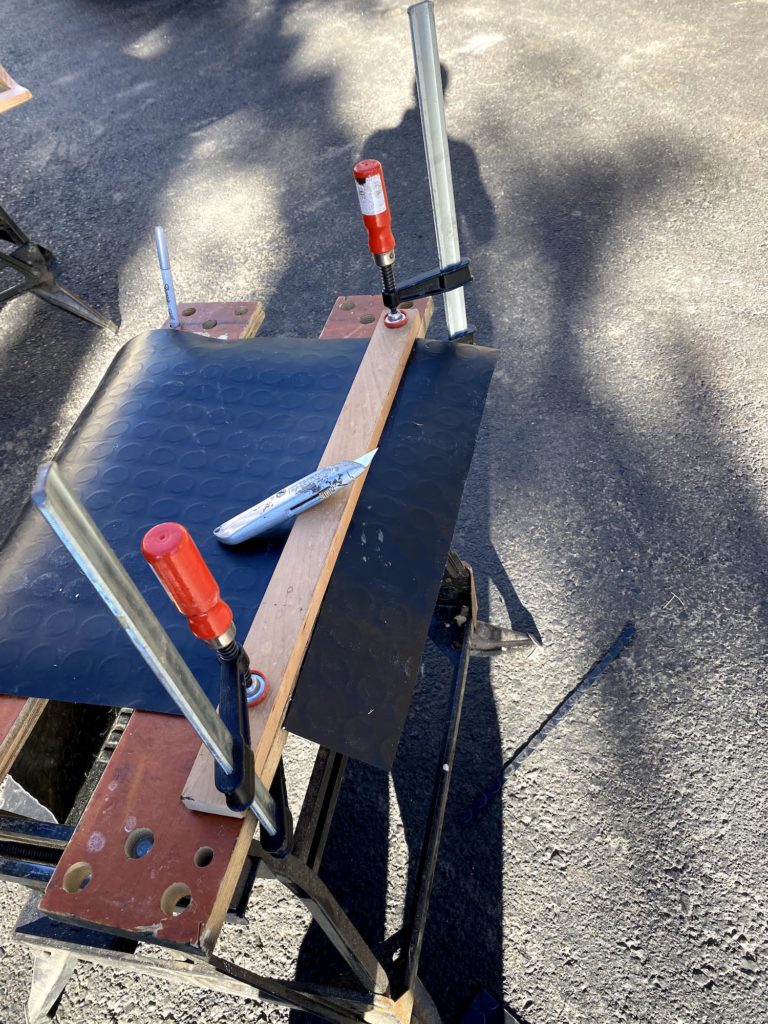
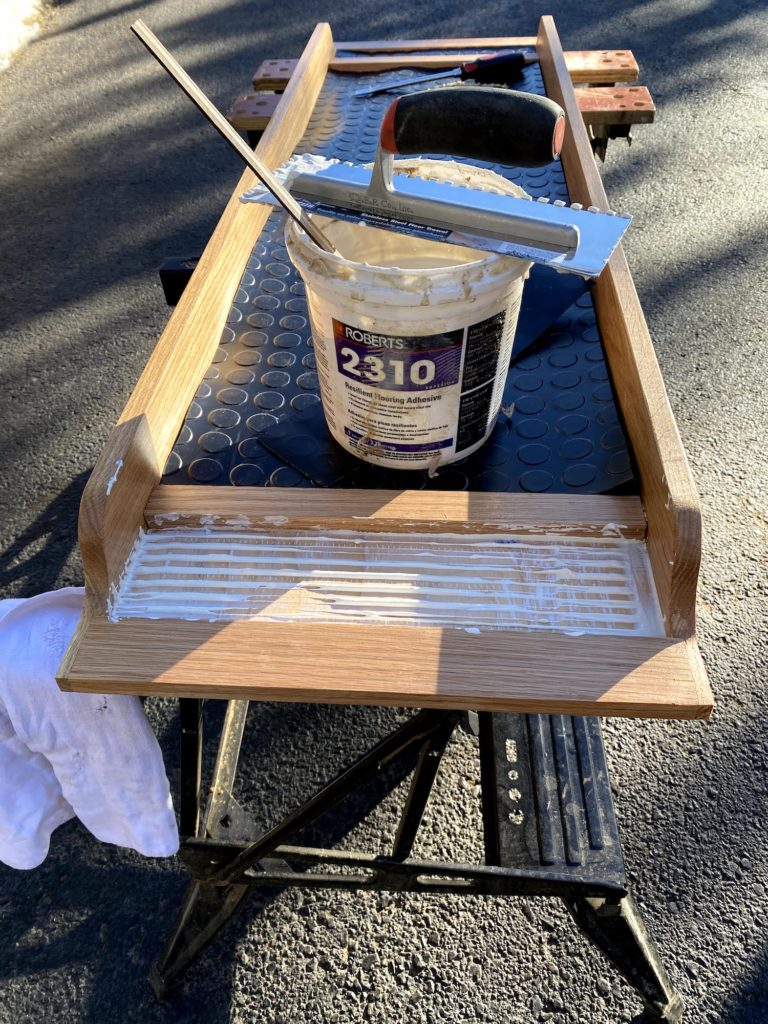
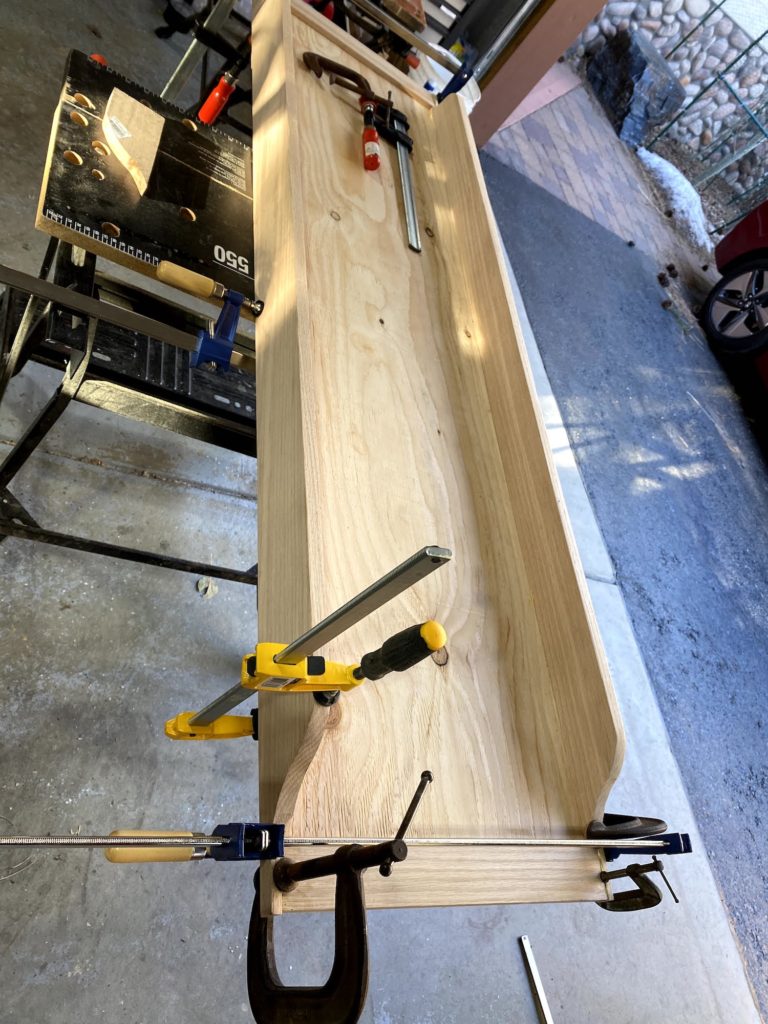
The finish for the plywood is vinyl coin flooring that I had left over from the van floor. To cut it straight, I clamped it between 2 pieces of straight boards and ran the utility knife along that edge in several light passes. The cuts were decent but not perfect. Someone later recommended that I use a table saw to cut the vinyl, I will do that for future cuts. The vinyl is glued to the plywood using Roberts 2310 adhesive. The adhesive is applied with a notched trowel. Then a roller is used to work out any air pockets. Lastly, place heavy objects all over the vinyl so the adhesive can cure without lifting off the plywood.
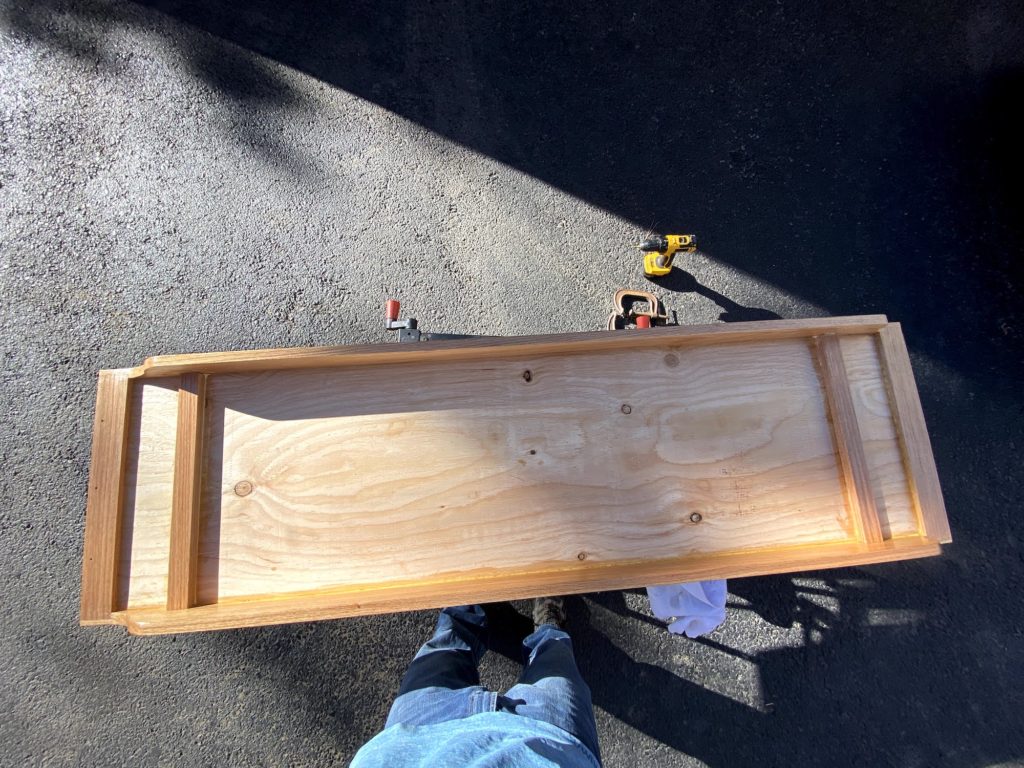
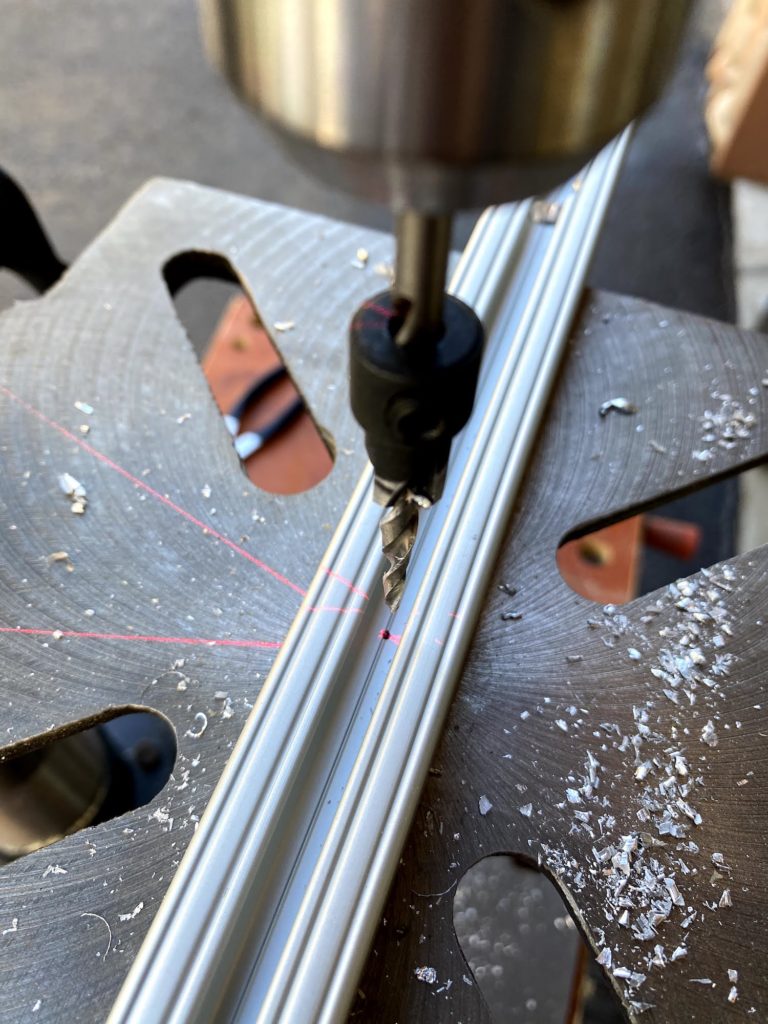
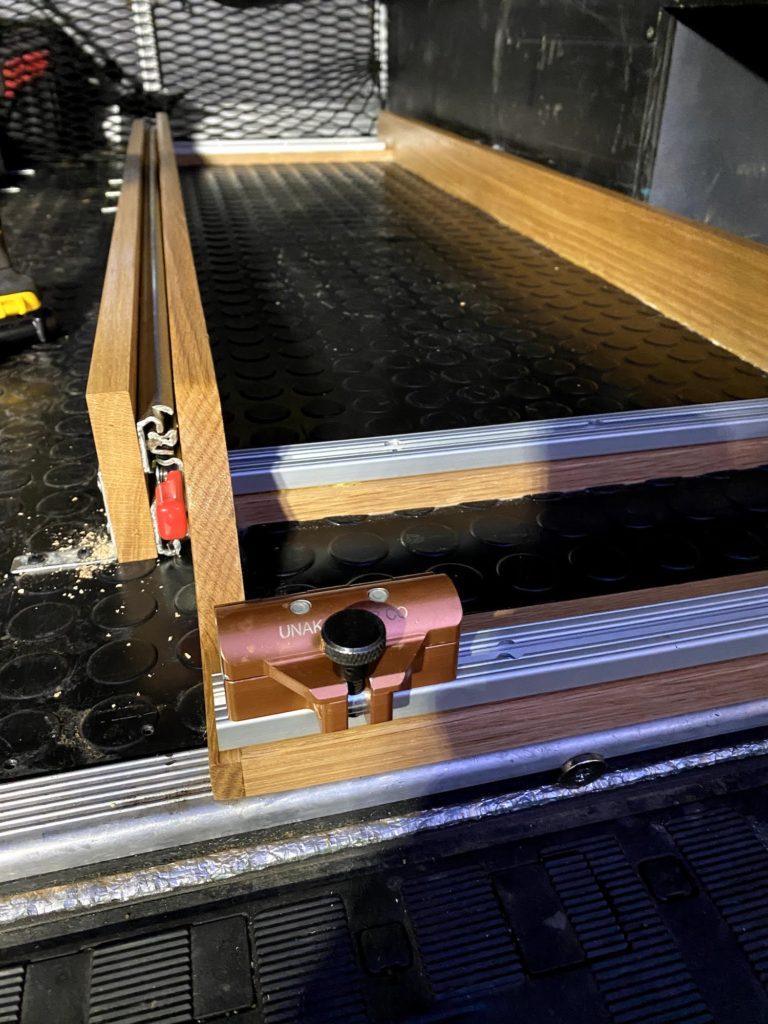
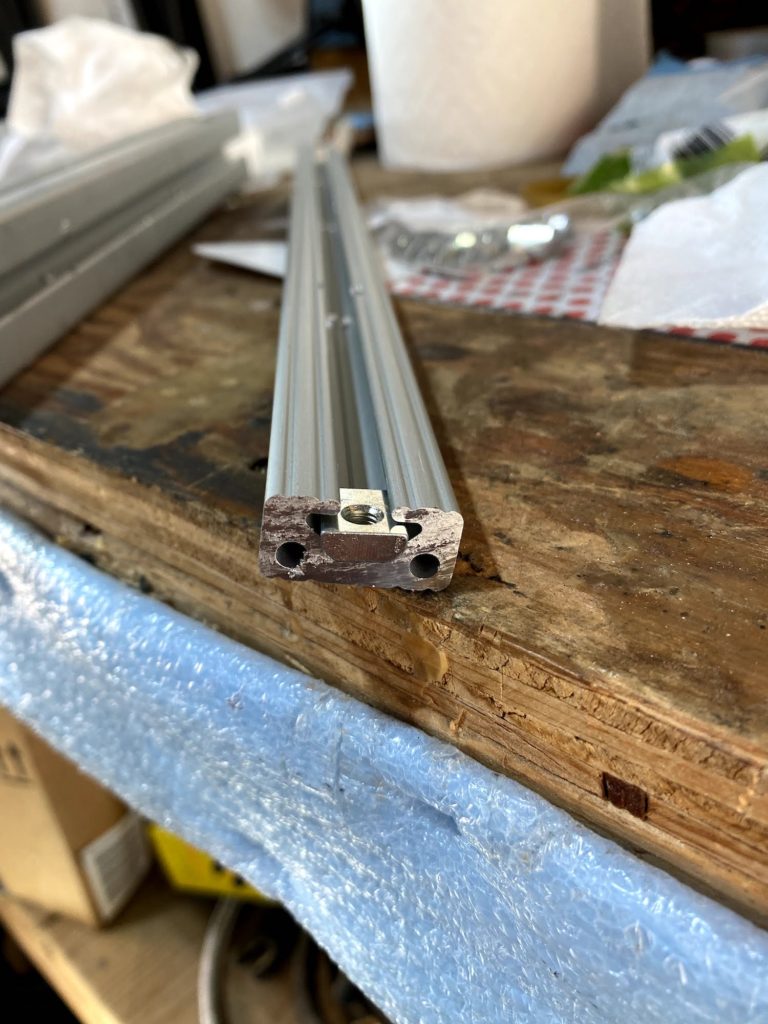
With the bike slider storage tray complete, the next step is to prep the 80/20 extrusions. The use of 80/20 is new with this iteration of the tray as a mounting base for the fork mounts. I had modified the prototype tray to use a piece of 15-series 80/20 for the fork mounts. This was an improvement over the L-Track that I had used previously with more side to side flexibility. Along with the theme of being low profile, I’ll continue to use 80/20, but I got a length of 1050 series 8020 which is 1″ wide by 1/2″ high.
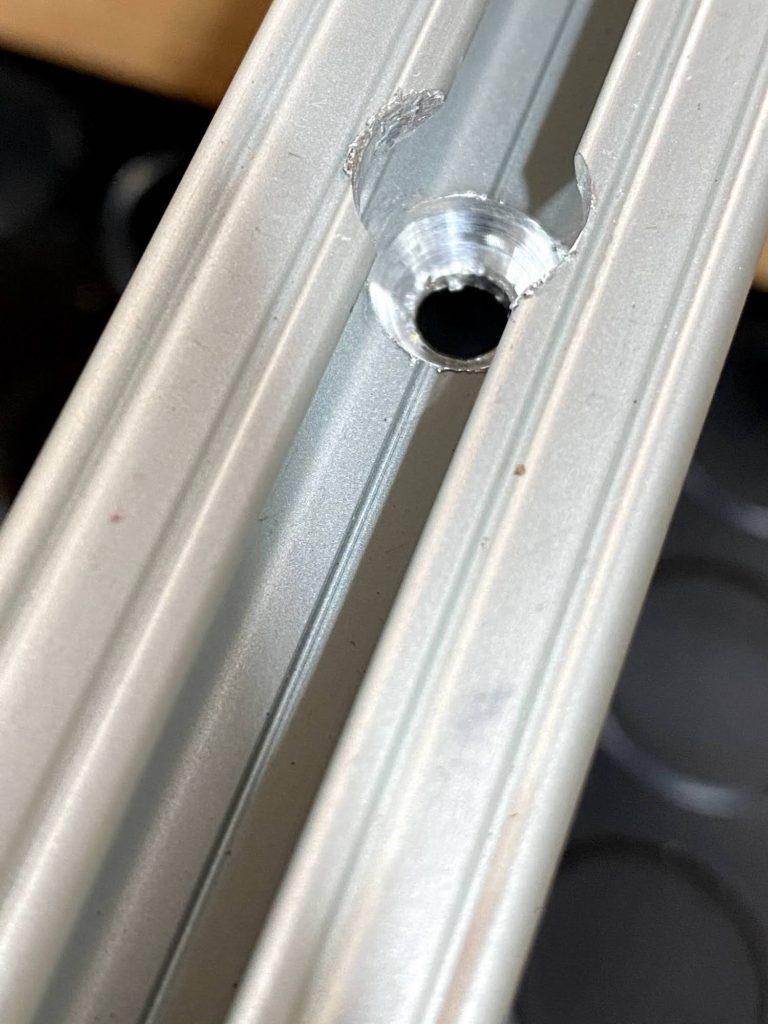
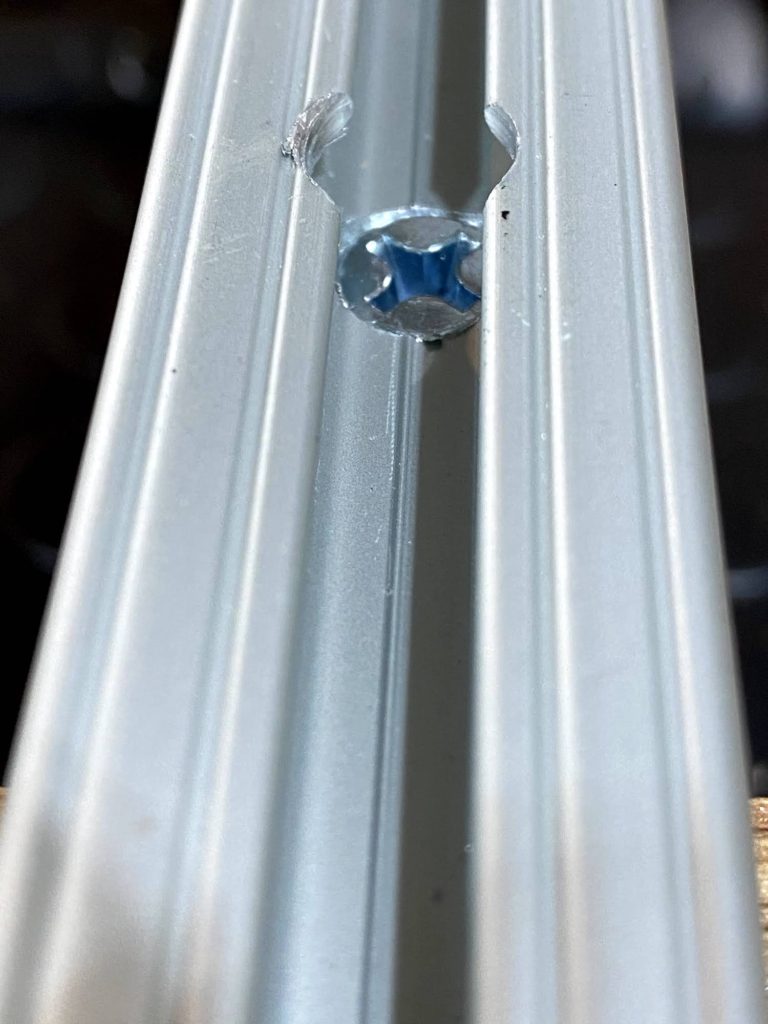
The 80/20 is screwed and glued to the hardwood base pieces of the tray. In order for the screw heads to not interfere with the slot in the 80/20, countersunk holes must drilled into the 80/20 at just the right depth for the screw head. I did this by trial and error and then marked the countersink drill bit once I had the depth determined correctly.
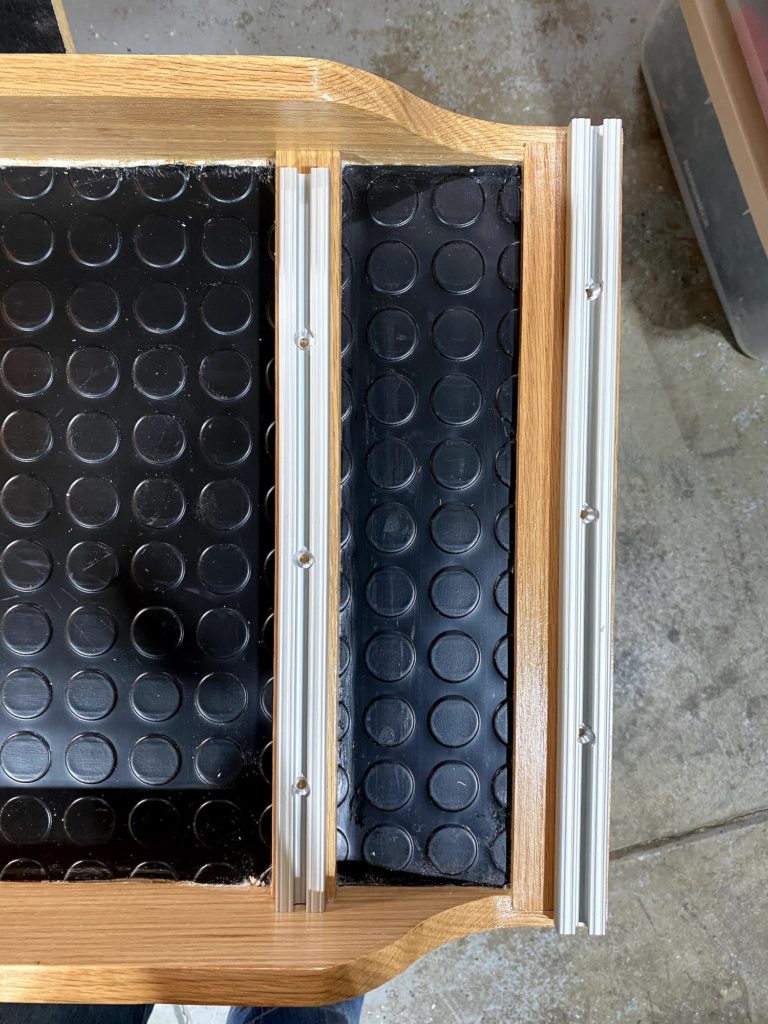
The length of the 80/20 for the drop bar bikes is about 1/3″ short of the internal width of the tray. This gap allows for adding or removing the t-nuts as the bike configuration may change over time. The 80/20 that will be used for the flat bar bikes to be the full width of the tray since the sides of the tray do not interfere with the slot in the ends of the 80/20.
With the tray complete, it is time to install it into the van with the slides.
The tray needs to move in and out of the van, it is important that there is a small amount of open space beneath the tray when it is attached to the slides so that it does not rub against the floor. I used some long lengths of thin scrap wood to create the space between the tray and the van floor.
The heavy duty drawer slides generally do not come apart for ease of installation or maintenance. The general consensus is to mount the drawer slides to the van first and then attach the bike slider storage trays to the slides.
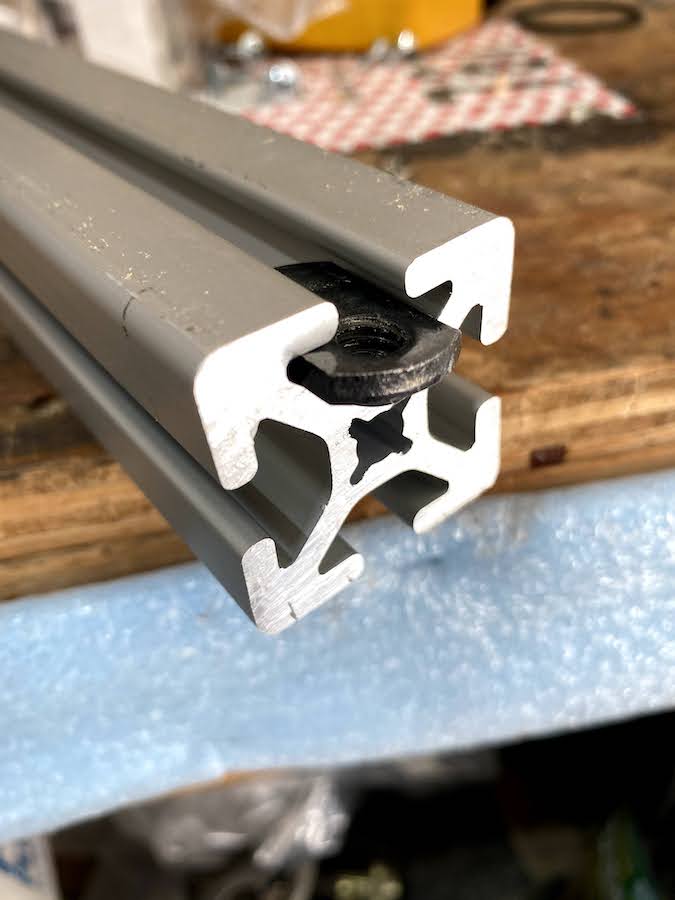
A note on the T-nuts used with the 80/20. There are several different types of T-Nuts available for 80/20 and most are quite expensive. You will likely come across “Economy T-Nuts” that are considerably cheaper than the other types of T-Nuts. Take this as a warning that the economy T-Nuts will likely cause you grief way beyond the initial cost savings. The economy T-Nuts can float around within the slot of the 80/20 making it easy to cross thread the nut causing work to take apart the structure to replace the nut to try again.
Materials and tools:
(6) 1″ x 4″ x 8′ hardwood (maple, oak, etc)
(1) 4′ x 8′ x 3/8″ sheet plywood
50″ heavy duty locking sliders
80/20 aluminum extrusion 1050 series
Unaka Gear Co low profile fork mount
This looks awesome!!! If you ever consider selling it, I’d be in!
Thanks! Check out Unaka Gear Co, they are selling something similar.